Recent Posts

How to Remove 3m Tape from Car


Have you ever wondered how to remove 3m tape from your car without damaging the paint? Well, I’m here to share a simple solution that will save you both time and money.

Over time, 3m tape can leave behind residue on your car’s surface, making it look unsightly. But fear not, because with a few basic tools and a little patience, you can easily remove it. Start by heating the tape with a hairdryer to soften the adhesive. Then, use a plastic scraper or a credit card to gently lift the tape away from the car.

Finally, apply some rubbing alcohol to a cloth and wipe off any remaining residue. Voila! Your car will be tape-free and looking fresh again. So, no need to stress about that 3m tape anymore, as removing it is as easy as 1-2-3!

how to remove 3m tape from car

Important

Welcome to our comprehensive guide on how to remove 3M tape from your car. With 3M tape being a popular adhesive choice for various automotive applications, it’s essential to know the proper techniques for removing it without causing damage. Whether you’re trying to remove an old decal, strip, or trim, we’ve got you covered.

In this article, we’ll walk you through step-by-step instructions, share expert tips, and provide alternative methods for removing 3M tape from your car.

Why and When Should You Remove 3M Tape from Your Car?

Before we dive into the removal process, let’s explore why and when you might need to remove 3M tape from your car. There can be several reasons why you would want to remove it:

  1. Replacing or upgrading: If you’re looking to replace or upgrade your car’s trim, decals, or strips, you’ll need to remove the existing 3M tape.
  2. Resale or repainting: When selling your car or repainting a specific area, removing the 3M tape ensures a clean surface without any residue.
  3. Damage or wear: Over time, 3M tape can wear out or get damaged. Removing it allows you to repair or replace the affected area.

Now that we understand why and when to remove 3M tape from your car, let’s move on to the step-by-step process.

Gather the Necessary Tools

Before starting the removal process, gather the following tools:

  • Heat gun or hairdryer
  • Plastic scraper or credit card
  • Adhesive remover or rubbing alcohol
  • Clean microfiber cloth
  • Car shampoo and wax (optional)

These tools will make the removal process easier and safer for both your car’s surface and yourself.

Heat the 3M Tape

Start by using a heat gun or hairdryer on a medium setting to warm up the 3M tape. Hold the tool 2-3 inches away from the tape and move it back and forth evenly. The heat will soften the adhesive, making it easier to remove.

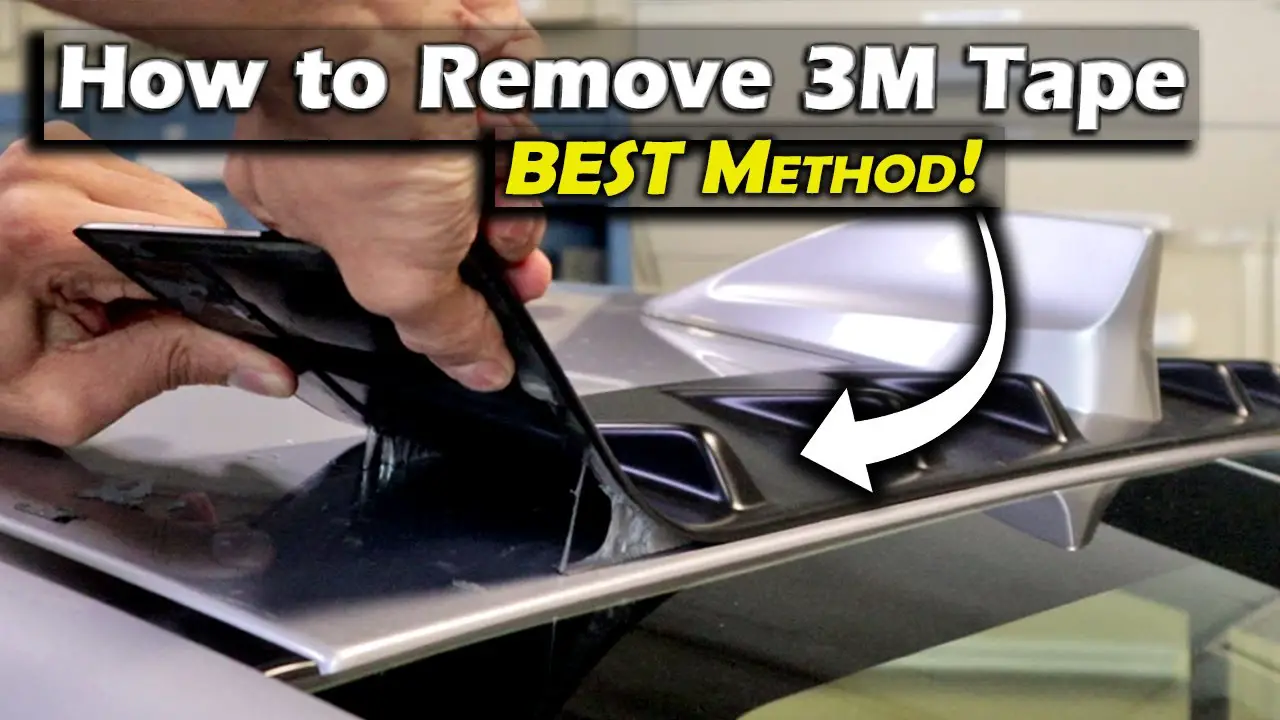
Use a Plastic Scraper or Credit Card

Once the tape is heated, use a plastic scraper or credit card to gently lift the edges of the tape. Be careful not to scratch or damage the car’s surface. Gradually work your way along the tape, applying even pressure to separate it from the car.

Apply an Adhesive Remover or Rubbing Alcohol

If any adhesive residue remains on the car after removing the tape, apply an adhesive remover or rubbing alcohol to a clean microfiber cloth. Gently rub the residue in a circular motion until it comes off. Repeat this process until the surface is clean and free of adhesive.

Cleaning and Finishing Touches

With the 3M tape removed, it’s time to clean the surface and add finishing touches.

Wash the Car

Using a car shampoo and water, wash the area where the 3M tape was located. This will remove any remaining residue and ensure a clean surface.

Apply Car Wax (Optional)

If you want to restore the shine and protect the paint, apply car wax to the area using a soft cloth or applicator. Follow the instructions on the wax packaging for the best results, and make sure the paint is completely dry before applying.

Alternative Methods for Removing 3M Tape from a Car

how to remove 3m tape from car

In addition to the heat and scraping method described above, there are a few alternative methods you can try:

Using Dental Floss or Fishing Line

If the 3M tape is located in a tight or curved area, using dental floss or fishing line can be effective. Simply slide the floss or fishing line behind the tape and use a sawing motion to separate it from the car.

Using a Plastic Razor Blade

A plastic razor blade can be useful for removing 3M tape from delicate surfaces or areas susceptible to scratches. The plastic blade is less likely to damage the paint while effectively lifting the tape.

Using a Commercial Adhesive Remover

If the adhesive residue is stubborn and difficult to remove, using a commercial adhesive remover specifically designed for automotive use can be a viable option. Follow the instructions on the product label and use it in a well-ventilated area.

Tips for Safe and Effective 3M Tape Removal

Removing 3M tape from your car can be a delicate process, so here are some tips to ensure a safe and effective removal:

Test a Small Area First

Before applying heat or using any adhesive remover, test a small, inconspicuous area of your car to ensure it doesn’t cause any damage or discoloration.

Work in Small Sections

Instead of trying to remove the entire tape at once, work in small sections. This allows you to maintain control and prevents the heated adhesive from cooling down and becoming difficult to remove.

Be Patient

Take your time during the removal process. Rushing can lead to mistakes or damage. Patience ensures a clean and safe removal.

Clean the Surface Thoroughly

After removing the tape and adhesive residue, thoroughly clean the surface. Any remaining residue can affect the appearance and adherence of new tape or other trim.

By following these tips and methods, you can effectively and safely remove 3M tape from your car without causing any damage.

How to Remove 3M Tape from Car

  • Use a hairdryer or heat gun to warm up the tape.
  • Gently peel off the tape from one end to the other.
  • Apply a adhesive remover or rubbing alcohol to remove any residue.
  • Use a plastic card or scraper to scrape off any stubborn tape.
  • Wash the area with soap and water to remove any remaining residue.

Frequently Asked Question

How can I safely remove 3M tape from my car without causing damage?

The best way to remove 3M tape from your car without damaging the surface is to use heat. Start by using a hairdryer or a heat gun to warm up the tape. Apply heat to the tape for a few minutes to soften the adhesive. Then, gently peel off the tape using your fingers or a plastic card, working slowly to avoid any pulling or tearing.

If any residue remains, use a mild adhesive remover or rubbing alcohol to gently wipe it away. Remember to test the adhesive remover on a small, inconspicuous area first to ensure it doesn’t damage the paint.

What if the 3M tape has been on my car for a long time and is difficult to remove?

If the 3M tape has been on your car for a long time, it may become more difficult to remove. In that case, you can try using a stronger adhesive remover specifically formulated for stubborn adhesives. Follow the manufacturer’s instructions carefully and apply the adhesive remover to the tape, allowing it to soak for a few minutes. This should help break down the adhesive and make it easier to remove.

If the tape still doesn’t come off easily, you can also try using a plastic razor blade or a plastic scraper tool to gently lift and scrape off the tape. Be cautious and apply minimal pressure to avoid scratching the car’s surface. If necessary, you can also repeat the process or seek professional help from a car detailing or paint shop.

Can I use a household cleaner to remove 3M tape from my car?

Using a household cleaner to remove 3M tape from your car is not recommended as it can damage the paint or clear coat. Household cleaners often contain harsh chemicals that can strip the paint or cause discoloration. Stick to using automotive-specific adhesive removers or rubbing alcohol to safely remove the tape without causing any harm to your car’s finish.

Is it safe to use a metal scraper or a razor blade to remove 3M tape from my car?

No, it is not safe to use a metal scraper or a razor blade to remove 3M tape from your car. These tools can easily scratch or gouge the paint or clear coat, causing irreversible damage. It’s best to stick to plastic razor blades or plastic scraper tools specifically designed for automotive use. These tools are less likely to cause any harm to your car’s surface.

If you’re unsure, it’s always better to be cautious and seek professional advice or assistance to avoid any accidental damage to your car.

How can I remove any residue left after removing the 3M tape from my car?

If you have any residue left after removing the 3M tape from your car, you can use a mild adhesive remover or rubbing alcohol to gently wipe it away. Apply a small amount of the adhesive remover or rubbing alcohol to a soft cloth and gently rub the residue in a circular motion. This should help dissolve and remove the leftover adhesive.

Be sure to work gently and avoid applying too much pressure to prevent damaging the paint. You can also use a clean cloth or towel to wipe away any excess residue as you go. Once the residue is completely removed, wash and rinse the area thoroughly to remove any remaining residue and to restore the shine of your car’s surface.

Conclusion

In conclusion, removing 3M tape from a car requires patience and the right approach to avoid damage to the paint. Using heat, adhesive removers, or gentle scraping methods can effectively loosen and remove the tape residue.

Prioritizing caution and testing removal methods on a small area helps prevent unintended harm to the car’s surface. Being meticulous and employing suitable techniques ensures a clean and safe removal of 3M tape, restoring the car’s appearance without compromising its paint job.

How to Install Evenflo Car Seat


Installing an Evenflo car seat may seem daunting, but did you know that proper installation is crucial for your child’s safety on the road? According to the National Highway Traffic Safety Administration, when car seats are installed correctly, they can reduce the risk of fatalities by up to 71%. So, let’s dive in and learn how to ensure a secure installation of your Evenflo car seat.

To install an Evenflo car seat, start by reading the vehicle and car seat manuals thoroughly. Familiarize yourself with the different parts and installation methods. You’ll typically secure the car seat using either the lower anchors and tether or the vehicle seat belt, depending on the model. Remember to position the car seat in the back seat, as it’s the safest place for your little one.

Always double-check that the seat is snug and does not move more than an inch in any direction. By following these steps, you can have peace of mind knowing your child is traveling in a safe and properly installed Evenflo car seat.

how to install evenflo car seat

How to Install Evenflo Car Seat: A Complete Guide

Installing a car seat correctly is crucial for the safety of your child when traveling. Evenflo car seats are known for their quality and reliability, but it is essential to follow the proper installation process to ensure maximum protection.

In this guide, I will take you through step-by-step instructions for installing an Evenflo car seat correctly, providing you with the peace of mind that your child is safe and secure during each car ride.

Read the Instruction Manual and Understand the Car Seat Components

Before beginning the installation process, it is vital to read the car seat’s instruction manual thoroughly. Each car seat model may have specific installation requirements and features, and understanding these details is crucial for a successful installation.

Additionally, familiarize yourself with the different components of the car seat, such as the harness, latch system, and recline adjustments. This knowledge will help you navigate through the installation process with confidence.

Once you have read the manual and have a good understanding of the car seat’s components, gather all the necessary tools for installation. This may include a level indicator, vehicle owner’s manual, and any additional accessories required to install the car seat properly.

Choose the Appropriate Seating Position

The next step in installing an Evenflo car seat is choosing the correct seating position in your vehicle. The safest place for a car seat is typically in the back seat. However, consult your vehicle owner’s manual to identify the seating positions that are safest for car seat installation. The manual may provide specific instructions or restrictions for certain seating positions and the use of the latch system or seat belt.

While installing the car seat in the rear-facing position is recommended for infants and young children, always refer to the car seat’s manual for the specific weight and height requirements for each installation mode. Ensure that the seating position you choose provides ample legroom for the car seat and is compatible with the car seat’s recline settings.

Remember, the middle rear seat is generally the safest position in the vehicle. However, if your vehicle does not have a latch system in the middle seat or the car seat does not fit securely in that position, choose the next safest seating position as recommended in the vehicle owner’s manual.

Install the Car Seat Using the LATCH System

Evenflo car seats are equipped with the LATCH (Lower Anchors and Tethers for Children) system, which provides an additional layer of security during installation. The LATCH system uses two lower anchors located in the vehicle’s seat bight and a tether anchor to secure the car seat in place.

  1. Begin by locating the lower anchors in your vehicle. They are typically found between the seat cushions, indicated by small plastic covers.
  2. Attach the car seat’s lower anchor connectors to the lower anchors in your vehicle. Press them firmly into the anchors until they click into place.
  3. Ensure that the car seat is level by checking the built-in level indicator. Adjust the recline angle of the seat as necessary. Consult the car seat’s manual for specific instructions on adjusting the recline.
  4. Once the car seat is correctly positioned and level, tighten the lower anchor straps to remove any excess slack. Apply pressure to the car seat while tightening the straps to ensure a secure installation.
  5. Finally, connect the car seat’s tether strap to the tether anchor in your vehicle. The tether anchor is typically located at the back of the vehicle seat, either on the seatback or floor.

Double-check the installation by pushing and pulling the car seat from different angles. It should not move more than one inch in any direction. If the car seat moves excessively, readjust the installation or consult the car seat’s manual for troubleshooting tips.

Install the Car Seat Using the Seat Belt

If your vehicle does not have the LATCH system or you prefer to install the car seat using the seat belt, follow these steps:

  1. Position the car seat in your chosen seating position, making sure it is level and provides ample legroom.
  2. Thread the seat belt through the appropriate belt path on the car seat. The belt path may vary depending on whether you are installing the car seat in the rear-facing or forward-facing mode.
  3. Insert the seat belt’s buckle into the buckle receptor, ensuring it is securely latched.
  4. Lock the seat belt by pulling it all the way out and then letting it retract, creating a snug fit. Refer to your vehicle owner’s manual for specific instructions on locking the seat belt in your vehicle.
  5. Check the car seat’s level indicator to ensure it is properly reclined. Make any necessary adjustments to the seat’s recline angle.
  6. Apply pressure to the car seat and pull the seat belt tight, removing any excess slack.

As with the LATCH installation, perform the movement test by pushing and pulling the car seat from different angles to ensure a secure installation. Make any necessary adjustments or tighten the seat belt further if the car seat moves excessively.

Securely Harness Your Child in the Car Seat

Once the car seat is securely installed, the final step is to properly harness your child. Follow these guidelines for a safe and snug fit:

  1. Ensure that the harness straps are adjusted to the appropriate height for your child. The harness straps should be at or below your child’s shoulders for rear-facing installation and at or above the shoulders for forward-facing installation.
  2. Place your child in the car seat and buckle the harness straps. The straps should lie flat and be free of twists. The chest clip should be positioned at armpit level to ensure proper placement.
  3. To tighten the harness, pull the adjustment strap located at the front of the car seat. It should be tight enough that you can only fit one finger between your child’s collarbone and the harness strap.
  4. Perform a pinch test to ensure that the harness is snug enough. If you can pinch excess material on the harness strap, tighten it further.
  5. Check the harness every time you put your child in the car seat to ensure it remains properly adjusted and secure.

Routinely Check and Maintain Your Car Seat’s Installation

Installing your Evenflo car seat correctly is not a one-time task. Routinely check the installation to ensure its continued effectiveness. Here are some maintenance tips:

  • Regularly inspect the car seat for any signs of wear, damage, or recalls. Evenflo provides information on recalls and offers support to address any concerns or issues you may have.
  • Revisit the car seat’s manual periodically to refresh your memory on installation procedures and ensure you are correctly following all guidelines.
  • Check the tightness of the installation and harness straps every time you put your child in the car seat. Car seats may shift slightly over time, so it is essential to regularly assess and adjust the installation as necessary.

Additional Tips for a Successful Installation

how to install evenflo car seat

Seek professional help

If you are unsure about installing your Evenflo car seat correctly, seek assistance from a Certified Child Passenger Safety Technician in your area. They can provide expert guidance and ensure your car seat is installed properly.

Register your car seat

Registering your car seat with Evenflo ensures that you receive important safety updates and product information. In the event of a recall, you will be notified promptly.

By following these installation guidelines and maintaining your Evenflo car seat correctly, you can travel with peace of mind, knowing that your child is secure and protected on every journey.

Choosing the Right Evenflo Car Seat for Your Child’s Age and Weight

When it comes to car seat safety, choosing the right car seat for your child’s age and weight is of utmost importance. Evenflo offers a range of car seats designed to provide optimal protection and comfort for children of different ages and sizes. Here are three popular Evenflo car seat models and their recommended usage:

Evenflo LiteMax 35 Infant Car Seat

The Evenflo LiteMax 35 Infant Car Seat is designed for newborns and infants weighing between 4 and 35 pounds. It features a lightweight and ergonomic design, making it easy to carry and install in a vehicle. The seat is rear-facing, providing superior protection for young passengers.

The LiteMax 35 includes a stay-in-car base with a one-step LATCH system for easy and secure installation. It also has an adjustable canopy to shield your baby from the sun and a removable head and body pillow for added comfort and support.

It is essential to note that the LiteMax 35 should be used in the rear-facing position until your child reaches the weight limit specified by the manufacturer or when their head is within one inch of the top of the car seat.

Evenflo EveryStage DLX All-in-One Car Seat

The Evenflo EveryStage DLX All-in-One Car Seat is a versatile option designed to accommodate children from infancy to their booster seat years. It can safely hold infants weighing 4 pounds up to larger children weighing 120 pounds. This car seat eliminates the need for multiple seats as your child grows.

The EveryStage DLX offers ten different positions to ensure a proper fit at every stage of your child’s development. It also features an easy-to-adjust headrest and harness system, allowing you to adapt the car seat’s size and fit as your child grows taller.

The EveryStage DLX is equipped with the SureSafe Installation system, which includes LATCH connectors and a BeltLock system for a secure and straightforward installation process. It also has breathable, temperature-regulating fabric and an integrated cup holder for added convenience.

Evenflo Maestro Sport Harness Booster Car Seat

The Evenflo Maestro Sport Harness Booster Car Seat is designed for older children ready for a booster seat. This car seat accommodates children weighing between 22 and 110 pounds and can be used in both forward-facing harnessed and belt-positioning booster modes.

The Maestro Sport features an easy-to-adjust five-point harness system, providing a secure fit for younger children. As your child grows, the car seat can transition into a belt-positioning booster mode using your vehicle’s seat belt. It also offers two built-in cup holders, providing convenient storage for drinks and snacks.

Always ensure that your child meets the weight and height requirements specified by the car seat’s manufacturer before transitioning to a booster seat.

Main Points to Remember When Installing an Evenflo Car Seat:

  • Read the car seat’s instruction manual thoroughly and understand its components.
  • Choose the appropriate seating position in the vehicle.
  • Follow the installation process using either the LATCH system or seat belt.
  • Ensure the car seat is secure and level, checking for any movement.
  • Harness your child properly, adjusting the straps for a snug fit.
  • Routinely check and maintain the car seat’s installation and components.
  • Choose an Evenflo car seat suitable for your child’s age and weight.

By following these steps and selecting the correct Evenflo car seat for your child, you can travel confidently, knowing that your little one is protected on every journey.

Statistics on Car Seat Safety

According to the National Highway Traffic Safety Administration (NHTSA), proper car seat usage can reduce the risk of fatal injury by up to 71% for infants and 54% for toddlers. However, statistics still show that many car seats are installed incorrectly, leaving children vulnerable to injury in the event of a crash.

The NHTSA reports that approximately 46% of car seats are installed incorrectly, mainly due to errors in securing the seat and harnessing the child. By following proper installation guidelines and using car seats that are appropriate for your child’s age and weight, you can significantly increase their safety on the road.

Frequently Asked Questions

Why is it important to read the car seat manual before installation?

It is essential to read the car seat manual before installation to understand the specific guidelines and instructions provided by Evenflo. The manual contains important information about the proper installation of the car seat, including the correct positioning and use of safety features.

It will also outline any specific requirements or recommendations for your particular model of the Evenflo car seat. By familiarizing yourself with the manual, you can ensure that the car seat is installed correctly and maximizes the safety of your child.

The car seat manual will also provide step-by-step instructions on the installation process, including any necessary adjustments or modifications to fit your vehicle properly. It will guide you through the installation and help you avoid common mistakes that could compromise the effectiveness of the car seat.

How can I ensure a secure installation of my Evenflo car seat?

To ensure a secure installation of your Evenflo car seat, begin by carefully reading the car seat manual. Follow the step-by-step instructions provided, paying attention to details such as correct positioning, angle adjustments, and securing the seat tightly. Make sure you have a thorough understanding of the installation process, including any specific requirements for your car seat model.

Next, perform a thorough inspection of your vehicle’s seat belt or latch system, depending on the installation method specified for your Evenflo car seat. Ensure that the seat belt is securely fastened or that the latch system is properly engaged. Check for any signs of wear or damage on the seat belt or latch, as this could affect the overall safety of the installation.

During installation, it is crucial to exert enough force when tightening the seat belt or latch to eliminate any slack. Firmly press down on the car seat while pulling the seat belt or latch to achieve a snug fit.

Double-check by giving the car seat a firm shake from side to side and front to back to ensure it is securely installed. If the car seat moves more than an inch in any direction, readjust and tighten it until it remains firmly in place.

Can I install an Evenflo car seat using both the seat belt and latch system?

No, it is not recommended to install an Evenflo car seat using both the seat belt and latch system simultaneously. Evenflo advises against using both methods together as it may compromise the integrity of the car seat installation.

The car seat manual will provide clear instructions on which installation method to use for your specific car seat model. It is important to select and follow one method consistently, ensuring a secure installation that adheres to the guidelines provided. Choosing either the seat belt or latch system will depend on your vehicle’s make and model and the specifications of your Evenflo car seat.

If you are unsure which installation method to use, consult the car seat manual or contact Evenflo customer support for further guidance. They will be able to help you determine the appropriate installation method that best suits your vehicle and car seat model.

Can I use an Evenflo car seat with the lower anchors in the middle seat of my vehicle?

Yes, you can usually use the lower anchors in the middle seat of your vehicle to install an Evenflo car seat. However, it is important to check your vehicle’s owner manual and the car seat manual for any specific restrictions or recommendations.

Some vehicles may not have lower anchors in the middle seat, or there may be weight limitations for using the lower anchors in that particular seat. Additionally, certain Evenflo car seat models may have guidelines regarding the use of lower anchors in the middle seat.

To ensure a secure installation, always follow the instructions provided in your vehicle’s owner manual and the car seat manual. If you are unsure or have any questions, reach out to Evenflo customer support, who can provide additional guidance to help you correctly and safely install the car seat in the middle seat of your vehicle.

Can I install an Evenflo car seat using the top tether without using the lower anchors?

Yes, it is possible to install an Evenflo car seat using the top tether without using the lower anchors. This installation method, known as a top tether installation, is suitable when your vehicle does not have lower anchors or when you prefer not to use them.

To install the car seat using the top tether, follow the instructions provided in the Evenflo car seat manual. Locate the top tether anchor point in your vehicle, usually found behind the rear seat or on the rear shelf. Attach the top tether strap of the car seat to this anchor point, ensuring it is securely fastened.

Conclusion

In conclusion, installing an Evenflo car seat correctly is crucial for child safety during travel. Following the manufacturer’s instructions step-by-step and utilizing the LATCH system or seat belt ensures a secure installation. Regular checks and adjustments guarantee a snug fit, providing maximum protection for the child.

Prioritizing safety protocols and seeking professional assistance or guidance when uncertain ensures proper installation, granting caregivers peace of mind while transporting their little ones in the Evenflo car seat.

How to Draw a Police Car


Have you ever wondered how to bring a police car to life on a blank canvas? Well, it’s easier than you might think. With a few simple steps, you can learn how to draw a police car that captures its power and authority. Get ready to unleash your artistic side and create a vehicle that commands attention.

To draw a police car, start by sketching the basic outline of the car’s body, using straight lines to define its shape. Then, add the details like the lights, sirens, and the iconic police logo. Don’t forget to emphasize the sleek and sturdy design that gives these cars their distinctive look. Let your imagination shine as you add the finishing touches to your drawing, making it as realistic or stylized as you desire. Whether you’re an aspiring artist or just looking to unleash your creativity, drawing a police car will surely be a fun and exciting experience. So grab your pencil and let’s get started!

how to draw a police car

How to Draw a Police Car: A Step-by-Step Guide

Welcome to this step-by-step guide on how to draw a police car. Whether you’re an aspiring artist, a beginner, or just looking for a fun activity, this tutorial will break down the process of drawing a police car into easy-to-follow steps. Get your pencils and paper ready, and let’s get started!

Gathering the Right Materials

Before you begin, it’s important to gather all the necessary materials. You will need a pencil, eraser, paper, and a ruler. A ruler will help you in drawing straight lines and maintaining the right proportions for your police car.

Make sure the pencil is sharp and the eraser is clean. Now that you have everything you need, let’s move on to the next step.

Start with the Basic Shapes

To draw a police car, it’s helpful to start with the basic shapes that make up its structure. Begin by drawing a rectangular shape for the body of the car. This will be the main frame. Next, draw two smaller rectangles for the windows and a larger rectangle for the windshield.

These shapes will serve as your guide throughout the drawing process. Remember, at this stage, it’s not about getting everything perfect, but rather establishing the overall shape and proportions.

Now, let’s focus on the details of the police car.

Adding Details to the Body

Now that we have the basic shape of the police car, it’s time to add some details. Start by sketching the front grille. This can be done by drawing a series of horizontal lines in the front of the car. Next, add the headlights and the police siren on top of the car.

Don’t fret if it doesn’t look perfect right away – you can always make adjustments as you go. Once you have these details in place, move on to the next step.

Pro tip: Use references or images of actual police cars to guide you in adding the specific details that make a police car recognizable.

Adding Wheels and Finishing Touches

Now that the main structure of the police car is complete, it’s time to add some wheels and the finishing touches. Start by drawing two circles on opposite sides of the car for the front and back wheels. Ensure that they are proportional to the body of the car. Once the wheels are in place, you can add the spokes or rims for a more realistic look.

Lastly, add any additional details or decals that you want to incorporate into your police car drawing. This could include the words “police” on the sides, a badge, or other distinguishing features. Use your imagination and creativity to personalize your drawing and make it unique.

Adding Color and Shading

Now that you have completed the pencil drawing, it’s time to add color and shading to bring your police car to life. You can use colored pencils, markers, or even digital tools to add vibrant colors to your drawing. Research different police car designs and color schemes to get inspiration for your own coloring.

When it comes to shading, start by identifying the direction of the light source in your drawing. Add darker shades to areas that are further away from the light source and lighter shades to areas that are closer. This will create depth and make your drawing appear more three-dimensional.

Remember, practice makes perfect, so don’t be discouraged if your first attempt doesn’t turn out exactly as you envisioned. With time and patience, you will improve your drawing skills and create amazing police car illustrations.

Tips for Improving Your Drawing Skills

how to draw a police car

1. Practice regularly: The more you draw, the better you will become. Set aside time each day or week dedicated to honing your drawing skills.

2. Study from references: Look at photographs, images, and real-life examples of police cars to understand their proportions, details, and features.

3. Break it down: When drawing complex objects like a police car, break down the process into smaller steps and tackle each component individually.

4. Experiment with different techniques: Try using different shading techniques, coloring styles, and materials to enhance your drawing skills.

5. Don’t be afraid to make mistakes: Mistakes are a natural part of the learning process. Embrace them, learn from them, and use them to improve your skills.

Right Way to Draw a Police Car

  • Start by drawing the basic shapes of the police car, like the rectangle for the body and circles for the wheels.
  • Add details to the car, such as the windows, doors, and lights.
  • Draw the police car’s roof rack with sirens and antennas.
  • Add the police decals and markings to give the car a realistic look.
  • Color your police car drawing, using shades of blue and white for the classic police car design.

Frequently Asked Questions

How can I start drawing a police car?

Getting started with drawing a police car is easier than you might think. Begin by sketching the basic shape of the car using simple lines and curves. You can use a reference image or a toy car to help you visualize the proportions.

Next, start adding details like the windows, doors, and tires. Pay attention to the small details that make a police car unique, such as the flashing lights and sirens. Finally, add shading and color to bring your drawing to life. Don’t be afraid to make mistakes – practice makes perfect!

What art supplies do I need to draw a police car?

To draw a police car, you’ll need a few basic art supplies. Start with a pencil and eraser for sketching and making corrections. You will also need paper or a sketchbook to draw on. If you want to add color to your drawing, consider using colored pencils, markers, or even watercolors.

Additionally, having reference images or toy cars on hand can help you better understand the shape and details of a police car. Remember, the most important thing is to have fun and be creative!

Are there any tips for drawing the details of a police car?

Drawing the details of a police car can be challenging, but with a few tips, you’ll be able to capture them accurately. Use light pencil strokes when sketching the details to avoid making hard-to-erase lines. Focus on the proportions and shapes of the windows, doors, and tires. Pay attention to the placement and size of the police lights and siren on the car’s roof.

Don’t forget about the small details like the police decals and logo. Take your time and observe reference images to help you get the details right.

Can I use different colors for the police car?

Absolutely! While police cars are traditionally black and white, you can get creative with your colors. Experiment with different color combinations for the body of the car, such as blue and white, red and white, or even silver and black.

You can also add additional details in contrasting colors, like yellow or red for the flashing lights. Remember, it’s your drawing, so feel free to let your imagination run wild!

Is it necessary to have prior drawing experience to draw a police car?

No prior drawing experience is necessary to draw a police car. Drawing is a skill that can be learned and improved with practice. Start by following simple tutorials or step-by-step guides, and gradually challenge yourself with more complex drawings.

Remember to be patient with yourself and enjoy the process. With time and practice, you’ll be able to draw a police car that you’re proud of!

Conclusion

Drawing a police car can be a rewarding and enjoyable experience. By following the step-by-step guide outlined above and incorporating your own creativity, you can create stunning illustrations of police cars. Remember to practice regularly, study references, and experiment with different techniques to continuously improve your drawing skills. So, grab your pencils and start drawing!

How to Reset Sirius Radio in Car


Have you ever found yourself in a situation where your Sirius radio in your car suddenly stops working? Perhaps the signal gets lost, or the channels become scrambled. Well, fear not! I’m here to share with you a simple solution to reset your Sirius radio and get it back up and running in no time.

To reset your Sirius radio in your car, there are a few simple steps you can follow. First, locate the power button on your radio. Press and hold the power button for about 10 seconds until the device shuts off. Once it’s off, wait for a few seconds, and then press the power button again to turn it back on. This reset should clear any temporary glitches and restore your Sirius radio to its normal functioning state.

Resetting your Sirius radio in your car is a quick and easy process that can save you from the frustration of a malfunctioning device. It’s important to note that occasional signal loss or channel issues are not uncommon, especially when driving through areas with poor reception. By following these reset steps, you’ll have a better chance of restoring your Sirius radio to its optimal performance and enjoying all your favorite channels without any interruptions.

How To Reset Sirius Radio In Car

How to Reset Sirius Radio in Car: A Comprehensive Guide

Welcome to our comprehensive guide on how to reset Sirius radio in your car. Whether you’re experiencing technical difficulties or simply want to start fresh with your Sirius radio, a reset can often solve the issue.

In this article, we will provide you with step-by-step instructions and useful tips to help you reset your Sirius radio and get back to enjoying your favorite channels. So, let’s dive in and learn how to reset Sirius radio in your car.

Check the Power Connection

The first step in resetting your Sirius radio in your car is to check the power connection. Ensure that the radio is properly connected to the power source and that the power cable is securely plugged in. Sometimes, a loose or faulty connection can cause issues with the radio’s performance. If you find any issues with the power connection, fix them before proceeding to the next steps.

If the power connection is fine, try resetting the radio by disconnecting it from the power source for a few minutes and then reconnecting it. This can help in resolving minor glitches and restoring the radio’s functionality.

If the power connection and reset do not resolve the issue, it’s time to move on to the next troubleshooting steps.

Perform a Factory Reset

If you’re experiencing persistent issues with your Sirius radio, performing a factory reset can often solve the problem. However, it’s important to note that a factory reset will delete all your saved settings and preferences. Make sure you’re okay with resetting your radio to its original factory settings before proceeding.

To perform a factory reset, locate the reset button on your Sirius radio. It is usually a small indentation or a tiny button labeled “Reset” or “Factory Reset.” You may need to use a paperclip or a similar tool to press and hold the reset button for a few seconds.

After releasing the reset button, your Sirius radio will go through the reset process, which may take a couple of minutes. Once the reset is complete, you will need to reprogram your radio and set up your preferences again. This should resolve most issues and return your Sirius radio to its default settings.

Check Signal Strength and Antenna

If you’re still experiencing issues with your Sirius radio after performing a factory reset, it’s important to check the signal strength and the condition of your antenna. A weak signal or a damaged antenna can lead to poor reception and cause your radio to malfunction.

Start by checking the signal strength indicator on your Sirius radio. It should display the signal strength as a percentage or a bar graph. If the signal strength is consistently low, try moving your car to an area with a better line of sight to the sky, such as an open parking lot or away from tall buildings.

If the signal strength is still poor, you may need to inspect the antenna. Check for any visible damage, such as a bent or broken antenna. If you notice any issues, you may need to replace the antenna or contact Sirius customer support for further assistance.

Important Tip

If you live in an area with tall buildings or dense tree coverage, you may consider using an external antenna for better signal reception. External antennas can be mounted on your car’s roof or placed on the dashboard to improve signal strength and overall performance.

By following these steps and troubleshooting tips, you should be able to reset your Sirius radio in your car and resolve any issues you may be facing. Remember to double-check all connections, perform a factory reset if necessary, and ensure optimal signal strength and antenna condition. Enjoy your uninterrupted Sirius radio experience!

Common Problems with Sirius Radio and How to Fix Them

Common Problems with Sirius Radio and How to Fix Them

If you’re experiencing problems with your Sirius radio, you’re not alone. Many users encounter issues with signal reception, frozen screens, or unresponsive buttons. In this section, we will address some common problems and provide you with possible solutions to fix them. Read on to troubleshoot and resolve the most common problems with Sirius radio.

No Signal or Poor Reception

If you’re facing a weak or no signal issue, there are a few steps you can take to improve reception:

  1. Check the antenna connection: Ensure that the antenna is securely connected to the radio.
  2. Reposition the antenna: Try repositioning the antenna to a different location on your car, such as the roof or dashboard.
  3. Get an external antenna: Consider using an external antenna for better signal reception, especially if you live in an area with poor coverage.

By following these steps, you should be able to improve the signal reception and enjoy uninterrupted Sirius radio.

Frozen or Unresponsive Screen

If your Sirius radio’s screen is frozen or unresponsive, try the following troubleshooting steps:

  1. Perform a power cycle: Disconnect the power source and reconnect it after a few seconds. This can often resolve temporary software glitches.
  2. Reset the radio: Locate the reset button on your Sirius radio and press it for a few seconds to initiate a reset. This can help in resolving more persistent screen issues.
  3. Contact customer support: If the screen remains frozen or unresponsive, reach out to Sirius customer support for further assistance.

These troubleshooting steps should help in resolving screen-related issues with your Sirius radio.

Quick Tips for Optimal Sirius Radio Experience

Now that you have learned how to reset Sirius radio in your car and troubleshoot common problems, here are a few quick tips to enhance your overall Sirius radio experience:

Keep Your Radio Updated

Regularly check for firmware updates for your Sirius radio. These updates often include bug fixes and performance improvements, ensuring a smoother experience.

Explore Different Channels and Genres

With a vast selection of channels available, don’t limit yourself to just one genre. Explore different channels and genres to discover new music, shows, and podcasts that resonate with your interests.

Use the Favorites Feature

Create a list of your favorite channels using the favorites feature on your Sirius radio. This makes it easier to navigate through your preferred channels and keeps your listening experience organized.

Take Advantage of the Pause and Rewind Functionality

Many Sirius radios allow you to pause and rewind live broadcasts. Make use of this feature to never miss a beat and catch up on any content you may have missed.

Consider a Subscription Plan

While Sirius radio offers a free trial period, consider subscribing to a plan that suits your preferences. Subscribing unlocks additional features, access to exclusive content, and an ad-free listening experience.

By following these tips, you can maximize your enjoyment of Sirius radio and make the most out of your subscription.

Easy Way to Reset Sirius Radio in Car

  • To reset your Sirius Radio in your car, start by turning off your radio.
  • Locate the fuse box in your car and find the fuse labeled “Sirius” or “Satellite Radio”.
  • Remove the fuse for about 10-15 seconds, then reinsert it back into the fuse box.
  • Turn on your radio and wait for it to boot up. This may take a few minutes.
  • Your Sirius Radio should now be reset and ready to use.

Frequently Asked Questions

How do I reset my Sirius radio in my car?

To reset your Sirius radio in your car, first, make sure your vehicle is turned on and the Sirius radio is powered on. Locate the satellite radio receiver in your car, which is usually found in the trunk, under a seat, or in the dashboard.

Next, locate the “Reset” button, typically labeled with the word “Reset” or depicted by an icon. Use a paperclip or a similar tool to press and hold the reset button for about 10-15 seconds. Release the button and wait for the radio to reboot. You may need to re-enter your Sirius account information after the reset is complete.

This reset procedure can vary depending on your car make and model, so it’s always a good idea to consult your vehicle’s manual for specific instructions. Following these steps should help you get your Sirius radio up and running again.

Why would I need to reset my Sirius radio in my car?

There can be a few reasons why you would need to reset your Sirius radio in your car. One common reason is when the radio freezes or becomes unresponsive. Resetting the radio can help resolve software glitches and get it back to normal functioning.

Additionally, if you have recently changed your Sirius subscription plan or updated your account information, resetting the radio can ensure that your changes take effect properly.

Resetting the Sirius radio can also be helpful if you are experiencing audio or reception issues. It gives the radio a fresh start, allowing it to reestablish connections with the Sirius satellite and possibly improve reception. If you’re encountering any issues with your Sirius radio, resetting it is a good troubleshooting step to try before seeking further assistance.

Is there a way to reset my Sirius radio without using the reset button?

Yes, there is an alternative method to reset your Sirius radio without using the physical reset button. To do this, locate the power and volume knobs on your radio. Press and hold both the power and volume knobs simultaneously for about 10-15 seconds. Release the knobs and wait for the radio to reboot. This alternative reset method can work for certain car models that do not have a dedicated reset button.

However, keep in mind that this method may not be applicable to all car models, so it’s always recommended to check your vehicle’s manual for specific instructions on resetting the Sirius radio.

Will resetting my Sirius radio delete my saved channels and presets?

Resetting your Sirius radio should not delete your saved channels and presets. The purpose of a reset is to restart the radio’s software and resolve any issues it may be experiencing. It does not typically affect the saved channel settings. After the reset, your radio should retain the same channel lineup, customized preferences, and presets as before.

If, for any reason, your saved channels or presets are lost after a reset, you can easily reprogram them by tuning to the desired channels and following the instructions in your vehicle’s manual. It’s always a good idea to make a note of your favorite channels and presets before performing a reset, just in case.

What should I do if resetting my Sirius radio doesn’t solve the problem?

If resetting your Sirius radio doesn’t solve the issue you’re experiencing, there are a few other troubleshooting steps you can try. First, check your antenna connections to ensure they are secure and not damaged. A loose or damaged antenna can affect signal reception. If the antenna looks fine, try a different channel to see if the issue persists. It’s possible that the problem is isolated to a specific channel.

If the problem still persists, you can try refreshing your Sirius radio signal by contacting Sirius customer support. They can send a signal refresh to your radio, which may help resolve the issue. Be prepared to provide them with your radio’s ESN or ID number, which can usually be found in the radio’s settings menu. Sirius customer support will guide you through the process and provide further assistance if needed.

Conclusion

To sum up, resetting a Sirius radio in a car involves simple steps like locating the reset button, power cycling the radio, or contacting SiriusXM customer support for assistance. Following the manufacturer’s guidelines or consulting the car manual aids in a swift reset process.

If issues persist, reaching out to customer service ensures professional guidance. Understanding these reset methods empowers users to troubleshoot minor issues independently, ensuring uninterrupted enjoyment of SiriusXM services while driving.

How to Remove Graco Car Seat from Base


As a parent constantly on the go, I was shocked to learn that many people struggle with removing their Graco car seat from the base. It’s such a crucial skill to have, considering how often we need to transfer our little ones from car to stroller and back. Luckily, I’ve mastered the art of removing a Graco car seat from the base and I’m here to share my simple technique with you.

Removing a Graco car seat from the base is a breeze once you know the right steps. First, ensure that the car seat is securely in place by checking that the base is properly installed and latched. Then, locate the release lever on the base, usually positioned near the front of the seat.

With one hand supporting the car seat, press and hold the release lever, and simultaneously lift the car seat upward and backward. The car seat should easily detach from the base, allowing you to smoothly transition your child from the car to their next adventure. Easy, right?

how to remove graco car seat from base

How to Remove a Graco Car Seat from the Base: A Step-by-Step Guide

Whether you’re a new parent or a seasoned caregiver, knowing how to properly remove a Graco car seat from its base is essential for the safety and comfort of your child.

In this article, I will provide a detailed step-by-step guide on how to remove a Graco car seat from the base, ensuring that you have the knowledge and confidence to do it correctly. From unlocking the seat to safely lifting the car seat out, I will cover everything you need to know. So, let’s get started!

Prepare for Removal

First, make sure your vehicle is parked on level ground and turned off. Locate the base of the Graco car seat and identify the release mechanism. It’s usually a lever or button positioned near the front of the base. Familiarize yourself with how it works by reading the manufacturer’s manual or watching online tutorials. This will give you a better understanding of the specific model you have.

Once you’re familiar with the release mechanism, ensure that the car seat is empty. Remove any toys, blankets, or accessories that may be in the seat. It’s important to have a clear and unobstructed path during the removal process.

Pro tip:

If your Graco car seat has a recline feature, adjust it to the upright position before attempting to remove it from the base. This will make it easier to handle and prevent any potential injuries.

Release the Car Seat

To remove a Graco car seat from the base, you need to release it from the secured position. Different models may have slightly different mechanisms, but the general process remains the same. Locate the release lever or button and press, pull, or lift it in the appropriate direction. This action will disengage the seat from the base.

Some car seats have additional safety features, such as lock-offs or clips. Ensure that all these mechanisms are fully disengaged before attempting to lift the car seat.

Pro tip:

If you’re unsure about the specific release mechanism of your Graco car seat, consult the manufacturer’s manual or seek help from a certified car seat technician. They can provide guidance and answer any questions you may have.

Lift the Car Seat

Now that the Graco car seat is released from the base, it’s time to lift it out. Firmly hold the car seat by the handle or the designated areas specified by the manufacturer. Lift it straight up and out of the base, maintaining a steady grip.

Take extra care while lifting to ensure the seat doesn’t catch on any parts of the base or the vehicle. Lift it with confidence, but without applying excessive force that could damage the car seat or its components.

Pro tip:

Before removing the car seat from the base, double-check that you have a secure grip on it. This will prevent any accidental drops or mishandling. Always prioritize the safety of your child.

Additional Tips for Removing a Graco Car Seat from the Base

Additional Tips for Removing a Graco Car Seat from the Base

Now that you know the basic steps involved in removing a Graco car seat from the base, here are a few additional tips to make the process even smoother:

Use a Mirror

If you’re having trouble seeing the release mechanism or accessing it due to the car seat’s position, consider using a small mirror. Place the mirror strategically to get a better view of the mechanism. This will help you release the car seat more easily and with confidence.

Check for Compatibility

Before attempting to remove a Graco car seat from its base, double-check that the seat and the base are compatible. Each Graco car seat model may have specific base requirements. Ensure that the base you’re using matches the car seat to avoid any compatibility issues that could compromise your child’s safety.

Easy Way to Remove Graco Car Seat from Base

  • 1. Make sure the car is in park and the engine is off before attempting to remove the Graco car seat from the base.
  • 2. Locate the release lever or button on the back of the car seat.
  • 3. Press the release lever or button while lifting the car seat up and out of the base.
  • 4. Ensure that the car seat is securely detached from the base before moving it.
  • 5. Double-check that the car seat is properly installed in the new location or in stroller mode if applicable.

Remember to always follow these steps when removing your Graco car seat from the base to ensure safety and proper installation.

Frequently Asked Questions

How do I remove a Graco car seat from its base?

To remove a Graco car seat from its base, first, ensure that the car seat is properly installed in the base. Check if the base has an adjustable recline feature; if it does, move the base to the most upright position before attempting to remove the car seat. Next, locate the release lever or button, usually located at the front or side of the base.

Press or pull the lever/button while simultaneously lifting the car seat away from the base. Depending on the model, you may need to apply some force, but be gentle to avoid damaging the car seat or base. Once the car seat is detached, carefully lift it away from the base and set it aside.

It’s important to remember that each Graco car seat model may have slightly different mechanisms to remove the seat from the base, so always consult your specific car seat’s manual for detailed instructions.

Can I remove a Graco car seat from its base with the baby in it?

No, it is not safe to remove a Graco car seat from its base with the baby still in it. To ensure the safety and well-being of your child, always take them out of the car seat before attempting to remove it from the base.

Never try to detach or lift the car seat while your baby is still seated in it, as it can lead to accidents or injuries. Always handle the car seat removal process separately from placing your child in or out of the seat to maintain their safety.

Remember, it’s crucial to follow the car seat manufacturer’s guidelines and recommendations for proper use and installation to keep your child safe while traveling.

Why is my Graco car seat not detaching from the base?

If your Graco car seat is not detaching from the base, check the following possible reasons: First, make sure that the car seat is correctly installed in the base, and that all the necessary adjustments and latches are securely in place. If the base has an adjustable recline function, ensure it is set to the appropriate position for your child’s age and weight.

Additionally, check if the release lever or button is fully engaged or functional. Sometimes, dirt, debris, or fabric can obstruct the release mechanism, preventing the car seat from detaching. Clean any visible obstructions or try gently pressing the release lever or button multiple times to disengage it. If the issue persists, consult your car seat’s manual or contact Graco’s customer support for further assistance.

Remember, the safety and proper functioning of your car seat are paramount, so addressing any detachment issues promptly is essential.

Do I have to uninstall the base from my car to remove the Graco car seat?

No, you do not need to uninstall the Graco car seat base from your car to remove the car seat. The base and car seat are designed to facilitate easy removal and installation without detaching the entire base from your vehicle. Simply follow the proper steps to release and lift the car seat from the base, as outlined in the car seat’s manual.

However, if you need to remove the entire base for any reason, such as cleaning or reinstallation, consult the car seat’s manual for instructions specific to your model.

Remember to always follow the manufacturer’s guidelines and recommended installation methods for secure and safe usage of your Graco car seat.

Can I reuse a Graco car seat base with a different Graco car seat?

Yes, in most cases, you can reuse a Graco car seat base with a different Graco car seat. Graco car seat bases are often designed to be compatible with multiple car seat models within their product line. However, it’s crucial to refer to the car seat’s manual and verify if the base is compatible with the specific car seat you intend to use.

The manual will provide details regarding compatibility and any necessary adjustments or installations required for a secure fit. If you are uncertain about compatibility or have any questions, it’s best to contact Graco’s customer support for clarification.

Always prioritize the safety of your child and ensure that the car seat and base are correctly installed, regardless of reusing a base or using a different car seat model.

Conclusion

Removing a Graco car seat from its base is a straightforward process that can be easily mastered with a little practice. By following the steps outlined in this guide and taking the additional tips into account, you can ensure that your child’s car seat is safely and correctly removed whenever needed.

Remember to always refer to the manufacturer’s manual for specific instructions and guidelines. Your child’s safety is our utmost priority, and by following these guidelines, you can ensure a secure and comfortable ride for your little one.

How Old to Test Drive a Car


I never thought I’d be able to test drive a car until I turned 18. But did you know that in some states, you can start test driving at the age of 15? Yes, that’s right! In states like Alabama, Alaska, and Arkansas, teenagers as young as 15 can legally get behind the wheel for test drives. It’s quite surprising, isn’t it?

When it comes to how old you need to be to test drive a car, the laws can vary from state to state. While most states require you to be 18 or older, there are some exceptions. For example, in states like California, New York, and Texas, the minimum age is 16.

This variation in age limits reflects the different approaches states have taken to balance the need for driving experience with safety concerns. So, if you’re eager to get your hands on the steering wheel before turning 18, make sure to check the specific laws in your state.

How Old To Test Drive A Car

How Old to Test Drive a Car: Exploring the Age Restrictions and Requirements

When it comes to test driving a car, there are certain age restrictions and requirements that vary depending on your location. It’s important to understand these regulations to ensure a smooth and legal experience.

In this article, we will delve into the topic of how old someone needs to be to test drive a car, covering different aspects such as learner’s permits, accompanying adults, and dealer policies.

Obtaining a Learner’s Permit

Before even considering test driving a car, many regions require individuals to obtain a learner’s permit. This permit allows new drivers to practice their driving skills under the supervision of a licensed adult.

The age requirements for obtaining a learner’s permit vary, but typically range from 15 to 18 years old. It’s important to check the specific regulations in your area to determine the age at which you can apply for a learner’s permit.

Once you have your learner’s permit, you may be allowed to test drive a car under certain conditions. These conditions usually include having a licensed adult in the passenger seat, such as a parent or guardian, who is at least 21 years old.

The accompanying adult must also meet the requirements set forth by the local authorities. Keep in mind that some dealerships may have additional age restrictions or policies, so it’s essential to inquire beforehand.

Test Driving with an Accompanying Adult

If you have a learner’s permit, it’s crucial to have an accompanying adult with you when test driving a car. This adult will not only ensure your safety but also act as a guiding presence during the test drive. The accompanying adult should be someone who has a valid driver’s license and is experienced in driving. Moreover, they should be familiar with the rules and regulations of the road to provide proper guidance and instruction.

During the test drive, the accompanying adult should sit in the passenger seat or the back seat if a salesperson needs to occupy the front passenger seat. They should be actively observing your driving skills, offering advice, and stepping in if necessary. It’s important to have open communication with the accompanying adult to ensure a smooth and educational test driving experience.

Dealerships may have additional policies when it comes to test driving with an accompanying adult. Some dealers may require the adult to be present for the entire duration of the test drive, while others may allow the adult to leave once you have demonstrated sufficient driving skills. It’s advisable to clarify these policies with the dealership before scheduling a test drive.

Age Restrictions and Dealer Policies

In addition to the requirements set by local authorities, car dealerships also have their own age restrictions and policies for test driving. These policies can vary widely and may depend on factors such as the type of car being test driven, insurance considerations, and dealership regulations.

For example, some dealerships may have a minimum age requirement of 18 for test driving any car, regardless of the presence of a learner’s permit or accompanying adult. Others may have specific age restrictions depending on the vehicle’s horsepower, price, or other factors. It’s crucial to check with the dealership beforehand to understand their policies and ensure that you meet their age requirements.

In some cases, dealerships may require individuals to provide proof of insurance before allowing them to test drive a car. This requirement ensures that both the driver and the vehicle are covered in case of any accidents or damages that may occur during the test drive. If you already have car insurance, make sure to bring the necessary documentation with you. Otherwise, you may need to inquire about temporary coverage options offered by the dealership.

The Importance of Responsible Driving

Regardless of the age restrictions and requirements for test driving a car, it’s crucial to prioritize responsible driving. Test driving should not be taken lightly, as it involves operating a vehicle on public roads. Remember to follow all traffic rules and regulations, maintain a safe speed, and be respectful of other drivers on the road.

Always remain focused and alert during the test drive, paying attention to the vehicle’s handling, braking, and acceleration. Look for any signs of mechanical issues or abnormalities. If you’re uncertain about a particular aspect of the car, don’t hesitate to ask the accompanying adult or dealership staff for clarification.

By adhering to responsible driving practices, you not only ensure your own safety but also demonstrate your maturity and capability to handle a vehicle. This responsible behavior can leave a positive impression on both the accompanying adult and the dealership, increasing your chances of a successful test drive and a potential purchase.

Remember Those Things Before Test Drive a Car

Remember Those Things Before Test Drive a Car

  • You typically need to be at least 16 years old to test drive a car.
  • The age requirement may vary depending on the specific dealership or state laws.
  • Some dealerships may have additional restrictions, such as requiring a valid driver’s license.
  • It’s important to check with the dealership beforehand to ensure you meet the age and any other requirements.
  • If you’re underage, you may still be able to accompany someone who is of legal age to test drive a car.

Frequently Asked Questions

What is the age requirement to test drive a car?

To test drive a car, you typically need to be at least 18 years old, as this is the legal driving age in many countries. However, some car dealerships may have their own policies, so it’s always a good idea to check with them. If you’re under 18, you may still be able to test drive a car if you have a licensed adult present with you.

Keep in mind that the age requirement can vary depending on the type of car you’re looking to test drive. High-performance vehicles or specialty cars may have stricter requirements due to their power or value. Always inquire about the specific policies of the dealership or car company you’re interested in.

Do I need a driver’s license to test drive a car?

In most cases, yes, you will need a valid driver’s license to test drive a car. This is to ensure that you have the necessary skills and knowledge to operate a vehicle safely during the test drive. A driver’s license is also used for identification purposes. If you don’t have a license, you may need to bring along a licensed adult who can test drive the car on your behalf.

Keep in mind that car dealerships or private sellers may also request additional documentation, such as proof of insurance, before allowing you to test drive a car. It’s always a good idea to have these documents handy in case they are required.

Can I test drive a car if I’m a minor?

If you’re under 18 years old and have a learner’s permit or a driver’s license, you may be able to test drive a car with the presence of a licensed adult. This adult will need to supervise your test drive and take responsibility for any liabilities that may arise during the process. It’s important to note that the age requirement may vary depending on the dealership or car company, so be sure to inquire about their specific policies.

Keep in mind that even if you’re legally allowed to test drive a car as a minor, the dealership may still impose additional restrictions, such as limiting the types of cars you can test drive or requiring a parent or guardian to be present. Always check with the dealership beforehand to ensure you meet their requirements.

Are there any age restrictions for test driving high-performance cars?

Yes, there are often age restrictions when it comes to test driving high-performance cars. These restrictions are in place due to the power and handling capabilities of these vehicles. Typically, you need to be at least 25 years old, or even older in some cases, to test drive high-performance cars. This is to ensure that the driver has more experience and maturity behind the wheel before operating a car with exceptional speed and performance.

These age restrictions help ensure the safety of both the test driver and the vehicle itself. High-performance cars often require a greater level of skill and control, and younger drivers may not have the necessary experience to handle them responsibly. It’s always best to check with the dealership or car company to know the specific age restrictions for high-performance car test drives.

Can someone test drive a car for me if I’m unable to?

If you’re unable to test drive a car yourself, whether due to age restrictions, physical limitations, or any other valid reason, you may be able to designate someone else to test drive on your behalf. However, this is subject to the policies of the dealership or car company. Generally, the person test driving the car on your behalf needs to have a valid driver’s license and be responsible for ensuring its safe operation.

It’s important to note that if you’re designating someone else to test drive for you, they should have a clear understanding of your preferences and requirements. Make sure to communicate your needs to them and authorize them to negotiate on your behalf if you’re interested in purchasing the car. Always check with the dealership in advance to ensure they allow someone else to test drive the car in your place.

Conclusion

Testing driving a car is an exciting experience that allows you to evaluate its features, performance, and overall suitability for your needs. However, it’s essential to be aware of the age restrictions and requirements that come with this privilege.

Obtaining a learner’s permit, test driving with an accompanying adult, and complying with dealership policies are all crucial aspects to consider. By following these guidelines and prioritizing responsible driving, you can maximize the benefits of a test drive while ensuring safety and legality.