A gleaming, well-maintained car not only turns heads but also serves as a testament to your pride of ownership. In the world of automotive aesthetics, car waxing and polishing are the unsung heroes, responsible for transforming a dull, weathered vehicle into a shining work of art.
In this comprehensive guide, we will delve into the essential art of properly waxing and polishing your car.

Importance of Car Waxing and Polishing
Car waxing and polishing go beyond mere vanity; they are critical elements of car care. Your car’s exterior is exposed to a multitude of harsh elements every day, including UV rays, road debris, bird droppings, and more.
Over time, these factors can take a toll on your car’s paint, leaving it looking lackluster and vulnerable to damage. This is where waxing and polishing come to the rescue, offering a protective shield and revitalizing your car’s appearance.
Benefits of a Well-Maintained Exterior
Maintaining your car’s exterior isn’t just about aesthetics; it’s about preserving its value and longevity. A well-waxed and polished car boasts several benefits, including:
- Enhanced Protection: Wax acts as a barrier against environmental contaminants, reducing the risk of paint damage.
- Increased Resale Value: Regular maintenance helps maintain your car’s value when it’s time to sell or trade it in.
- Improved Fuel Efficiency: A smoother surface reduces aerodynamic drag, potentially improving gas mileage.
- Aesthetics: Your car will have that showroom shine, turning heads and boosting your pride of ownership.
Gathering the Necessary Materials and Tools
To embark on the journey of waxing and polishing your car, the first step is gathering the necessary materials and tools. You’ll need a few key essentials to get started.
- Car wax and polish
- Microfiber towels
- Applicator pads
- Car wash supplies
Firstly, make sure to have high-quality car wax and polish. These products are the foundation of your car’s rejuvenation, and choosing the right ones for your specific vehicle is paramount.
Additionally, you’ll require a stack of soft, lint-free microfiber towels to ensure a streak-free finish. Applicator pads are indispensable for smooth and even product application, and having the right ones can make a significant difference in the final result.
Lastly, don’t forget your car wash supplies, as it’s crucial to start with a clean slate. With these materials and tools in hand, you’ll be well-prepared to begin the journey toward a beautifully waxed and polished car.
Preparing Your Car for the Process
Before you dive into the waxing and polishing process, it’s essential to ensure your car’s exterior is in the best possible condition. This involves two critical steps: washing and drying your car and inspecting the paint for imperfections.
Washing and Drying Your Car
Begin by giving your car a thorough wash. Use a high-quality automotive shampoo and a soft sponge or microfiber wash mitt to gently remove dirt, grime, and contaminants from the surface.
Pay special attention to areas prone to build-up, like the lower panels and wheel arches. Rinse your car with clean water, ensuring all soap residue is removed.
Once the car is clean, dry it with a microfiber drying towel or chamois to prevent water spots. A clean surface is essential before proceeding with waxing and polishing, as any remaining dirt or debris can cause scratches or prevent the products from adhering effectively.
Inspecting the Paint for Imperfections
After washing and drying your car, take a closer look at the paint’s surface. Carefully inspect for imperfections such as swirl marks, light scratches, oxidation, or water spots. Identifying these issues before waxing and polishing allows you to address them effectively.
Depending on the severity of imperfections, you may need additional products or techniques during the polishing stage to achieve a flawless finish.
By taking the time to inspect and assess your car’s paint, you’ll be better prepared to tailor your waxing and polishing process to your vehicle’s specific needs, ultimately achieving the best possible results.
Step by Step Waxing Process

Waxing your car is a crucial step in achieving that beautiful, long-lasting shine. It not only enhances the appearance but also acts as a protective barrier against environmental elements. Here’s a detailed step-by-step process to ensure your car’s wax application is flawless.
Choosing the Right Wax for Your Car
Selecting the appropriate wax for your car is the first and foremost decision. It’s important to consider the type of paint, the age of your vehicle, and personal preferences. There are various types of car wax available, including traditional paste wax, liquid wax, synthetic wax, and spray wax.
Each type has its advantages and may work better for specific conditions. Always follow the manufacturer’s recommendations and, if in doubt, seek advice from professionals or fellow car enthusiasts.
Step-by-Step Wax Application
Wax can be applied either by hand or with the assistance of a machine polisher. The choice depends on your preference and the tools you have at your disposal. Here’s a breakdown of both methods:
1. Applying Wax by Hand:
- Start with a clean, dry car.
- Using an applicator pad or a soft, lint-free cloth, apply a small amount of wax to the surface.
- Work in small, manageable sections, such as one car panel at a time.
- Use a circular or back-and-forth motion to evenly distribute the wax.
- Apply slight pressure, but avoid pressing too hard to prevent swirl marks.
- Allow the wax to haze over, typically for a few minutes, or follow the manufacturer’s instructions.
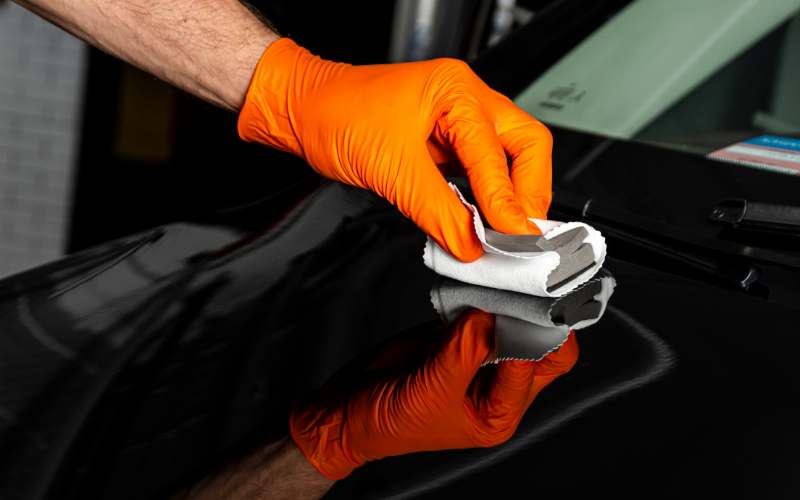
- Once the wax has hazed, use a clean microfiber towel to gently buff the wax, revealing a brilliant shine.
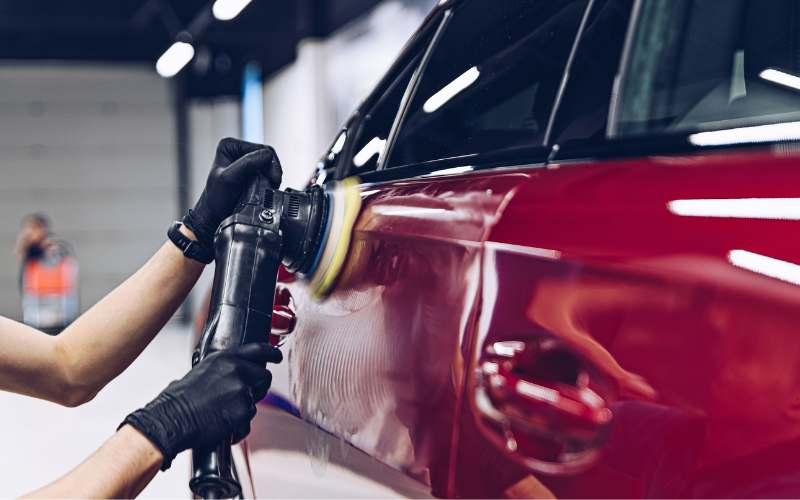
2. Using a Machine Polisher:
- Ensure the machine polisher is clean and equipped with a foam or microfiber applicator pad suitable for waxing.
- Apply a small amount of wax directly to the applicator pad or the car’s surface.
- Work at a low to medium speed to evenly spread the wax.
- Overlap your passes for consistent coverage.
- Allow the wax to haze, following the recommended curing time.
- Use a separate, clean pad or microfiber cloth to buff away the wax, unveiling a stunning finish.
3. Allowing the Wax to Cure:
Once you’ve evenly applied the wax, it’s crucial to let it cure. Curing time varies depending on the type of wax you’ve chosen, so follow the manufacturer’s guidelines. During this curing period, the wax bonds with the paint, forming a protective barrier.
While waiting, resist the temptation to touch or buff the surface prematurely. Instead, use this time to prepare for the polishing stage or simply enjoy the anticipation of revealing your car’s renewed brilliance.
Tips for an Even and Consistent Wax Coat
Regardless of the application method you choose, here are some key tips to ensure an even and consistent wax coat:
- Work in the shade to prevent the wax from drying too quickly.
- Apply the wax sparingly; using too much won’t improve results.
- Follow a systematic approach, working section by section to maintain control.
- Check for missed spots or streaks before the wax dries, and touch up as needed.
Understanding When and Why to Polish
Polishing is a more aggressive step than waxing and is primarily used to correct paint imperfections. You should consider polishing your car when you encounter issues such as swirl marks, light scratches, water spots, or a dull, oxidized surface.
By removing a thin layer of the clear coat, polishing can eliminate or minimize these imperfections and restore your car’s shine. It’s important to note that not all cars require polishing during every detailing session; it should be done as needed to maintain the integrity of the paint.
Choosing the Correct Polish for Your Car
Selecting the appropriate polish for your car is vital to achieve the desired results. Polishes come in varying levels of abrasiveness, typically classified as heavy-cut, medium-cut, and fine-cut. Choose a polish based on the severity of the imperfections and the condition of your car’s paint.
Heavy-cut polishes are designed for deep scratches and severe oxidation, while fine-cut polishes are suitable for minor imperfections and enhancing gloss. Always follow the manufacturer’s recommendations and conduct a test spot if you’re unsure about the product’s suitability for your car.
Step-by-Step Polishing Instructions
The polishing process involves two primary methods: hand polishing and machine polishing. Each method has its advantages and is suitable for different scenarios.
1. Hand Polishing Techniques:
- Start with a clean, dry car.
- Apply a small amount of polish to a foam or microfiber applicator pad.
- Work in small sections, gently massaging the polish into the paint using circular or back-and-forth motions.
- Apply moderate pressure, allowing the abrasives in the polish to work on imperfections.
- Frequently inspect the area to check for progress and to ensure you’re not overworking the paint.
- Once the imperfections have diminished and the desired gloss is achieved, wipe off the excess polish with a clean, dry microfiber towel.
2. Machine Polishing for Efficiency:
- Equip a machine polisher with the appropriate foam or microfiber pad for the chosen polish.
- Apply a small amount of polish directly to the pad and dab it onto the car’s surface to prevent splattering.
- Begin with low to medium speed to spread the polish evenly.
- Gradually increase the speed as you work the machine in overlapping passes.
- Keep the machine moving at all times to avoid overheating the paint.
- Once you’ve achieved the desired results, use a separate, clean pad or microfiber cloth to remove excess polish, revealing a renewed and lustrous surface.
Wrap Up
Mastering the art of car waxing and polishing is a transformative journey that not only enhances your car’s appearance but also extends its longevity. By following the step-by-step processes and techniques, you’ll be able to maintain a showroom-quality shine, protect your investment, and take pride in a vehicle that truly reflects your care and attention to detail.
Happy detailing and enjoy the radiance of your newly polished and waxed car!
