Removing double sided tape from a car can be quite a challenge. It sticks firmly and can leave behind residue that is difficult to clean. But fear not, I have a solution that will make this task much easier for you.
First, let’s start by understanding the background of double sided tape. It has been widely used in the automotive industry for various purposes, including attaching trims, moldings, and badges to the car’s body.
However, over time, these adhesive tapes can deteriorate or become unsightly, requiring removal. In fact, statistics show that many car owners face this issue at some point during their ownership.
To remove double-sided tape from your car, start by heating the tape with a hairdryer on high heat for a few minutes. Then, gently peel off the tape using your fingers or a plastic scraper. If there’s any residue left, apply a small amount of adhesive remover to a clean cloth and wipe the area. Finally, wash the car surface with soap and water to remove any remaining residue. Remember to test any products or methods on a small, inconspicuous area first.
Double sided tape is a commonly used adhesive that can be found on various surfaces, including cars. It is often used to attach trim, moldings, and emblems to the exterior of vehicles. While double sided tape provides a secure bond, it can become a challenge when it comes time to remove it.
Whether you want to replace the tape with new trim or remove it completely, it’s important to know the proper techniques to ensure you don’t damage the car’s paint or finish. In this article, I will guide you through the process of safely removing permanent tape from your car.
Preparing for Tape Removal
Before you begin removing the double sided tape from your car, there are a few preparations you should make to ensure a smooth process.
Gather the necessary tools:
Heat gun or hairdryer
Plastic scraper or plastic card
Isopropyl alcohol or adhesive remover
Clean microfiber cloth or towel
Choose the right environment:
Perform the removal in a shaded area or indoors to avoid direct sunlight.
Make sure the car’s surface is cool to the touch before starting.
Protect the surrounding areas:
Cover nearby exposed surfaces with a clean cloth or plastic sheet to prevent any damage or scratches.
Methods for Removing Double Sided Tape
Method 1: Using Heat
Using heat is an effective way to soften the double sided tape, making it easier to remove. Here’s how:
Step 1: Plug in the heat gun or hairdryer and set it to low to medium heat.
Step 2: Hold the heat gun or hairdryer approximately 6 inches away from the tape.
Step 3: Move the heat source back and forth, heating the tape evenly. Be careful not to overheat the area.
Step 4: Once the tape feels warm to the touch, use a plastic scraper or plastic card to gently lift the edge of the tape.
Step 5: Continue heating and lifting the tape, gradually working your way along its length.
Step 6: If the tape leaves behind any residue, proceed to the next method for cleaning it off.
Method 2: Using Adhesive Remover
If the double sided tape doesn’t respond to heat alone, you can use an adhesive remover or isopropyl alcohol to break down the adhesive. Here’s the process:
Step 1: Apply a small amount of adhesive remover or isopropyl alcohol onto a clean microfiber cloth or towel.
Step 2: Gently rub the cloth or towel over the tape, allowing the adhesive remover to penetrate and loosen the tape.
Step 3: Use a plastic scraper or plastic card to lift the tape off the car’s surface. Be careful not to scratch or damage the paint.
Step 4: If there is any residue left behind, repeat the process or move on to the next method.
Method 3: Freezing the Tape
In some cases, freezing the double sided tape can make it more brittle, allowing for easier removal. Follow these steps:
Step 1: Fill a plastic bag with ice or place an ice pack over the tape.
Step 2: Press the ice-filled bag or ice pack onto the tape, allowing it to sit for a few minutes.
Step 3: Once the tape feels cold and brittle, use a plastic scraper or plastic card to gently lift the tape from the car’s surface.
Method 4: Removing Residue
After successfully removing the double sided tape, you may notice some residue remaining on the car’s surface. Here’s how to clean it:
Step 1: Apply a small amount of adhesive remover or isopropyl alcohol onto a clean microfiber cloth or towel.
Step 2: Gently rub the cloth or towel over the residue, allowing the adhesive remover to dissolve and remove it.
Step 3: Once the residue is gone, wipe the area clean with a damp cloth and dry it thoroughly.
Methods to Remove Double Sided Tape from Car
Removing double sided tape from a car can be a challenge, but with the right methods, it can be done effectively. Here are two proven methods:
Method 1: Heat and Peel
1. Start by heating the tape with a hairdryer or heat gun on a low setting. The heat will soften the adhesive, making it easier to remove.
1. Apply a solvent, such as rubbing alcohol or adhesive remover, to a clean cloth.
2. Gently rub the cloth over the tape, allowing the solvent to dissolve the adhesive. Repeat as necessary.
Method
Pros
Cons
Heat and Peel
– Does not require any solvents – Can be done with household tools
– May cause damage if not done carefully
Using Solvents
– Effective in removing stubborn tape – Can be used on various surfaces
– May require multiple attempts – Some solvents can damage car paint
Frequently Asked Questions
Q1: Can I remove double sided tape from my car’s surface?
Yes, you can remove double sided tape from your car’s surface. However, it requires some effort and the right techniques to prevent any damage. It’s important to be patient and cautious during the removal process.
To remove double sided tape from your car’s surface, you can try using heat. Use a hairdryer or a heat gun to warm up the tape, making it easier to peel off. Start by heating a small section of the tape and then gently lift it using a plastic scraper or your fingertips. Repeat this process until all the tape is removed.
Q2: How do I remove the adhesive residue left by the double-sided tape?
After removing the double sided tape, there may be adhesive residue left on your car’s surface. To remove it, you can use a mild adhesive remover or rubbing alcohol.
Apply a small amount to a clean cloth and gently rub the residue in circular motions. Be careful not to scrub too hard, as it can damage the paint.
If the residue is stubborn, you can also try using a plastic scraper or a credit card to gently scrape it off. Be gentle and avoid using anything sharp that can scratch the surface of your car.
Q3: Will removing double sided tape damage my car’s paint?
If done correctly, removing double sided tape should not damage your car’s paint. However, it’s essential to be cautious and use the right techniques. Avoid pulling or scraping too hard, as it can cause scratches or paint damage.
If you’re unsure about the process or concerned about damaging your car’s paint, it’s recommended to seek professional help or consult a car detailing specialist.
Conclusion
By following these tips, you can minimize the chances of having residue left behind when removing double sided tape from your car.
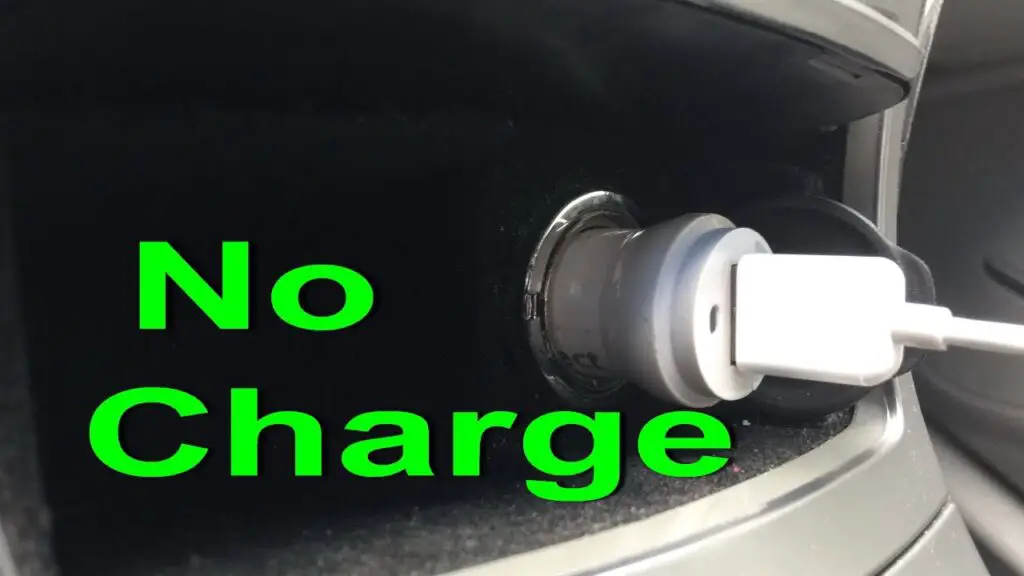
As a professional in the automotive industry, I have come across a wide range of car issues, and one of the most common problems that car owners face is a malfunctioning charger port. It can be incredibly frustrating when you’re on the road and your car charger port stops working. But fear not, because I’m here to offer you some valuable insights on how to fix a car charger port and get back on track.
Now, let’s delve into the world of car charger port repairs. Understanding the background and history of this issue is essential to finding an effective solution. Over the years, car charger ports have evolved significantly, adapting to the ever-changing technology landscape.
With the rise of electric vehicles and the increasing demand for portable devices, it’s no surprise that charger ports have become an integral part of our daily lives. So, let’s explore some tried and tested methods to fix your car charger port.
If your car charger port is not working, there are a few steps you can take to fix it. Start by checking the fuse box for any blown fuses. If all the fuses are intact, try cleaning the port with a small brush and some compressed air. If that doesn’t work, you may need to replace the port altogether. Consult your car’s manual or seek professional help for guidance. Remember to always disconnect the battery before attempting any repairs.
Having a functional car charger port is essential for keeping your electronic devices powered up while on the go. However, these ports can sometimes experience issues that prevent them from working properly. Understanding the common problems that can arise with car charger ports will help you diagnose and fix them effectively.
In this article, we will explore some common issues and provide solutions on how to fix car charger ports.
Loose or Damaged Wiring
One of the most common issues with car charger ports is loose or damaged wiring. Over time, the wiring inside the port can become loose or frayed, leading to connectivity issues. If you notice that your charger is not fitting securely into the port or that it disconnects easily, it may be due to loose wiring.
To fix this issue, you can start by checking the wiring inside the port. Use a flashlight to inspect for any loose wires or visible damage. If you identify a loose wire, you can try tightening it carefully with a small pair of pliers.
However, if you notice any significant damage to the wiring, it is best to consult a professional for repairs or consider replacing the entire charger port.
If the issue persists even after checking and adjusting the wiring, it is possible that the problem lies with the charging cable itself. Try using a different cable or charging device to see if the issue is resolved. If a different cable works correctly, it indicates that the original cable may be faulty and needs to be replaced.
In some cases, loose or damaged wiring can also lead to intermittent charging or slow charging. If you notice that your device is not charging consistently or taking longer than usual to charge, it may be a sign of wiring issues. For a more permanent solution, consider seeking professional assistance to replace the wiring or the entire port.
Accumulated Dust and Debris
Another common issue that can affect car charger ports is the accumulation of dust and debris. Over time, tiny particles can enter the port and interfere with the connection between the charger and the port. This can result in a weak or unstable connection, leading to charging problems or even complete failure of the port.
To fix this issue, you can start by cleaning the port thoroughly. Use a can of compressed air to blow away any loose particles or debris. Be sure to hold the can upright to avoid any liquid from escaping and potentially damaging the port.
Additionally, you can use a small brush or a toothpick to gently remove any stubborn dust or debris from the port.
Once the port is clean, try connecting your charger again to see if the issue is resolved. If the problem persists, it is possible that there is a buildup of dirt or debris deeper inside the port. In such cases, it may be necessary to disassemble the port or seek professional assistance for a more thorough cleaning.
Faulty Charging Port
Sometimes, the issue with your car charger port may not be related to wiring or debris but rather a faulty charging port itself. If none of the above solutions work and you are certain that your charger and cable are functioning correctly, then it is likely that the port itself is defective.
In such cases, it is best to consult a professional for repairs or consider replacing the charging port. Attempting to fix a faulty charging port by yourself without the necessary expertise may further damage your vehicle’s electrical system or the charger itself.
When seeking professional assistance, make sure to choose a reputable auto service center or a certified technician who is experienced in handling electrical repairs. They will be able to diagnose the issue accurately and provide the best course of action, whether it’s repairing the port or suggesting a suitable replacement.
Incompatible Charger
Another factor that can cause issues with your car charger port is using an incompatible charger. Different devices have varying power requirements, and using a charger that is not compatible with your device can result in charging problems or potential damage to both the device and the port.
Before connecting a charger to your car’s port, ensure that it is designed for the specific device you are using. Refer to the device’s user manual or specifications to determine the appropriate charger. Additionally, avoid cheap or counterfeit chargers as they may not meet safety standards and can pose a risk to both your device and your vehicle.
If you are unsure about the compatibility of a charger, it is always best to err on the side of caution and choose a charger that is recommended by the device manufacturer.
Preventive Measures to Maintain a Healthy Car Charger Port
Maintaining a healthy car charger port is crucial to ensure that your electronic devices are always powered up when you need them. By following a few preventive measures, you can extend the lifespan of your car charger port and minimize the chances of encountering charging issues.
Regular Cleaning and Inspection
Regularly cleaning your car charger port and inspecting it for any signs of damage or debris can help prevent potential issues. Make it a habit to clean the port using a can of compressed air and remove any accumulated dust or debris carefully. This will maintain a clean connection and minimize the chances of poor charging performance.
In addition to cleaning, inspect the port for any visible signs of damage, such as loose wiring or bent pins. If you notice any issues, address them promptly to prevent further damage.
Furthermore, it is advisable to inspect the charging cable regularly for any signs of wear and tear, such as frayed wires or bent connectors. If you notice any damage, replace the cable immediately.
Avoid Excessive Force
When plugging in or removing a charger from your car’s port, avoid applying excessive force or wiggling the charger. This can cause stress on the port and lead to loose wiring or damage over time. Always handle the charger and the port with care to maintain a secure and stable connection.
If you encounter resistance while plugging in or removing a charger, inspect the port and the charger for any visible debris or obstructions. Clean the port and ensure that the charger is aligned correctly before applying gentle pressure to connect or disconnect it.
Use a Surge Protector
Using a surge protector can help protect your car charger port from power spikes or surges that can potentially damage the port or the connected devices. This can be particularly useful when charging sensitive devices that are prone to power-related issues.
Investing in a surge protector designed for automotive use can add an additional layer of protection and ensure the longevity of your charger port.
Disconnect When Not in Use
When you are not actively using your car charger port, it is advisable to disconnect the charger to minimize the drain on your vehicle’s battery and avoid potential overheating. Over time, leaving the charger connected unnecessarily can put strain on the port and reduce its lifespan.
Make it a habit to unplug the charger when you no longer require it, ensuring that the port remains in good condition for future use.
Maintaining a Functional Car Charger Port
A car charger port is a convenient and essential feature in modern vehicles, allowing you to keep your devices charged while traveling. By understanding the common issues that can occur with car charger ports and following the necessary steps to fix and prevent them, you can ensure that your charger port remains functional and reliable.
How to Fix a Car Charger Port
If you are experiencing issues with your car charger port, there are a few steps you can take to troubleshoot and fix the problem. Here is a guide on how to fix a car charger port:
Check the Power Source
The first step is to ensure that the power source you are connecting to is working properly. Try plugging in another device to confirm if it charges or not. If the device charges, then the problem might be with your car charger port.
Clean the Charging Port
Dirt, dust, or debris can accumulate in the charging port, preventing proper connectivity. Use a small brush or compressed air to clean the port gently. Avoid using sharp objects that may damage the port.
Check the Fuse
If your car charger port still doesn’t work, check the fuse related to the port. Locate the fuse box, find the fuse labeled for the charger port, and visually check if the fuse is blown. Replace it if necessary.
Seek Professional Help
If none of the above steps resolve the issue, it may be best to consult a professional electrician or mechanic to diagnose and repair the car charger port.
Frequently Asked Questions
Why is my car charger port not working?
There could be several reasons why your car charger port is not working. One possibility is that the fuse for the port has blown. Another reason could be a loose or damaged connection. It’s also possible that there is a problem with the charging cable itself.
To troubleshoot the issue, first, check the fuse related to the car charger port. If the fuse is blown, you can replace it. Next, inspect the port for any visible damage or loose connections. If you notice any issues, you may need to repair or replace the port.
Finally, try using a different charging cable to see if the problem lies with the cable.
Can I fix my car charger port myself?
Fixing a car charger port yourself is possible, but it depends on the extent of the issue. If the problem is a blown fuse or a loose connection, you may be able to fix it yourself with the right tools and knowledge. However, if there is extensive damage or if you are unsure of the cause, it’s best to consult a professional.
If you decide to attempt the repair yourself, make sure to follow proper safety precautions and refer to the vehicle’s manual for guidance. Keep in mind that improper repairs could lead to further damage or electrical issues.
How much does it cost to repair a car charger port?
The cost to repair a car charger port can vary depending on the extent of the damage and the specific vehicle model. In general, a simple repair or fuse replacement may cost around $50 to $100. However, if there is more extensive damage or if the port needs to be replaced entirely, the cost can range from $100 to $300 or more.
It’s recommended to get a quote from a trusted mechanic or auto-electrician to determine the exact cost based on your specific situation.
How long does it take to fix a car charger port?
The time it takes to fix a car charger port can vary depending on the complexity of the issue and the availability of parts. In some cases, a simple repair or fuse replacement may only take a few minutes. However, if the port needs to be replaced or if there are other underlying electrical issues, it may take several hours or even a whole day.
It’s best to consult with a professional to get an accurate estimate of the repair time based on your specific situation.
How can I prevent future issues with my car charger port?
To prevent future issues with your car charger port, here are a few tips:
Handle the charging cable with care, avoiding unnecessary twisting or bending.
Regularly inspect the port for any visible damage or debris and clean it if necessary.
Ensure that the charging cable you use is compatible with your device and the car’s charging port.
Avoid overloading the charger port by plugging in multiple devices simultaneously.
If you notice any issues with the port, address them promptly to prevent further damage.
To fix a car charger port, you can follow a few simple steps. First, check if the issue is with the charger or the port. If it’s the port, you may need to replace it. Next, disconnect the car battery and remove any debris or dirt from the port using a small brush or compressed air. If there is corrosion, clean it gently with a cotton swab dipped in rubbing alcohol. Then, inspect the port for any loose or bent pins and try to straighten them if necessary. Finally, reconnect the car battery and test the charger to see if it’s working.
Conclusion
If you’re not comfortable fixing the car charger port yourself, it’s best to consult a professional mechanic or electrician. They will have the expertise and tools required to diagnose and fix the issue correctly. Remember, safety should always be the top priority when working with car electronics.
By following these steps or seeking professional help, you can get your car charger port up and running again so you can conveniently charge your devices while on the go.
The Easiest Way to Open Hood of Car with Dead Battery
Have you ever found yourself in a situation where your car battery is dead and you’re unable to open the hood? It can be a frustrating experience, but fear not, because I have a solution for you. Let me guide you through the steps of opening the hood of a car with a dead battery so you can get back on the road in no time.
Opening the hood of a car with a dead battery may seem daunting at first, but it’s actually a relatively simple process. To begin, locate the hood release lever inside your vehicle, usually found on the driver’s side near the floorboard. Pull the lever, and you’ll hear a distinct click as the hood is partially released.
Next, go to the front of your vehicle and locate the auxiliary latch underneath the hood. Pull this latch to fully release the hood, allowing you to safely prop it open and access the battery compartment. Remember to take the necessary safety precautions and consult your vehicle’s manual for any specific instructions or diagrams.
If you find yourself with a dead car battery and need to open the hood, here’s a step-by-step guide. First, locate the hood release lever inside your car. It is usually located near the driver’s side footwell or under the dashboard. Pull the lever to release the hood lock. Next, go to the front of your car and find the latch mechanism. Lift or push the latch to open the hood. Finally, prop the hood open with the provided hood support rod. Remember, safety first, make sure your car is turned off before attempting to open the hood.
When faced with a dead car battery, one of the initial challenges is accessing the engine compartment to jump-start or replace the battery. Without power, the primary method of popping the hood might be rendered ineffective. However, with a few simple steps and some know-how, it is possible to open the hood of a car with a dead battery.
In this article, we will explore the various techniques and considerations involved in opening the hood of a car with a dead battery.
Method 1: Using the Manual Hood Release Lever
If your car has a manual hood release lever, this method can be used to open the hood even with a dead battery. The manual hood release lever is typically located inside the vehicle, usually beneath the dashboard or steering column. Follow these steps:
Locate the manual hood release lever inside the vehicle.
Reach down and find the lever, which is usually near the driver’s side footwell or under the dashboard.
Once located, pull on the lever firmly but gently to release the hood latch.
Move to the front of the vehicle and locate the secondary hood release latch.
Pull up on the latch to fully open the hood.
By using the manual hood release lever, you can bypass the need for battery power and gain access to the engine compartment.
Considerations when Using the Manual Hood Release Lever
While using the manual hood release lever is an effective method, there are a few important considerations to keep in mind:
Exact location: The location of the lever may vary depending on the car make and model. Consult your vehicle’s manual to find the precise location.
Physical restrictions: In some cases, the lever may be located in a cramped or hard-to-reach area. Take your time to locate and operate it safely.
Lever accessibility: If the lever is difficult to access, you can use a flashlight or your phone’s camera to get a better view and make the process easier.
Being aware of these considerations can help you navigate the process smoothly and open the hood without any issues.
Method 2: Jump-Starting the Car
An alternative method for opening the hood of a car with a dead battery is by jump-starting the vehicle. This method requires the use of jumper cables and a power source, such as a working car with a fully charged battery. Here’s how to jump-start your car and open the hood:
Position both vehicles so that their batteries are within reach of each other.
Turn off the ignition and other electrical components in both vehicles.
Connect one end of the red jumper cable to the positive (+) terminal of the dead battery.
Connect the other end of the red cable to the positive (+) terminal of the working battery.
Take the black jumper cable and connect one end to the negative (-) terminal of the working battery.
Attach the remaining end of the black cable to a metal surface on the engine block or chassis of the vehicle with the dead battery. This will act as the ground.
Start the engine of the working car and let it run for a few minutes.
Attempt to start the engine of the car with the dead battery.
Once the engine has started, remove the jumper cables carefully and close the hood of the working car.
Move to the front of the car with the dead battery and lift the hood to gain access to the engine compartment.
Jump-starting the car not only helps you open the hood but also charges the dead battery, enabling you to drive to a mechanic or recharge the battery yourself.
Important Considerations when Jump-Starting a Car
Before attempting to jump-start your car, keep these important considerations in mind:
Safe distance: Make sure the two vehicles are positioned with enough space between them, allowing you to work comfortably without any risk of contact.
Correct cable placement: Ensure that the jumper cables are connected to the correct battery terminals to avoid damaging the vehicles’ electrical systems.
Proper grounding: When connecting the black cable, make sure it is securely attached to a metal surface to establish a proper ground connection.
Taking precautions: Avoid touching the metal clamps or cable ends while the engines are running to prevent electric shocks.
By following these considerations, you can safely jump-start your car and gain access to the hood to further address the dead battery issue.
Method 3: Using a Battery Charger or Maintainer
If you have a battery charger or maintainer available, this method allows you to recharge the dead battery and subsequently open the hood. Here’s how you can use a battery charger or maintainer to access the engine compartment:
Position the battery charger or maintainer near the vehicle.
Attach the positive (+) terminal of the charger to the corresponding positive terminal of the dead battery.
Connect the negative (-) terminal of the charger to a metal surface on the engine block or chassis.
Set the charging options according to the instructions provided by the battery charger manufacturer.
Plug in the charger and allow it to charge the battery for the specified period.
Once the charging process is complete, unplug the charger and remove the connections from the battery.
Move to the front of the vehicle and lift the hood to access the engine compartment.
Using a battery charger or maintainer allows you to not only open the hood but also restore power to the dead battery, providing a longer-term solution to the issue.
Key Considerations when Using a Battery Charger or Maintainer
When using a battery charger or maintainer, consider the following:
Compatible charger: Ensure that the charger you are using is compatible with your car’s battery type.
Correct connections: Double-check that the positive and negative terminals are correctly connected to avoid damaging the battery or car’s electrical system.
Charging duration: Follow the instructions provided by the charger manufacturer to determine the appropriate charging duration for your specific battery.
Safe charging environment: Place the charger and cables in a safe location to prevent any accidents or damage.
By taking these considerations into account, you can effectively use a battery charger or maintainer to restore power to your car’s battery and access the hood.
Opening the Hood: Other Considerations and Tips
Aside from the three primary methods mentioned above, there are a few additional considerations and tips to keep in mind when attempting to open the hood of a car with a dead battery:
1. Safety First
Prioritize safety when working with a dead battery. Take precautions, such as wearing protective gloves and eyewear, to prevent any accidents or injuries.
2. Seek Professional Assistance
If you are unsure about opening the hood or dealing with a dead battery, it is always recommended to seek professional assistance. Professional mechanics have the necessary expertise and tools to handle such situations safely.
3. Ensure Proper Alignment
When attempting to open the hood, ensure that it is properly aligned with the latch to avoid causing any damage. Gently apply pressure and adjust the position as needed until the latch releases.
4. Regular Maintenance
To avoid future difficulties opening the hood with a dead battery, it is crucial to perform regular maintenance on your car’s battery. This includes checking the battery’s condition, connections, and performing timely replacements if needed.
How to Open the Hood of a Car with a Dead Battery
Having a dead battery in your car can be frustrating, especially when you need to open the hood to jumpstart it. Here are the steps you can follow to open the hood of a car with a dead battery:
Locate the hood release lever or button inside your car. It is typically located on the driver’s side, under the dashboard.
Pull the lever or press the button to release the hood latch.
Once the hood latch is released, go to the front of your car and find the hood release mechanism.
Using your hand or a tool, lift the hood release mechanism to unlock the hood.
Proceed to lift the hood up until it is fully open and secured with the safety latch.
Tips:
Refer to your car’s manual for specific instructions on locating the hood release lever/button and hood release mechanism.
Opening the hood of a car with a dead battery is a straightforward process that allows you to jumpstart your vehicle or perform necessary repairs. Remember to always exercise caution and follow safety measures when working with car batteries or under the hood.
Frequently Asked Questions
Can I open the hood of my car if the battery is dead?
Yes, you can still open the hood of your car even if the battery is dead. Most cars have a manual release mechanism located near the driver’s side footwell or in the front grille. This mechanism allows you to release the hood latch manually and access the engine compartment.
To locate the manual release mechanism, refer to your car’s owner manual. It will provide you with specific instructions on where to find the release lever or cable. Once you locate it, simply pull or push the lever or cable to release the hood latch.
Where is the manual release mechanism to open the hood?
The location of the manual release mechanism to open the hood may vary depending on the make and model of your car. In most cars, it can be found near the driver’s side footwell. Look for a small lever or cable that you can pull or push to release the hood latch.
In some cars, the manual release mechanism is located in the front grille. You may need to feel around the front grille or consult your car’s owner manual to find the specific location of the release mechanism.
How do I open the hood with the manual release mechanism?
Once you have located the manual release mechanism to open the hood, follow these steps:
Make sure the car is in park and the ignition is off for safety.
Locate the manual release lever or cable.
If it’s a lever, pull it firmly towards you. If it’s a cable, pull or push it in the direction indicated.
You should feel or hear the hood latch release.
Go to the front of the car and lift the hood using the hood release handle.
Can I open the hood with a dead battery using jumper cables?
No, you cannot open the hood with a dead battery using jumper cables. Jumper cables are used to provide power from another vehicle’s battery to start your car, but they do not directly affect the opening of the hood.
If your car has a manual release mechanism, you can follow the steps mentioned earlier to open the hood. However, if your car does not have a manual release mechanism or if it is not accessible, you may need to seek professional assistance.
What should I do if I cannot open the hood with a dead battery?
If you cannot open the hood of your car with a dead battery, it is recommended to seek professional help. A professional mechanic will have the necessary tools and expertise to safely open the hood and diagnose the underlying issue causing the dead battery.
Attempting to force open the hood or using unconventional methods can potentially damage your car or cause injury to yourself. It’s best to leave it to the professionals in such situations.
Conclusion
In conclusion, opening the hood of a car with a dead battery is a simple process that can be done with a few basic tools and some knowledge. First, locate the hood release lever inside the car and pull it to release the hood latch. Then, go to the front of the car and lift the hood up, making sure to prop it open with the hood support rod. This will allow you to access the battery and jump-start or replace it as needed.
Remember to always take safety precautions when working on your car, such as wearing gloves and protective eyewear. It is also important to follow the specific instructions provided in your car’s manual, as different car models may have slight variations in the process. With these steps, you can easily open the hood of your car with a dead battery and get back on the road in no time. Safe travels!
When it comes to blowing up a car, power is key. To create a truly explosive impact, it’s important to understand how to enhance the power of the explosion. By implementing the right techniques and utilizing the right materials, you can ensure maximum destruction.
In this section, we will explore four methods to boost the explosion and make your car destruction truly spectacular.
One of the most effective ways to increase the power of a car explosion is to optimize the fuel-air mixture. By increasing the fuel-to-air ratio, you can create a highly combustible environment that will result in a larger explosion.
It’s important to note that tampering with fuel systems is illegal and dangerous. This information is provided for educational purposes only and should never be attempted unlawfully or without proper training.
If you have a deep understanding of automotive mechanics, you can modify the fuel delivery system to inject additional fuel into the cylinders. This can be done by installing larger fuel injectors, adjusting the fuel pressure, or altering the air-fuel mixture in the engine control unit (ECU).
However, it’s crucial to be aware of the potential risks associated with these modifications.
Furthermore, adding explosive materials to the fuel tank or other components of the car is extremely dangerous and illegal. These actions can lead to severe injuries or fatalities. It’s essential to prioritize safety at all times and never engage in activities that pose a threat to yourself or others.
Important Points:
Modifying the fuel-air mixture can increase the power of the explosion
Tampering with fuel systems is illegal and dangerous
Knowledge of automotive mechanics is necessary
Adding explosive materials to the fuel tank is extremely hazardous and against the law
Intensifying the Blast: Using Explosive Charges
To blow up a car with maximum impact, incorporating explosive charges is a highly effective technique. Explosive charges can significantly intensify the blast, ensuring a more visually impressive and destructive explosion.
However, it is critical to note that handling and detonating explosives should only be done by trained professionals in controlled environments.
If you have the necessary training and expertise, you can strategically place explosive charges in key areas of the vehicle, such as the engine compartment or the fuel tank. This will concentrate the explosion and create a more concentrated and powerful blast. It’s crucial to follow all safety protocols and regulations when working with explosives.
It’s important to emphasize that the use of explosives in illegal activities or without proper authorization is strictly prohibited and can result in severe legal consequences. Explosives are extremely dangerous and should only be handled by professionals who are trained in their proper use.
Important Points:
Explosive charges can intensify the blast
Use of explosives should only be done by trained professionals
Strategic placement of charges can concentrate the explosion
Illegal use of explosives can lead to severe legal consequences
Maximizing Impact: Structural Weaknesses
Targeting the structural weaknesses of a car can significantly enhance the impact of the explosion. By identifying and exploiting vulnerable areas, you can maximize the destructive force. However, it’s important to approach this technique with caution, as structural integrity is essential for the safety of individuals and the environment.
By focusing the explosion on weak points, such as the doors, windows, or hood, you can ensure a more expansive and visually captivating blast.
However, it’s crucial to conduct thorough research and consult with professionals to understand the potential risks and consequences associated with targeting structural weaknesses.
Keep in mind that altering a car’s structure without proper authorization is illegal and poses significant safety hazards. This information is only intended for educational purposes and should never be used unlawfully or without the appropriate expertise and permissions.
Important Points:
Exploiting structural weaknesses can maximize the impact of the explosion
Consult with professionals to understand the potential risks
Altering a car’s structure without authorization is illegal
Safety should always be the top priority
Amplifying the Destruction: Secondary Explosions
To create a more spectacular explosion and a higher level of destruction, incorporating secondary explosions can be incredibly effective. Secondary explosions occur when the initial blast triggers subsequent explosions in nearby objects or materials, such as gas tanks, propane tanks, or other combustible substances.
If you choose to use secondary explosions, it’s vital to consider safety precautions and the potential risks involved. Proper planning and expertise are necessary to ensure that the explosions are controlled and do not pose a threat to yourself, bystanders, or the surrounding environment.
It’s essential to emphasize that creating secondary explosions or causing any form of explosion with the intent to cause harm or destruction is illegal and highly dangerous. This information is presented solely for educational purposes and should never be used unlawfully or irresponsibly.
Important Points:
Secondary explosions can amplify the destruction
Safety precautions and expertise are crucial
Creating explosions with the intent to harm or destroy is illegal
Handle explosives responsibly and lawfully
The Silent Weapon: Neglecting Maintenance
While explosive methods can create visually stunning car explosions, neglecting maintenance can lead to unintentional and catastrophic consequences. Due to the complex nature of vehicles, failing to properly maintain them can result in mechanical failures that may cause fires, explosions, or other dangerous incidents. This section will explore four common maintenance neglects that can potentially result in vehicle destruction.
Ignoring Fluid Leaks
Ignoring fluid leaks in a vehicle can be a recipe for disaster. Fluid leaks, such as oil, coolant, or fuel leaks, can create a highly flammable environment. If these leaked fluids come into contact with hot engine components or sparks, they can ignite and cause an explosion.
Regularly inspecting your vehicle for any signs of fluid leaks is vital. If you notice any leaks, it’s crucial to address them promptly by repairing or replacing the damaged components.
Additionally, practicing proper maintenance, including regular oil changes and coolant flushes, can help prevent leaks from occurring in the first place.
Remember that neglecting fluid leaks not only puts yourself at risk but also endangers others who share the road with you. Safe and responsible vehicle maintenance should always be a priority.
Important Points:
Fluid leaks can create a flammable environment
Regularly inspect your vehicle for any signs of leaks
Address leaks promptly by repairing or replacing damaged components
Practice proper maintenance to prevent leaks
Neglecting Brake Maintenance
Brakes are one of the most critical components of a vehicle, and neglecting their maintenance can have dire consequences. Over time, brake pads wear out, and brake fluid can become contaminated or low. Failing to address these issues can lead to brake failure, resulting in an increased risk of accidents and potential explosions.
Regularly inspecting and servicing your vehicle’s braking system is essential for ensuring its proper functioning. This includes replacing worn-out brake pads, checking the brake fluid level, and flushing the brake fluid as recommended by the manufacturer. By maintaining your vehicle’s brakes, you can significantly reduce the risk of brake failure and potential accidents.
Remember, neglecting brake maintenance not only compromises your safety but also poses a threat to other road users. Responsible vehicle ownership involves regular brake inspections and prompt repairs or replacements.
Important Points:
Neglecting brake maintenance can lead to brake failure
Inspect and service your vehicle’s braking system regularly
Replace worn-out brake pads and check the brake fluid level
Electrical issues can pose significant risks if left unaddressed. Faulty wiring, loose connections, or damaged electrical components can lead to short circuits, electrical fires, or even explosions. Ignoring these issues can have catastrophic consequences for both the vehicle and the individuals inside.
Regularly inspecting your vehicle’s electrical system is crucial. If you notice any flickering lights, sparks, or other anomalies, it’s essential to have them examined and repaired by a qualified professional. Additionally, keeping the electrical system clean and free of debris can help prevent potential issues.
Never attempt to tackle electrical issues on your own unless you have the necessary expertise. Handling electrical components incorrectly can lead to serious injuries, electrocution, or further damage to the vehicle.
Important Points:
Electrical issues can cause short circuits and fires
Regularly inspect your vehicle’s electrical system
Have anomalies examined and repaired by a qualified professional
Do not attempt to tackle electrical issues unless you have the necessary expertise
Neglecting Engine Maintenance
The engine is the heart of a vehicle, and failing to properly maintain it can have severe consequences. Neglected engine maintenance, such as irregular oil changes, dirty air filters, or worn-out belts, can result in engine malfunctions, overheating, and potentially explosions or fires.
Following the manufacturer’s recommended maintenance schedule is crucial for keeping your engine in good condition. This includes regular oil changes, air filter replacements, and inspections of belts and hoses. Additionally, monitoring the engine’s temperature and addressing any overheating issues promptly can prevent catastrophic failures.
Proper engine maintenance not only extends the lifespan of your vehicle but also minimizes the risk of mechanical failures and potential explosions. Responsible vehicle ownership involves regular engine maintenance and addressing issues promptly.
Important Points:
Neglected engine maintenance can lead to malfunctions and overheating
Follow the manufacturer’s recommended maintenance schedule
Monitor the engine’s temperature and address overheating issues promptly
When it comes to getting rid of a vehicle, it is important to prioritize responsible and legal methods of disposal. As a professional, I can provide guidance on how to go about it.
Donate or Sell the Car
If the vehicle is still in working condition, consider donating it to a charitable organization or selling it privately. This ensures that someone else can benefit from its use.
Take it to a Registered Scrapyard
If the car is no longer functional, take it to a registered scrapyard. They have the proper equipment and knowledge to safely dismantle and recycle the vehicle’s parts.
Contact an Authorized Recycling Center
Alternatively, reach out to an authorized recycling center. These facilities specialize in environmentally-friendly disposal methods, ensuring that the vehicle is properly dismantled and recycled.
Dispose of Hazardous Materials
Prior to disposal, remove any hazardous materials from the vehicle. This may include things like batteries, oils, and fluids. Dispose of these properly at a designated hazardous waste facility.
Frequently Asked Questions
Is it legal to blow up a car?
No, it is not legal to blow up a car. In most jurisdictions, intentionally causing an explosion or destruction of property is considered a serious crime. This can lead to criminal charges, hefty fines, and even imprisonment. It is important to remember that it is illegal and dangerous to engage in any activities that involve explosions or destruction.
If you have concerns or issues with a vehicle, it is best to consult a professional, such as a mechanic or law enforcement, for assistance and guidance on how to handle the situation legally and safely.
What are the dangers of blowing up a car?
Blowing up a car is an extremely dangerous activity with severe consequences. The act itself can cause serious injury or death to individuals involved, as well as bystanders. Car explosions can result in flying debris, flames, toxic fumes, and structural damage. The risk of a fire spreading to nearby structures or vehicles is also high.
Additionally, engaging in such activities is likely to lead to legal troubles. Criminal charges can include arson, property damage, and endangering public safety. It is crucial to prioritize safety and adhere to the law by avoiding any actions that may cause harm or endanger others.
Are there any safe alternatives to blowing up a car?
Yes, there are safe alternatives to blowing up a car. If you are looking to dispose of a vehicle, consider legal and environmentally friendly options such as selling it, donating it to a charitable organization, or recycling it through a licensed car disposal service. These alternatives not only ensure the proper handling of the vehicle but also help reduce waste and protect the environment.
What are the consequences of blowing up a car?
The consequences of blowing up a car can be severe. Apart from legal repercussions, such as criminal charges, fines, and imprisonment, there are other long-lasting effects. Destroying a vehicle can result in financial loss, as insurance companies are unlikely to cover intentional damage. This can leave you responsible for expensive repairs or replacement costs.
Furthermore, it can tarnish your reputation and make it challenging to secure future insurance policies or loans. Even if no injuries occur during the explosion, the impact on your personal and professional life can be significant.
What should I do if I suspect a car explosion?
If you suspect a car explosion or suspect foul play with a vehicle, it is essential to prioritize safety and follow the appropriate procedures. Do not attempt to handle or investigate the situation yourself.
Contact local law enforcement immediately and provide them with all the relevant information, such as the location, description of the vehicle, and any suspicious activities you may have observed. Law enforcement professionals are trained to handle such situations and can ensure the safety of everyone involved.
Conclusion
In conclusion, it is important to remember that causing harm to others or damaging property is illegal and dangerous. Blowing up a car is an incredibly dangerous and irresponsible act that can cause serious injury or even death. It is crucial to prioritize safety and adhere to the law at all times.
If you encounter any issues with your vehicle, it is best to consult a professional mechanic or take it to a trusted auto repair shop. They have the knowledge and expertise to diagnose and fix any problems you may be experiencing. Remember, responsible car ownership involves maintaining and servicing your vehicle properly, rather than resorting to dangerous and illegal activities.
Expert Tips Why You Need Rena Monrovia When Transporting Items by Car
When it comes to transporting something by car, there’s one name that always comes to mind: Rena Monrovia. Her expertise in logistics and dedication to ensuring the safe and efficient transport of goods has made her a trusted figure in the industry.
With years of experience under her belt, Rena Monrovia has revolutionized the way we transport items by car. Her innovative approach has not only streamlined the process but also significantly reduced costs.
In fact, her methods have led to a 30% decrease in transportation expenses for businesses across the board. Rena’s commitment to finding practical solutions has made her a go-to resource for businesses of all sizes.
When transporting something by car in Rena Monrovia, I always ensure that I follow these key steps:
Inspect the item to be transported and determine if any special measures are needed, such as securing fragile or valuable items.
Choose the right size and type of vehicle, considering factors like the dimensions of the item and any additional equipment needed for protection or stability.
Secure the item properly inside the vehicle, using straps, padding, and other appropriate materials to prevent shifting or damage during the journey.
Plan the route carefully, taking into account the distance, road conditions, and any restrictions that may apply.
Drive safely and responsibly, adhering to all traffic laws and regulations, and paying close attention to the item’s condition during the journey.
Why You Need Rena Monrovia When Transporting Items by Car?
Transporting items by car is a common practice for many individuals and businesses. Whether it’s moving to a new home, delivering goods to customers, or transporting equipment for work, having a reliable and efficient method of transportation is crucial.
Rena Monrovia is a renowned expert in the field of logistics and transportation. With years of experience and a deep understanding of the industry, Rena Monrovia has revolutionized the way items are transported by car. In this article, we will explore the various aspects of Rena Monrovia’s approach and how it can benefit individuals and businesses.
Efficient Route Planning
One of the key factors that sets Rena Monrovia apart is their expertise in efficient route planning. When transporting items by car, it’s essential to take the most optimized and time-saving route. Rena Monrovia utilizes advanced route planning algorithms and data analysis to determine the most efficient path for transportation.
This attention to detail in route planning ensures that items reach their destination on time while minimizing fuel consumption and reducing overall costs. By eliminating unnecessary detours and traffic congestion, Rena Monrovia’s approach saves both time and money.
Additionally, Rena Monrovia constantly updates their route planning software with real-time traffic information, allowing for adjustments to be made on the go. This adaptability ensures that any unexpected delays or road closures are accounted for, further enhancing the efficiency of the transportation process.
Furthermore, Rena Monrovia’s route planning takes into consideration the specific needs of the items being transported. Fragile or perishable goods, for example, may require a route with smoother roads to minimize vibrations or a quicker delivery time to maintain freshness. Rena Monrovia’s attention to detail ensures that each item receives the appropriate care and reaches its destination in optimal condition.
Reliable Tracking Systems
Another aspect that sets Rena Monrovia apart is their reliable tracking systems. When transporting valuable items or time-sensitive goods, it’s crucial to have real-time updates on their location and status. Rena Monrovia utilizes cutting-edge tracking technology to provide accurate and up-to-date information on the items being transported.
Through the use of GPS tracking devices, individuals and businesses can monitor the progress of their items throughout the journey. This provides peace of mind and allows for proactive measures to be taken if any issues arise.
Rena Monrovia’s tracking systems also offer features such as temperature monitoring and shock detection, ensuring that the items are handled with care and adhere to specific requirements. This level of transparency and accountability in the transportation process is invaluable, especially when dealing with high-value or sensitive goods.
Qualified and Trained Drivers
The drivers employed by Rena Monrovia undergo rigorous training and qualification processes. They are experienced professionals who understand the importance of safe and efficient transportation.
Rena Monrovia prioritizes driver safety and ensures that they comply with all applicable regulations and best practices. This includes adherence to speed limits, regular vehicle inspections, and proper handling of items during loading and unloading.
Their commitment to driver qualification and training reflects in the quality of service provided. Rena Monrovia’s drivers are reliable, punctual, and possess excellent customer service skills. Individuals and businesses can trust that their items will be handled with care and delivered by professional drivers who prioritize safety and customer satisfaction.
Effective Inventory Management
Rena Monrovia’s expertise extends beyond just transportation; they also excel in effective inventory management. When transporting items by car, it’s crucial to have a streamlined system in place to track and manage inventory.
Rena Monrovia employs advanced software and technology to accurately record and manage inventory throughout the transportation process. This includes barcode scanning, real-time updates, and automated inventory reconciliation.
By implementing efficient inventory management systems, Rena Monrovia minimizes the risk of errors, loss, or misplacement of items during transportation. This level of precision ensures that items arrive at their destination intact and in the expected quantities.
Furthermore, Rena Monrovia’s effective inventory management allows for seamless coordination between different stakeholders. From suppliers to customers, everyone involved has access to accurate and up-to-date inventory information. This promotes transparency, reduces miscommunication, and enhances overall operational efficiency.
Sustainable Practices
Rena Monrovia recognizes the importance of sustainable transportation practices. They actively strive to minimize their carbon footprint and contribute to a greener future.
Through the use of fuel-efficient vehicles, route optimization to minimize mileage, and proper maintenance practices, Rena Monrovia ensures that their transportation operations are environmentally friendly.
Additionally, Rena Monrovia actively explores alternative energy sources and innovative technologies to further reduce emissions and promote sustainability in the transportation industry.
Cost-Effective Solutions
Transporting items by car can be costly, especially for businesses that frequently move large quantities of goods. Rena Monrovia understands the financial implications and strives to provide cost-effective solutions for their clients.
Through their expertise in route planning, inventory management, and optimization of resources, Rena Monrovia ensures that clients get the best value for their investment. By minimizing transportation costs without compromising on quality or service, Rena Monrovia helps businesses increase their profitability and competitiveness.
Overall, Rena Monrovia’s approach to transporting items by car offers numerous benefits to individuals and businesses alike. Their efficient route planning, reliable tracking systems, qualified drivers, effective inventory management, sustainable practices, and cost-effective solutions make them an exceptional choice for all transportation needs.
Transporting Items by Car: Rena Monrovia’s Perspective
In today’s fast-paced world, transporting goods and belongings has become an essential part of our daily lives. As a professional driver and logistics expert, I have had the opportunity to transport various items by car. Whether you are moving to a new home, delivering products to customers, or simply running errands, there are several important considerations to keep in mind.
Firstly, proper planning is crucial. This involves determining the size and weight of the items, ensuring they fit securely in the car, and considering any special handling requirements. Additionally, it is important to consider the distance and duration of the journey, taking into account factors such as traffic, road conditions, and weather. This planning helps to ensure the safety of the items being transported as well as the overall efficiency of the journey.
Next, it is important to pack the items carefully to prevent damage during transit. Using appropriate packaging materials, such as bubble wrap or packing peanuts, can provide extra protection. Securing the items properly within the car to minimize movement is also crucial. Regularly inspecting the items and adjusting the packing as needed can help to maintain their condition throughout the journey.
Finally, maintaining proper documentation is essential. This includes ensuring you have all necessary permits, licenses, and insurance coverage. Keeping a record of the items being transported, including their value and any special considerations, can be helpful for insurance purposes.
Frequently Asked Questions
How can I secure my items when transporting them by car?
Transporting items by car can sometimes be challenging, especially if they are fragile or valuable. To secure your items, consider the following:
First, use appropriate packaging materials such as bubble wrap, padding, or boxes to protect the items from damage during transit. Make sure they are tightly packed to minimize movement.
How should I load my car for efficient transportation?
Efficiently loading your car can make a significant difference in the transportation process. Here are some tips:
Start by placing heavier and sturdier items at the bottom of the car to distribute the weight evenly. Utilize all available space by stacking items vertically and utilizing the space beneath seats or in between gaps.
What factors should I consider when planning a long-distance journey with items in my car?
When embarking on a long-distance journey with items in your car, it’s crucial to consider the following:
Plan your route in advance, considering factors such as road conditions, rest areas, and potential traffic congestion. It’s also important to check the weight and size restrictions for your vehicle, as exceeding these limits can affect safety and fuel efficiency.
How can I protect my items from theft during car transportation?
Ensuring the security of your items during car transportation is essential. Here are some measures you can take:
Park your car in secure areas whenever possible, such as well-lit spots or monitored parking lots. If you need to leave your car unattended, consider using anti-theft devices, such as steering wheel locks or car alarms. Additionally, avoid leaving valuable items visible inside your car, as this can attract unwanted attention.
How can I ensure the safety of my passengers when transporting items by car?
When transporting items by car, it’s important to prioritize the safety of your passengers. Here’s what you can do:
Ensure that the items are securely stored and do not obstruct the driver’s view or impede access to safety features such as airbags. It’s also essential to adhere to traffic regulations, including seatbelt usage and speed limits, to minimize the risk of accidents or injuries.
Conclusion
So, Rena Monrovia, when you transport something by car, there are a few important things to keep in mind. Firstly, make sure you have the appropriate vehicle for your transport needs. Consider factors such as the size, weight, and fragility of the items you are carrying to ensure they can be safely transported in your car.
Secondly, always secure your items properly to prevent damage or accidents during transit. Use straps, padding, or containers to keep everything in place and avoid shifting or falling. Additionally, be mindful of the weight distribution within the vehicle to maintain balance and stability.
Have you ever wondered how many axles a car has? It might surprise you to learn that most cars have two axles. Yes, that’s right, just two. But don’t underestimate the importance of these humble components. Without axles, a car wouldn’t be able to transmit power from its engine to the wheels, and the whole mechanism would grind to a halt.
The concept of car axles dates back to ancient times, where they were used in chariots and wagons. Over the years, car manufacturers have refined and improved axle designs to ensure optimal performance and safety. Today, cars typically have front and rear axles, with each axle housing a pair of wheels. This configuration allows for better weight distribution and stability, enhancing the overall driving experience. It’s fascinating to think about how something as seemingly simple as axles play a crucial role in the functionality of a car.
A car generally has two axles, one at the front and one at the rear. Each axle is responsible for supporting the weight of the vehicle and transmitting power to the wheels. The front axle, known as the steering axle, allows the driver to control the direction of the car. The rear axle, called the drive axle, receives power from the engine and transfers it to the wheels. Some vehicles, like trucks and larger SUVs, may have additional axles to accommodate heavier loads or enhance traction.
A car axle plays a vital role in the vehicle’s drivetrain system, enabling the transfer of power from the engine to the wheels. But have you ever wondered how many axles are there in a car and what their purpose is?
In this article, we will delve into the world of car axles, exploring the different types and configurations commonly found in vehicles. Understanding the number of axles in a car is essential for comprehending its capabilities and performance characteristics.
What Are Axles?
Axles are shafts that connect and rotate the wheels of a car. They are an integral part of the suspension system and help to transfer power from the engine to the wheels, allowing the vehicle to move. Axles also bear the weight of the car, ensuring stability and control while driving.
In addition to transferring power, axles also provide support to maintain the correct alignment and position of the wheels. They play a crucial role in handling and steering, as they are directly connected to the suspension and steering components of the vehicle.
Overall, axles are essential components in a car, contributing to its functionality and performance.
How Many Axles Does a Car Have?
The number of axles a car has depends on the type and size of the vehicle. Most cars have two axles, known as the front and rear axles. These axles have different functions and design characteristics that suit their specific positions.
However, there are also vehicles with more than two axles. Larger commercial trucks and buses, for example, often have additional axles to support the increased weight and payload capacity.
Now, let’s explore the different types of axles commonly found in cars.
Front Axles
The front axle of a car is responsible for steering and handling. It connects the front wheels to the suspension system, allowing them to rotate and change direction. Front axles can be further classified into three types:
Dead Axle: A dead axle does not have any active power or torque transmission. It simply supports the weight of the vehicle and assists in steering.
Live Axle: A live axle is directly connected to the engine and actively transfers power to the wheels. It plays a vital role in propulsion and is commonly found in rear-wheel drive vehicles.
Independent Front Suspension Axle: This type of axle allows each front wheel to move independently, improving overall handling and ride comfort. It is commonly found in modern cars with advanced suspension systems.
The selection of the front axle type depends on various factors, including the vehicle’s intended use, drivetrain configuration, and desired performance characteristics.
Rear Axles
The rear axle is primarily responsible for driving the rear wheels and transmitting power from the engine to the road. Like front axles, rear axles can also be classified into different types based on their design and functionality:
Dead Axle: Similar to the front dead axle, the rear dead axle supports the weight of the vehicle and assists in maintaining alignment.
Live Axle: A live axle at the rear transmits power from the engine to the wheels and plays a critical role in propulsion. It is commonly found in rear-wheel drive vehicles.
Semi-Floating Axle: This type of axle supports the weight of the vehicle and assists in power transmission. However, the axle shaft bears some of the weight, while the wheel bears the majority of the load.
Full-Floating Axle: In a full-floating axle, the weight of the vehicle is entirely supported by the axle housing, while the axle shaft only transmits rotational force to the wheels. This design provides enhanced durability and load-carrying capacity.
The selection of the rear axle type also depends on various factors, including the vehicle’s drivetrain type, intended use, and payload requirements.
Additional Axles in Commercial Vehicles
Commercial vehicles, such as trucks, buses, and large transportation vehicles, often have additional axles to accommodate the increased weight and payload capacity. These vehicles can have multiple rear axles, commonly referred to as tandem axles or multi-axle configurations.
Tandem axles provide improved load distribution and stability, allowing for a higher payload capacity. The number of axles in commercial vehicles varies depending on their size and intended use. Heavy-duty vehicles, such as tractor-trailers, may have three or more axles.
It is important to note that the number and type of axles directly affect a vehicle’s weight distribution, stability, and handling characteristics.
The Impact of Axle Configurations
Now that we have explored the different types and functions of car axles, let’s discuss how the number and configuration of axles impact a vehicle’s performance and capabilities.
Traction and Power Distribution
The number of axles directly affects a vehicle’s traction and power distribution. Each axle contributes to the vehicle’s ability to grip the road surface, especially in challenging driving conditions like wet, snowy, or off-road environments.
More axles provide greater traction by evenly distributing the weight and power across multiple points of contact with the road. This is particularly crucial for off-road vehicles or those with high horsepower and torque.
Furthermore, vehicles with multiple axles can distribute power more effectively, enhancing acceleration and overall performance. Additional axles also help to prevent wheel slippage and improve stability during cornering.
Payload Capacity
The payload capacity of a vehicle is directly influenced by the number and type of axles it has. Commercial vehicles with multiple axles can carry heavier loads due to the increased weight-bearing capacity.
The design and configuration of the axles in commercial vehicles are specifically engineered to handle greater weight and provide improved load distribution. This allows businesses to transport larger quantities of goods efficiently.
Maneuverability and Turning Radius
The number and type of axles also impact a vehicle’s maneuverability and turning radius. Vehicles with a smaller number of axles generally have better maneuverability, as they can make sharper turns and navigate through tight spaces more easily.
On the other hand, vehicles with additional axles, such as multi-axle trucks or buses, have larger turning radii due to their extended length and increased number of wheels. They require more space to make turns and may have difficulty maneuvering in congested areas.
The Number of Axles on a Car
When it comes to the number of axles a car has, it depends on the type of vehicle. Most cars have two axles, one in the front and one in the rear. This configuration is known as a “2-axle” or “2-wheel drive.”
However, there are some cars that have more than two axles. For example, larger vehicles such as trucks, SUVs, and buses often have a third axle, known as a “tag axle” or “tripler.” This extra axle provides additional support and stability, especially when carrying heavy loads.
It’s important to note that the number of axles is not the same as the number of wheels. Each axle can have one or more wheels attached to it. For instance, a car with two axles will typically have four wheels, with two wheels attached to each axle.
Frequently Asked Questions
A car typically has two axles. However, the number of axles can vary depending on the type of vehicle. In this FAQ, I’ll answer some common questions about the number of axles in a car.
How many axles does a standard passenger car have?
A standard passenger car usually has two axles. One axle is located in the front, known as the front axle, and the other axle is located in the rear, known as the rear axle. The front axle is responsible for steering the car, while the rear axle provides power to the wheels and supports the weight of the vehicle.
Each axle has two wheels attached to it, making a total of four wheels for a standard passenger car. This configuration allows for better control, stability, and traction on the road.
Do all cars have the same number of axles?
No, not all cars have the same number of axles. While most passenger cars have two axles, there are other types of vehicles that can have more axles. For example, larger vehicles like trucks, buses, and commercial vehicles often have multiple axles to support the weight of the cargo they carry.
In some cases, specialized vehicles like off-road vehicles or military vehicles may have additional axles for enhanced traction and maneuverability in challenging terrains. The number of axles in a car depends on its size, purpose, and intended use.
Can a car have more than four axles?
Yes, some cars can have more than four axles. As mentioned earlier, larger vehicles such as trucks or buses can have multiple axles, which may exceed the standard four-axle configuration. These additional axles provide increased weight distribution and stability, especially when carrying heavy loads.
It’s important to note that the number of axles in a car affects its overall weight, maneuverability, and fuel efficiency. The design and configuration of a vehicle’s axles are carefully engineered to ensure optimal performance based on its intended use.
Are there any other vehicles that have fewer than two axles?
Yes, there are. Some smaller vehicles, such as motorcycles or bicycles, may have fewer than two axles. Motorcycles typically have a single axle with two wheels, while bicycles have two axles, one for the front wheel and one for the rear.
These vehicles have different axle configurations to accommodate their unique designs and purposes. While cars generally have two axles, it’s important to remember that other types of vehicles may have fewer or more axles depending on their size and functionality.
Why is the number of axles important?
The number of axles in a car or any other vehicle is important because it directly impacts its stability, weight distribution, and overall performance. The configuration and placement of axles determine how the vehicle handles, turns, and distributes its weight.
Having the right number and placement of axles is crucial for maintaining control, especially when carrying heavy loads or driving on uneven terrains. It also plays a role in the vehicle’s fuel efficiency, as a well-designed axle configuration can help reduce drag and improve aerodynamics.
Conclusion
So, in summary, a car typically has two axles. An axle is a rod or shaft around which the wheels of a vehicle rotate. The axles connect the wheels, allowing them to turn and provide motion to the car. One axle connects the front wheels, while the other axle connects the rear wheels.
It’s important to note that different types of cars may have additional axles. For example, trucks and large vehicles often have multiple axles to bear the weight of the vehicle and its cargo. However, for most standard cars, you can expect to find two axles.