Recent Posts

How To Set Off a Car Alarm | Learn the Easiest Ways Ever


Have you ever wondered how easy it is to set off a car alarm? Well, you might be surprised to learn that it doesn’t take much effort at all. In fact, with just a few simple steps, anyone can trigger a car alarm and cause quite a disturbance.

Whether you’re looking to prank a friend or test the sensitivity of your own vehicle’s alarm system, knowing how to set off a car alarm can come in handy.

how to set off a car alarm

How to Trigger a Car Alarm: Understanding the Mechanics

Car alarms are a common security feature built into vehicles to deter theft and protect your valuable possessions. While they are designed to alert you and others in case of unauthorized access or tampering, there may be situations where you need to intentionally set off a car alarm.

In this article, we will explore the different methods and techniques to trigger a car alarm, from the conventional to the more creative approaches.

However, it’s essential to note that these methods should only be used responsibly and in situations where the car’s owner has provided consent, such as for testing purposes or in emergency scenarios.

1. Utilizing the Key Fob

The simplest way to set off a car alarm is by using the key fob remote that is typically provided with the vehicle. Most car alarms can be activated or deactivated by pressing specific buttons on the key fob. To trigger the car alarm:

  • Ensure that the vehicle is parked in a safe and legal spot without any obstructions.
  • Locate the alarm button on your key fob. It is usually labeled with an icon resembling a car with soundwaves coming out of it.
  • Press and hold the alarm button for a few seconds until you hear the sirens and see the car lights flashing.
  • To deactivate the alarm, press the same button again or use the unlock button on the key fob.

Using the key fob to set off the car alarm is an easy and convenient method, especially in scenarios where you need to quickly test the functionality or locate your vehicle in a crowded parking lot. However, it’s crucial to inform nearby individuals and the authorities beforehand to avoid any unnecessary panic or confusion.

2. Triggering the Alarm through the Car’s Interior

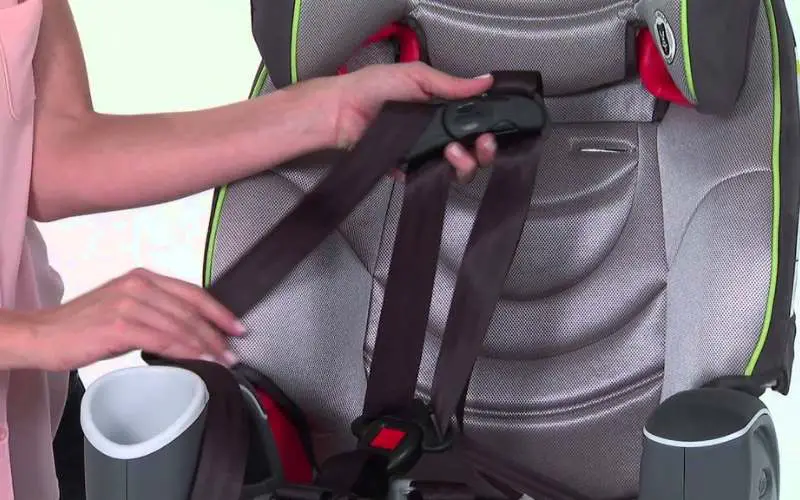
If you find yourself locked out of your car with the alarm system armed, you can trigger the alarm from the inside to attract attention and potentially get assistance. Here’s how:

  • Locate the alarm system disarm button or switch near the driver’s side footwell or the dashboard.
  • Using a tool or an improvised object, such as a long stick or a shoelace, press or toggle the disarm button or switch.
  • When the alarm system is triggered, the sirens will sound, and the lights will flash to indicate that the alarm has been set off.

It’s essential to note that triggering the alarm from the inside should be reserved for emergency situations, such as when you are trapped inside the vehicle or require immediate assistance. Always try to contact a locksmith or the authorities first and follow their instructions.

3. Creating Vibrations to Activate the Car Alarm

Some car alarms are designed to detect vibrations to protect against theft attempts. By creating sufficient vibrations, you can trigger the alarm system. Here are a few methods to set off the car alarm through vibrations:

3.1. Jumping on the Vehicle

One way to set off the car alarm is by physically jumping on the vehicle’s hood, trunk, or roof. The impact and vibrations caused by jumping can activate the alarm’s shock sensors, triggering the alarm system. However, this method should only be used in controlled environments and with the owner’s consent.

3.2. Using a Vibrating Device

Another method to trigger the car alarm is by using a vibrating device or tool. By placing a vibrating device, such as a powerful subwoofer or a specialized tool that emits vibrations, near the car, you can potentially activate the alarm system.

It’s important to note that this method may not work with all car alarm models and requires careful experimentation.

3.3. Slamming Doors or Hitting the Body

In some cases, slamming the doors or forcefully hitting the car’s body can generate enough vibrations to trigger the alarm. Again, this method should only be performed with the owner’s consent and in controlled environments where the risk of damage to the vehicle is minimized.

4. Disconnecting the Car Battery

Disconnecting the car battery is another effective method to set off the car alarm, but it should only be considered as a last resort. Here’s how:

  • Park the vehicle in a safe location away from traffic and engage the parking brake.
  • Open the hood and locate the car battery.
  • Wearing insulated gloves and using the appropriate tools, disconnect the negative (-) terminal of the battery first and then the positive (+) terminal.
  • Wait for a few minutes and then reconnect the battery terminals in the reverse order: positive (+) first and then negative (-).

Disconnecting the car battery will interrupt the power supply to the alarm system, causing it to trigger when the battery is reconnected. However, keep in mind that this method may also reset other vehicle systems such as radios and clocks, and it is not recommended unless no other options are available.

Exploring Different Dimensions: How to Set Off a Car Alarm

In this section, we will delve into additional methods to set off a car alarm, catering to different scenarios and situations.

1. Playing Loud and Disruptive Sounds

Car alarms are designed to detect sounds and vibrations that indicate potential theft or unauthorized access. By playing loud and disruptive sounds in close proximity to the vehicle, you can trigger the car alarm system. Here are a few ways to achieve this:

  • Use a high-powered megaphone or speaker to amplify and project a loud noise towards the car’s vicinity. Choose sounds that are likely to trigger the alarm, such as sirens or screeching noises.
  • Set off firecrackers or other loud fireworks close to the vehicle. The sudden noise and vibrations can activate the car alarm.
  • If available, utilize professional sound equipment designed for testing and evaluating alarm systems. Consult with experts in the field to ensure proper usage and safety precautions.

Remember to exercise caution and be mindful of local ordinances and laws regarding noise disturbances.

2. Manipulating the Wiring System

For those with knowledge in automobile electronics and wiring systems, manipulating the car’s wiring can set off the alarm system.

It’s important to note that this method should be performed by trained professionals or individuals with expertise in car electronics to avoid damaging the vehicle. Here are a few techniques:

2.1. Shorting the Wiring

By intentionally shorting specific wires in the car’s wiring system, you can cause a disruption that triggers the alarm system.

This method requires precise knowledge of the vehicle’s wiring schematic and should only be attempted by professionals or individuals with extensive experience in automotive electronics.

2.2. Tampering with Sensors

Car alarm systems are equipped with various sensors, such as shock sensors and motion detectors, that can be manipulated to trigger the alarm. By tampering with these sensors or their connections, you can cause a false activation.

However, it’s important to note that accessing and tampering with these components may require specific tools and expertise.

3. Seeking Professional Assistance

If you require assistance in setting off a car alarm for legitimate purposes, it is advisable to seek the help of professionals. Automotive technicians, locksmiths, or security experts who specialize in car alarm systems can provide guidance, advice, and services tailored to your specific needs.

They have the knowledge and tools necessary to analyze and trigger car alarms without causing unnecessary damage or disruption.

how to set off a car alarm 2

How to Set Off a Car Alarm?

Setting off a car alarm can be done intentionally or unintentionally. Here are a few methods to set off a car alarm:

1. Use a Keyless Entry Remote

If your car has a keyless entry remote, press the panic button to activate the alarm. This button is usually marked with an exclamation mark or a horn symbol. It is a quick and easy way to set off the car alarm in case of an emergency or to locate your vehicle in a crowded parking lot.

2. Trigger the Shock or Impact Sensor

Many cars are equipped with shock or impact sensors that detect abrupt movements or vibrations. You can test this feature by gently rocking or pushing your car. Be cautious not to damage your vehicle while doing so.

3. Disconnect the Battery

If you want to set off the car alarm as a prank, one way to do it is by disconnecting the car’s battery. However, this method may also cause the car’s electrical systems to reset, resulting in other problems.

4. Seek Professional Help

If you encounter problems with your car alarm system or need assistance in intentionally setting it off, it is recommended to seek professional help from a qualified car technician. They can guide you on how to safely activate or deactivate the alarm without causing any damage.

Frequently Asked Questions

Car alarms can sometimes be set off accidentally, causing a loud and intrusive sound. If you find yourself in a situation where you need to set off a car alarm intentionally, here are some commonly asked questions and answers to guide you.

1. How can I set off a car alarm without a key?

Setting off a car alarm without a key can be done by detecting the car’s sensitive areas. Look for places where the alarm sensors are located, such as the door handles, trunk, or hood. Apply firm pressure to these areas to trigger the alarm.

Keep in mind that this method may vary depending on the car make and model, so it’s always best to refer to the car’s manual for specific instructions.

To avoid any legal issues or damages, it’s important to note that intentionally setting off a car alarm without proper authorization may be illegal in some jurisdictions. Always ensure you have the necessary permissions or consult with a professional before attempting such actions.

2. Can I set off a car alarm using a remote control?

Yes, you can set off a car alarm using a remote control if your vehicle is equipped with a remote key fob. Typically, the remote control has a panic button that is specifically designed to activate the car’s alarm system.

Pressing this button will emit a loud sound and flash the vehicle’s lights to attract attention. Refer to your car’s manual to locate the panic button on your remote control and understand its functionality.

It’s essential to use this feature responsibly and avoid triggering the car alarm unnecessarily, as it may disrupt others and lead to unnecessary panic or annoyance.

3. Is there a way to set off a car alarm by tampering with the wires?

While it is technically possible to set off a car alarm by tampering with the wires, it is not recommended or advised. Tampering with the electrical system of a vehicle can cause damage, malfunctions, or even start a fire. Additionally, tampering with a car’s alarm system without proper authorization is illegal in many jurisdictions.

If you’re experiencing issues with your car alarm or need it to be disabled temporarily, it’s best to consult with a professional mechanic or contact the manufacturer for assistance.

4. What should I do if I accidentally set off a car alarm?

If you accidentally set off a car alarm, the first thing to do is locate your vehicle’s key fob and press the “lock” button or the specific “alarm off” button, if available.

This will usually stop the alarm from sounding. Alternatively, unlocking the car using the key or starting the engine can also deactivate the alarm.

If none of these methods work, you may need to consult your car’s manual or contact the manufacturer’s helpline for further assistance.

Remember to apologize to anyone who may have been disturbed by the alarm and ensure you take precautions to avoid triggering it accidentally in the future.

5. Can extreme temperature changes set off a car alarm?

Extreme temperature changes, such as sudden hot or cold weather, can potentially trigger a car alarm. This is because temperature fluctuations can affect the car’s electrical system, causing it to malfunction and set off the alarm.

To minimize the chances of your car alarm being triggered by temperature changes, consider parking your vehicle in a garage or shaded area to protect it from extreme weather conditions.

If you are experiencing persistent issues with your car alarm due to temperature changes, it’s best to have it inspected and repaired by a qualified automotive technician to ensure proper functionality.

Remember, intentionally setting off a car alarm without proper authorization or valid reasons may be illegal and unethical. It’s important to be considerate of others’ peace and safety when dealing with car alarms.

So, to conclude, it is important to note that setting off a car alarm can have serious consequences and should never be done unless it is absolutely necessary. In most cases, car alarms are designed to deter theft and protect the vehicle and its contents.

However, there may be situations where you need to disable a car alarm, such as when the alarm is malfunctioning or when you have accidentally triggered it.

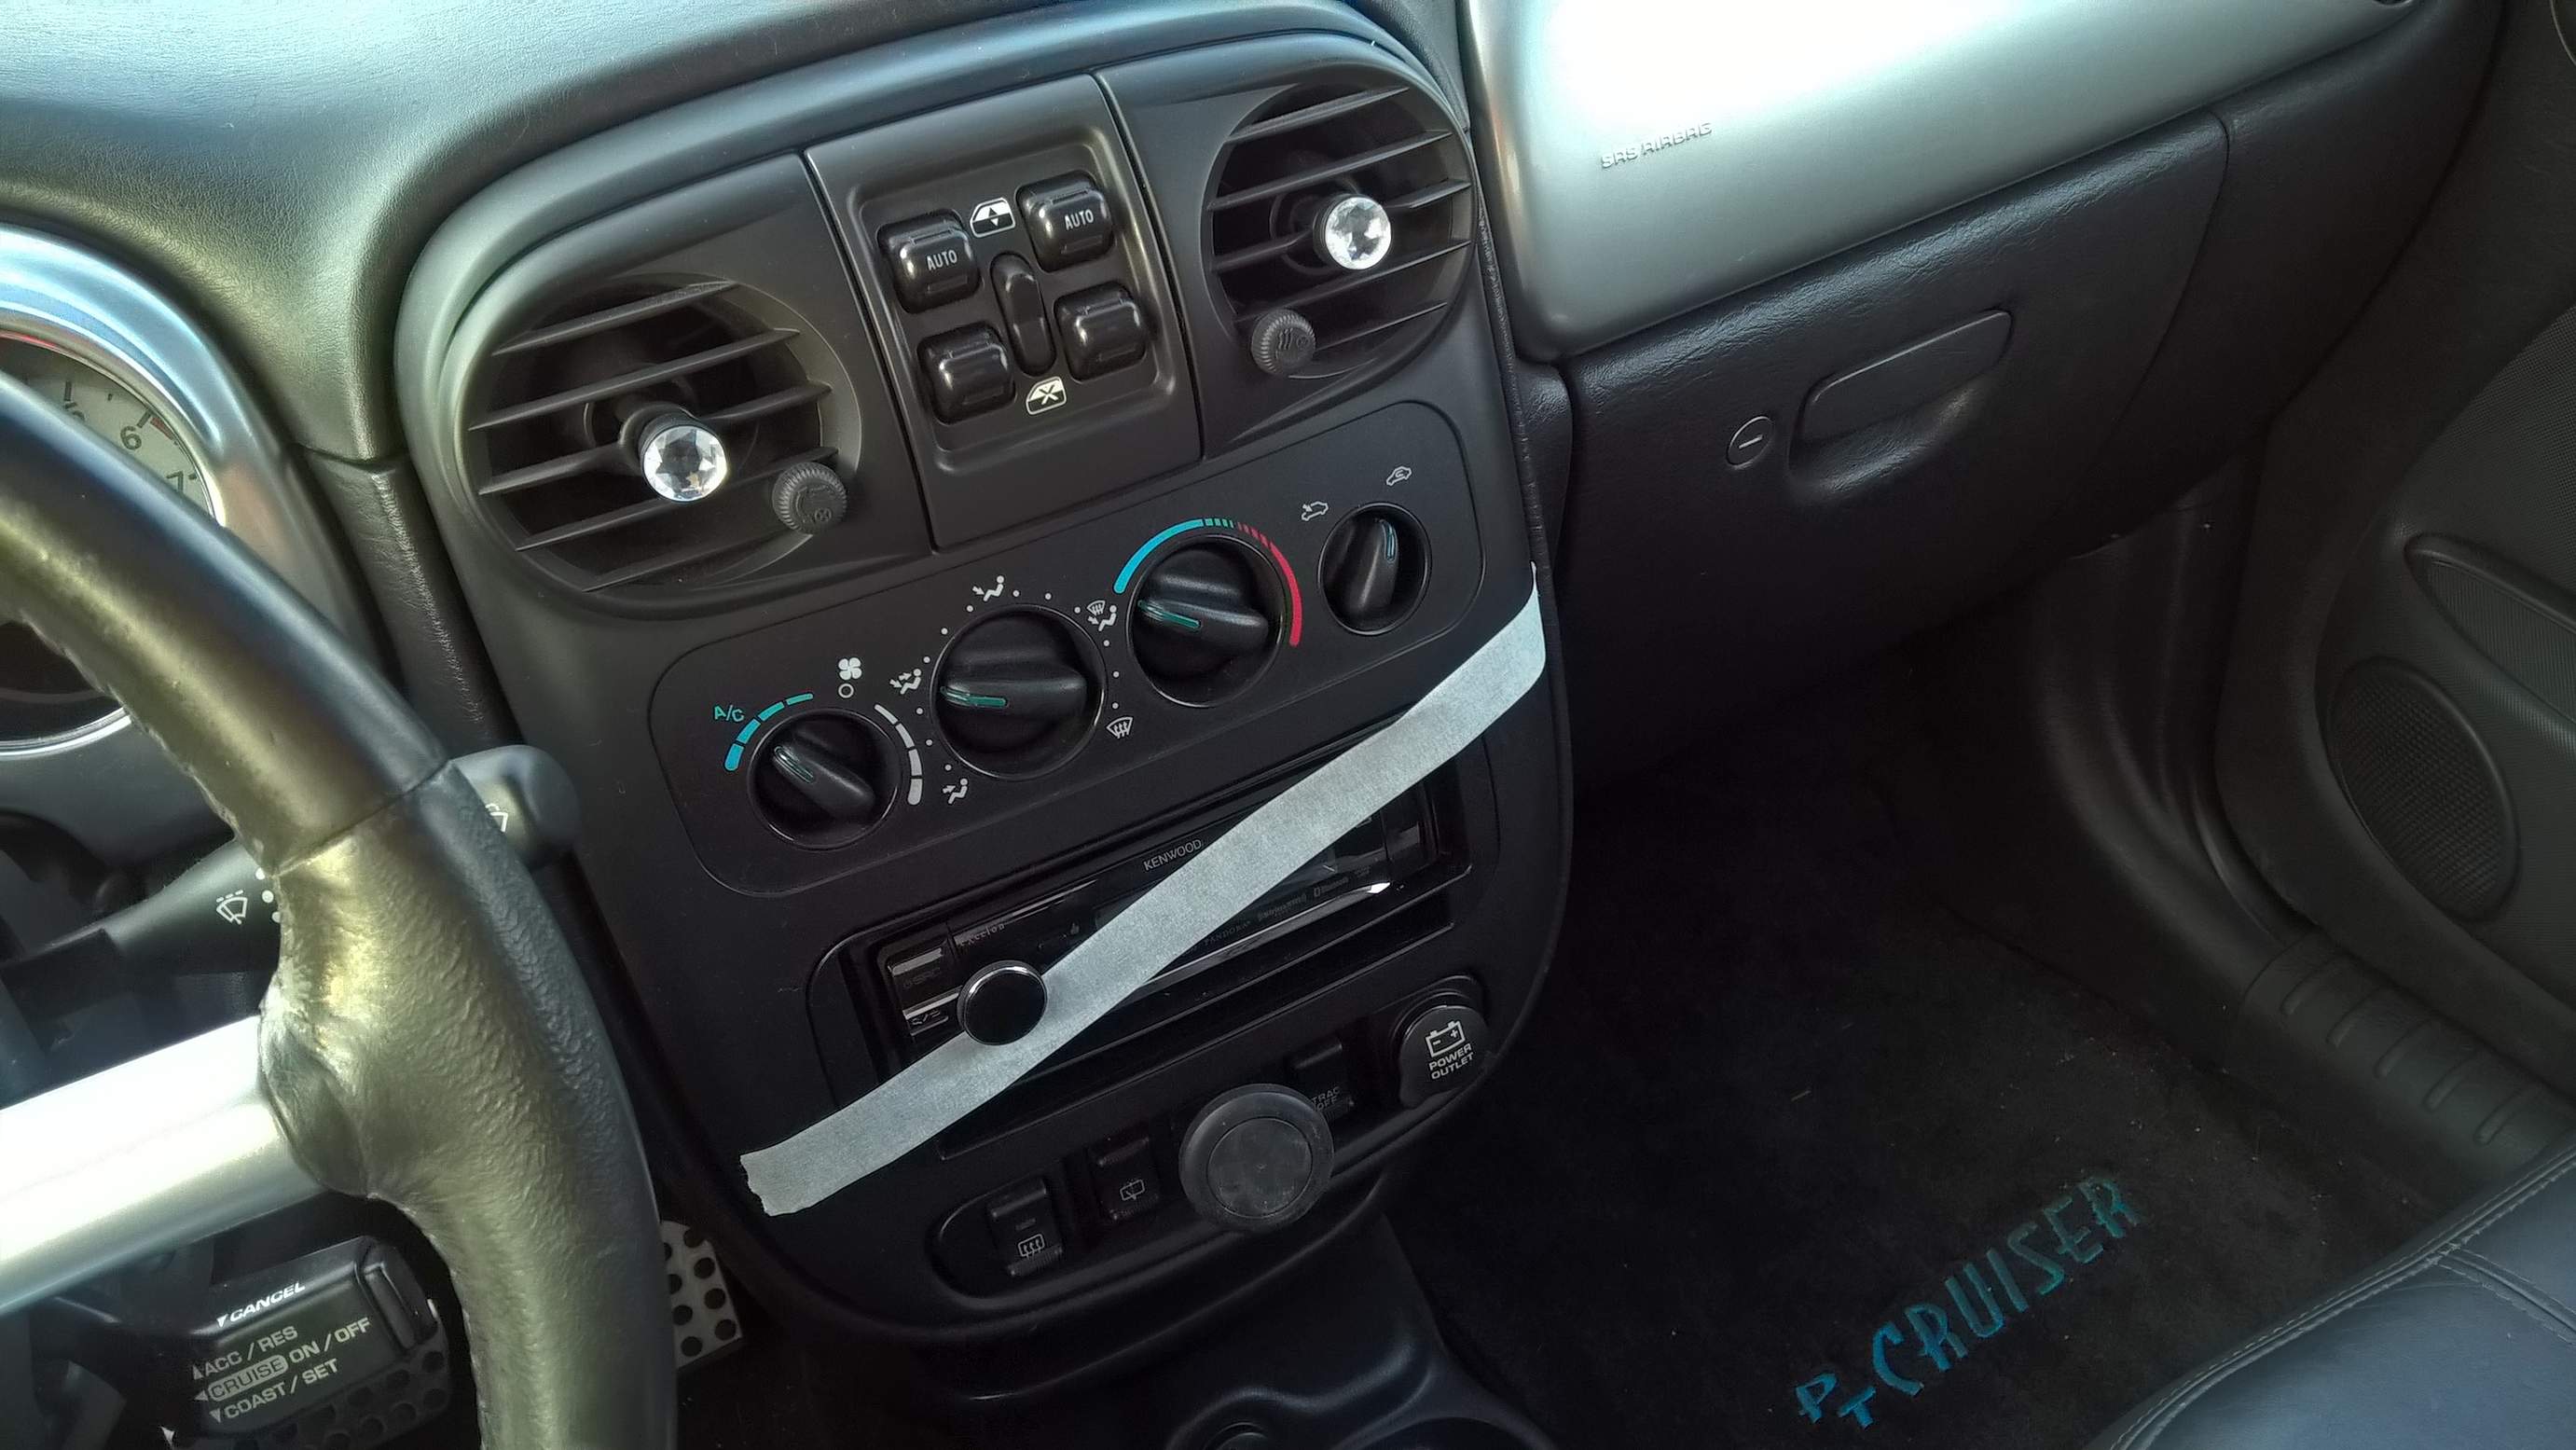
If you find yourself in a situation where you need to set off a car alarm, the first step is to identify the location of the alarm system, which is usually under the dashboard or in the engine compartment.

Once you locate the alarm system, you can disable it by disconnecting the power source or removing the fuse that controls the alarm. It is important to handle the alarm system with caution and to consult the car’s manual or seek professional help if you are unsure about the process.

In Conclusion

While it is important to have a basic understanding of how to set off a car alarm, it is crucial to do so responsibly and with the owner’s consent. Triggering a car alarm without permission can cause unnecessary panic, inconvenience, and potential damage to the vehicle.

Always be mindful of local laws and regulations regarding noise disturbances, and consider seeking professional assistance when necessary.

How to Wash a Black Car to Make It Shine


When it comes to washing a black car, it’s not just about achieving a sparkling shine. It’s about maintaining the sleekness and elegance that makes a black car stand out.

As a car enthusiast, I’ve learned a thing or two about how to properly care for a black car and keep it looking its best. Let me share some expert tips to help you achieve that showroom finish.

Black cars are notorious for showing every speck of dirt, but with the right technique and products, you can keep your car looking flawless.

The first step is to use a high-quality car wash soap that is specifically formulated for black cars. These soaps are designed to cleanse the paint without leaving behind scratches or swirl marks.

Additionally, using a soft microfiber wash mitt will further minimize the risk of creating any imperfections on the surface.

Remember to rinse the mitt frequently to avoid transferring dirt back onto the car. By following these steps, you can ensure your black car maintains its stunning appearance for years to come.

how to wash a black car

The Importance of Properly Washing a Black Car

As car enthusiasts, we understand the appeal and allure of a sleek black car. However, maintaining the pristine look of a black car requires special care and attention.

Black cars are notorious for showing dirt, dust, and even minor scratches more prominently than other colored vehicles. That’s why knowing how to properly wash a black car is crucial to preserving its beauty and ensuring it looks its best for years to come.

1. Gather the Necessary Supplies

Before you begin washing your black car, it’s important to gather all the necessary supplies. This will save you time and ensure that you have everything you need within reach. Here’s a list of supplies you’ll need:

  • A high-quality car wash soap specifically formulated for black cars
  • Two buckets – one for soapy water and one for rinsing
  • A soft, non-abrasive microfiber wash mitt or sponge
  • A gentle brush for cleaning tires and wheels
  • A hose or pressure washer for rinsing
  • Microfiber towels or a clean chamois for drying
  • Black car wax or sealant to enhance the shine and provide protection
  • Glass cleaner for the windows and mirrors
  • A detailing brush for hard-to-reach areas

Having these supplies ready will make the car washing process smoother and more efficient.

Choosing the Right Car Wash Soap

When it comes to washing a black car, using the right car wash soap is essential. Regular household cleaners or dish soaps are too harsh and can strip the protective wax or sealant from the car’s surface, leaving it vulnerable to scratches and damage.

Look for a car wash soap specifically designed for black cars, as these are formulated to enhance the paint’s shine and minimize the appearance of scratches.

Additionally, avoid using sponges or brushes with stiff bristles, as they can create swirl marks and fine scratches on the black paint. Instead, opt for a soft, non-abrasive microfiber wash mitt or sponge that gently lifts dirt and grime without harming the paint.

Note: Avoid washing a black car under direct sunlight or on a hot day, as the water and soap can quickly dry, leaving streaks and water spots on the paint surface.

Protecting the Tires and Wheels

While washing your black car, don’t forget about the tires and wheels. Brake dust, dirt, and grime can accumulate on these areas, detracting from the overall appearance of your vehicle.

Use a gentle brush specifically designed for tires and wheels to remove stubborn dirt and brake dust. Be cautious not to use the same brush or wash mitt that you used on the car’s paint, as this can transfer dirt and potentially scratch the surface.

Apply a specialized tire cleaner to the brush and scrub the tires and wheels thoroughly. Rinse with clean water to remove any residue. This step will not only ensure your car looks spotless, but it will also prevent any potential damage that dirt and grime buildup can cause over time.

2. Preparing the Car for Washing

Before you start washing your black car, it’s crucial to prepare the vehicle properly. Here’s a step-by-step guide:

  • Park the car in a shaded area to prevent the soap from drying too quickly and leaving streaks.
  • Rinse the car with water from the hose or a pressure washer to remove loose dirt and debris.
  • Make sure all windows and doors are closed to reduce the amount of water that enters the vehicle.
  • Remove any license plates or covers to facilitate cleaning.
  • Use a specialized detailing brush to clean hard-to-reach areas, such as around the door handles, side mirrors, and emblems.

Taking these steps will ensure that your black car is ready for a thorough and effective wash.

Preventing Scratches and Swirl Marks

One of the main concerns when washing a black car is the potential for scratches and swirl marks. These imperfections can significantly detract from the car’s overall appearance. To minimize the risk, consider following these tips:

  • Use the two-bucket method – fill one bucket with soapy water and the other with clean water for rinsing the wash mitt or sponge. This helps prevent dirt and debris from accumulating on the wash mitt and transferring back onto the car’s surface.
  • Work in small sections, starting from the top and gradually moving downward. This prevents the soap from drying on the surface and minimizes the risk of swirl marks.
  • Use gentle, straight motions when washing, avoiding circular or swirling motions that can create scratches.

By following these techniques, you can significantly reduce the chances of damaging the paint and keep your black car looking flawless.

how to wash a black car 2

3. The Actual Car Washing Process

Now that you have gathered the supplies and prepared the car, it’s time to begin the actual car washing process. Follow these steps for a thorough and effective wash:

Step 1: Fill one bucket with clean water for rinsing and the other with the appropriate amount of car wash soap mixed with water according to the manufacturer’s instructions. A good ratio is typically 1 ounce of soap per gallon of water.

Step 2: Start by rinsing the car from top to bottom with water to remove loose dirt and debris.

Step 3: Soak the wash mitt or sponge in the soapy water and begin washing one section at a time, working from top to bottom. Gently glide the mitt or sponge over the surface, applying light pressure to remove dirt and grime.

Step 4: Rinse the wash mitt or sponge in the clean water bucket after washing each section to remove dirt and debris. This step is essential to prevent dirt from scratching the paint.

Step 5: Continue washing and rinsing small sections until the entire car is clean.

Step 6: Once you have finished washing the car, rinse it thoroughly with clean water to remove all soap residue.

Step 7: Use microfiber towels or a clean chamois to dry the car. Pat the surface gently to avoid creating swirl marks or scratches.

Following these steps will ensure that your black car is thoroughly cleaned without damaging the paint.

Drying Techniques

When it comes to drying a black car, it’s crucial to choose the right techniques to avoid creating scratches or swirl marks. Here are a few tips:

  • Use a microfiber towel or a clean chamois specifically designed for drying cars. These materials are gentle on the paint and absorb water effectively.
  • Start drying from the top and work your way down, using light pressure and patting motions. Avoid dragging the towel across the surface, as this can result in scratches.
  • If necessary, use a detailing spray specifically formulated for black cars to enhance the shine and add an extra layer of protection.

4. Enhancing the Shine and Protecting the Paint

Once your black car is clean and dry, it’s time to take its appearance to the next level by enhancing the shine and protecting the paint. Follow these steps:

Step 1: Apply a high-quality black car wax or sealant to protect the paint from UV rays, oxidation, and environmental contaminants. Follow the manufacturer’s instructions and use a clean, soft applicator pad for even application.

Step 2: Allow the wax or sealant to dry according to the recommended time on the product label.

Step 3: Once dry, use a microfiber towel to buff the wax or sealant, enhancing the shine and providing a protective barrier.

Regularly applying wax or sealant will help preserve the appearance of your black car and protect it from the elements.

Remember to clean the windows and mirrors with a high-quality glass cleaner to ensure a crystal-clear view and complete the overall clean look of your black car.

Maintaining the Pristine Look of Your Black Car

Now that you know how to properly wash and maintain your black car, it’s essential to incorporate regular cleaning and maintenance into your car care routine. Here are some additional tips to keep your black car looking its best:

  • Regularly wash your car to remove dirt, dust, and debris that can accumulate on the surface.
  • Consider using a quick detailer spray between washes to remove light dirt and maintain the shine.
  • Park your car in shaded areas or use a car cover to protect it from direct sunlight, which can cause fading and damage to the paint.
  • Avoid using automated car washes with brushes, as they can scratch the paint. Opt for touchless or hand wash options instead.
  • Regularly apply a black car wax or sealant to maintain the paint’s shine and protect it from environmental elements.
  • Invest in a paint protection film or ceramic coating for additional long-term protection.
  • Be mindful of the products you use on your black car, ensuring they are specifically formulated for black or dark-colored vehicles.

By following these maintenance tips, you can keep your black car looking sleek and pristine for years to come.

Washing a Black Car

As a professional car detailer, I have gathered valuable knowledge and experience on how to wash a black car to maintain its lustrous shine. When it comes to washing a black car, extra care must be taken to prevent swirl marks and scratches. Here are some expert tips to follow:

1. Gather the Right Tools

  • Microfiber wash mitt
  • High-quality car wash soap
  • Grit guard bucket insert
  • Soft microfiber towels for drying

2. Pre-Rinse the Car

Before applying any soap, use a pressure washer or hose to thoroughly rinse the car, removing loose dirt and debris. This helps prevent scratches during the washing process.

3. Two-Bucket Method

Use the two-bucket method: one bucket with soapy water, and the other with clean water. Dip the wash mitt in the soapy water, wash a section of the car, then rinse the mitt in the clean water before dipping it back into the soap.

4. Wash in Straight Lines

Wash the car using straight lines instead of circular motions to minimize swirl marks. Start from the top and work your way down, ensuring each panel is thoroughly cleaned.

Frequently Asked Questions

I have compiled a list of frequently asked questions about washing a black car. Below, you will find helpful answers to guide you in maintaining the pristine appearance of your vehicle.

1. Can I use any car soap to wash my black car?

It is crucial to choose a car soap specifically designed for black cars. Using a regular car soap may result in streaks or a dull finish. Look for a product that is pH-balanced and contains polymers to enhance the shine and protect the paint.

Additionally, avoid using household cleaning products, as they can strip away the wax and damage the paint job. Always read the instructions and choose a soap that caters to the needs of black cars.

2. What type of sponge or mitt is best for washing a black car?

When washing a black car, it is essential to use a soft sponge or microfiber mitt to minimize the risk of scratches or swirl marks. Avoid abrasive sponges or brushes, as they can mar the paint surface. Opt for a high-quality microfiber mitt that is gentle on the paint and effective in lifting dirt without causing damage.

Remember to rinse the sponge or mitt regularly to remove any dirt particles and prevent them from scratching the car’s surface during the wash.

3. Should I wash my black car in direct sunlight?

No, washing your black car in direct sunlight is not recommended. The heat from the sun can cause the car soap to dry quickly, leaving residue and streaks on the paint surface. Additionally, the sunlight can amplify imperfections, making them more noticeable.

Choose a shaded area or wash your black car in the early morning or late afternoon when the sun is less intense. This will allow you to clean the car more effectively without the risk of unwanted streaks or blemishes.

4. How often should I wax my black car?

To maintain the glossy finish of a black car, it is recommended to wax it every 2 to 3 months. Waxing not only adds a protective layer to the paint, but it also enhances the shine and depth of the color.

However, the frequency may vary depending on factors such as weather conditions, exposure to sunlight, and the quality of the wax used.

Regularly inspect the paint surface, and if you notice water no longer beads up or the shine diminishes, it may be time to apply a fresh coat of wax.

5. Can I use a pressure washer to wash my black car?

While pressure washers can be effective in removing stubborn dirt, it is important to exercise caution when using them on a black car. High-pressure water can potentially damage the paint or force water into crevices, causing rust or other issues.

If you choose to use a pressure washer, ensure that the pressure setting is not too high and maintain a safe distance from the car.

Alternatively, you can use a hose with a gentle spray nozzle to clean the car. Always be mindful of the pressure to avoid any unwanted damage to the delicate paintwork.

In conclusion, washing a black car requires a gentle touch and careful attention to detail. Start by gathering all the necessary supplies, such as a non-abrasive car soap, microfiber towels, and a soft sponge or mitt. Then, park the car in a shaded area to avoid water spots and sun damage.

Next, rinse the car thoroughly to remove any loose dirt and debris. Take your time and wash one section at a time, using the soapy water and sponge or mitt to gently clean the surface. Rinse off the soap with clean water, making sure to remove all traces of soap residue.

Conclusion

Washing a black car requires attention to detail and the right techniques to ensure the best results. By following the proper steps, using high-quality products, and adopting a regular maintenance routine, you can maintain the beauty and shine of your black car and turn heads wherever you go.

How To Loosen Car Seat Straps Graco | Easy and Simple Process


As a parent, ensuring the safety and comfort of our little ones is our top priority. However, it can be frustrating when we need to adjust the car seat straps on our Graco car seat.

Did you know that properly adjusting the straps is not only crucial for your child’s safety, but it also ensures a snug and secure fit? Let me share some tips on how to loosen the car seat straps on your Graco car seat.

When it comes to loosening the car seat straps on your Graco car seat, it’s important to follow the instructions provided by the manufacturer. Start by locating the harness release button, typically located at the bottom of the car seat.

Press and hold the button while gently pulling on the straps to loosen them. You might need to adjust the straps accordingly to ensure a proper fit and ensure that there is enough room for your child to comfortably sit in the car seat.

Loosen Car Seat Straps Graco

Understanding the Importance of Loosening Car Seat Straps for Graco Car Seats

As a car seat manufacturer, Graco understands the utmost importance of ensuring the safety and comfort of your child while traveling in a vehicle. One essential aspect of using a Graco car seat is properly adjusting and securing the straps.

However, there may be instances when you need to loosen the car seat straps to accommodate your child’s growth or make adjustments for their comfort. In this article, we will guide you on how to correctly and safely loosen the car seat straps of your Graco car seat.

1. Understanding the Anatomy of Graco Car Seat Straps

Before we dive into the process of loosening the car seat straps, it’s important to have a basic understanding of the anatomy of Graco car seat straps. Graco car seats typically have a 5-point harness system, which consists of two shoulder straps, two hip straps, and a crotch strap.

These straps are designed to secure your child in the car seat and provide optimal protection in the event of a collision. The shoulder straps are connected to the back of the car seat and have adjustable height positions, allowing you to accommodate your child’s height as they grow.

The hip and crotch straps, on the other hand, are connected to the bottom of the car seat and are used to secure your child’s lower body.

Now that you have a better understanding of how the straps in a Graco car seat work, let’s move on to the step-by-step process of loosening them.

2. Step-by-Step Guide to Loosening the Car Seat Straps

Loosening the car seat straps on a Graco car seat is a relatively simple process. Follow these steps to ensure a safe and comfortable adjustment:

Step 1: Position the Car Seat Correctly

Before you start adjusting the straps, make sure the car seat is properly installed in your vehicle according to the manufacturer’s instructions.

The car seat should be securely fastened and not wobble or move excessively when nudged. This step is crucial to ensure your child’s safety throughout the process.

Step 2: Locate the Adjustment Mechanisms

Next, locate the adjustment mechanisms for the shoulder straps on the back of the car seat. Depending on the specific model of your Graco car seat, the adjustment mechanisms may be buttons, levers, or pull-tabs.

Familiarize yourself with the location and operation of these mechanisms before proceeding.

Step 3: Loosen the Straps

To loosen the car seat straps, grip the shoulder straps at the front of the car seat where they enter the shell. Insert your fingers between the straps and grasp them firmly.

Then, simultaneously pull the straps towards your chest and push down on the adjustment mechanisms located at the back of the car seat. This action will release the tension and allow you to loosen the straps.

Keep pulling until you achieve the desired level of looseness, taking into consideration your child’s comfort without compromising their safety.

It’s important to note that you should never remove the car seat straps completely or loosen them to the point where your child is not securely fastened in the car seat.

Step 4: Check for Proper Fit

After loosening the car seat straps, it’s crucial to check for the proper fit. Ensure that the shoulder straps are positioned at or slightly above your child’s shoulders when rear-facing, or at or slightly below their shoulders when forward-facing.

The hip straps should be snug against your child’s hips, and the crotch strap should be positioned correctly between their legs. Make any necessary adjustments to achieve the ideal fit and ensure your child’s safety.

3. Additional Tips for Adjusting Graco Car Seat Straps

Here are some additional tips to keep in mind when loosening and adjusting the car seat straps on your Graco car seat:

  • Always refer to the manufacturer’s instructions for your specific model of Graco car seat. Different models may have slight variations in the adjustment mechanisms.
  • Regularly check the tightness and fit of the car seat straps to ensure your child’s safety. Straps may become loose over time, especially with frequent use.
  • Consider using a mirror or enlisting the help of another adult to ensure the proper fit of the car seat straps.
  • Do not use aftermarket accessories or modifications that are not specifically designed and approved by Graco for use with their car seats. These can compromise the safety and effectiveness of the car seat straps.
how to loosen car seat straps graco

How to Loosen Car Seat Straps in a Graco Car Seat

When it comes to ensuring the safety of your child in a Graco car seat, it’s important to properly adjust the straps. However, you may find yourself needing to loosen the straps for various reasons. Here is a step-by-step guide on how to do so:

  • First, locate the belt adjuster on the front of the car seat.
  • Slide the belt adjuster up to loosen the straps.
  • Make sure the straps are loose enough to comfortably fit your child.
  • Check that the chest clip is at armpit level.
  • If needed, readjust the straps and repeat the process until you achieve the desired fit.
  • Remember to always buckle the chest clip, crotch buckle, and seatbelt properly.

It’s crucial to regularly check the fit of the car seat straps as your child grows. This ensures optimal safety and comfort while traveling.

Consult your Graco car seat manual for specific instructions on adjusting the straps for your particular model. By following these guidelines, you can rest assured that your child is secure in their car seat.

Frequently Asked Questions

1. How can I loosen the car seat straps on my Graco car seat?

Ensuring that your child is securely strapped into their car seat is crucial for their safety. To loosen the car seat straps on your Graco car seat, follow these steps:

First, locate the harness adjuster strap, which is usually located at the front of the car seat near the child’s shoulders. It is typically a strap with a buckle or a lever.

Next, push the harness adjuster strap button or pull the lever to release the tension on the straps. This will allow you to loosen the straps and create more space for your child to comfortably fit in the car seat.

Remember to adjust the straps to a snug fit once your child is securely seated in the car seat, ensuring that there is no excess slack or room for the child to move around too much.

2. Can I adjust the height of the car seat straps on my Graco car seat?

To provide the best fit and safety for your child, most Graco car seats have adjustable harness heights. This allows you to customize the height of the straps as your child grows.

To adjust the height of the car seat straps, follow these steps:

1. Locate the harness height adjustment mechanism. This is typically found at the back of the car seat, near the top.

2. Depending on the model of your Graco car seat, you may need to press a button or squeeze a lever to unlock the harness height adjustment feature.

3. Once unlocked, you can move the straps to the desired height. Be sure to adjust both sides evenly for proper alignment.

4. After adjusting the height, check that the straps are secure and snug on your child’s shoulders. There should be no gaps or excess slack.

3. What should I do if the car seat straps on my Graco car seat are too tight?

If the car seat straps on your Graco car seat feel too tight, follow these steps to loosen them:

1. Position yourself in front of the car seat and locate the harness adjuster strap, which is usually near the child’s shoulders.

2. Press the harness adjuster strap button or pull the lever to release the tension on the straps.

3. Pull the shoulder straps outward and downward to create more space for your child to sit comfortably.

4. Once the straps are adequately loosened, reposition your child in the car seat and adjust the straps to a snug fit.

Remember, the car seat straps should always be secure and snug, without any excess slack or room for the child to move around too much.

4. Are there any specific safety guidelines I should follow when adjusting the car seat straps on my Graco car seat?

When adjusting the car seat straps on your Graco car seat, it’s essential to follow these safety guidelines:

1. Ensure that the straps are adjusted to your child’s height and weight. The straps should fit snugly over the child’s shoulders, with no gaps or excess slack.

2. Make sure the chest clip is positioned at armpit level, resting on the chest bone. This helps keep the straps properly positioned and prevents them from slipping off the child’s shoulders.

3. Regularly check the straps for any signs of wear or damage. If you notice any fraying, tearing, or stretched-out straps, it’s time to replace the car seat or straps.

4. Always refer to the instruction manual provided with your Graco car seat for specific guidelines on adjusting and securing the straps.

By following these safety guidelines, you can ensure your child’s car seat straps are adjusted correctly for their safety and comfort.

5. Can I use aftermarket accessories to adjust the car seat straps on my Graco car seat?

It is important to use only accessories and products that are approved by the car seat manufacturer to adjust the car seat straps. Aftermarket accessories, such as strap covers or non-approved harness adjusters, may compromise the safety and effectiveness of the car seat.

If you need additional accessories or have any questions regarding the use of accessories with your Graco car seat, it is best to contact the manufacturer or refer to the instruction manual for guidance.

Remember, the safety and effectiveness of the car seat straps are crucial for your child’s protection during travel. Always prioritize using approved and recommended accessories for your Graco car seat.

So, there you have it! Loosening car seat straps on a Graco can be a simple process if you follow the right steps. Remember to always prioritize your child’s safety and ensure that the straps are appropriately secured and adjusted.

First, locate the harness release button and press it to loosen the straps. Then, slide the harness adjuster along the straps to loosen or tighten as needed. Make sure the straps are snug but not too tight, and always double-check the fit before hitting the road.

Conclusion

Properly adjusting and securing the car seat straps in your Graco car seat is vital for your child’s safety and comfort during travel.

Understanding the anatomy of the straps, following the step-by-step guide to loosening them, and implementing additional tips for adjustment will help you ensure that your child is securely fastened and protected while on the road.

Simple Steps to Keep Pollen Off Your Car


When the inevitable arrival of spring brings with it an explosion of pollen, car owners nationwide face the familiar challenge of keeping their vehicles clean and allergen-free. While it may seem like an uphill battle, there are effective ways to prevent pollen from settling on your car’s exterior. So, how can you protect your car from this yellow menace and maintain its pristine appearance?

One of the key strategies to keep pollen off your car is regular washing and waxing. By creating a smooth barrier on the surface, waxing helps prevent pollen from adhering to the paint job. Additionally, consider parking your car in a covered area or a garage, especially during high pollen count days. This simple step can significantly reduce the exposure of your vehicle to pollen, keeping it cleaner for longer periods.

how to keep pollen off car

How to Keep Pollen Off Car

Keeping pollen off your car is important not only for aesthetic reasons but also for the well-being of the vehicle. Pollen can accumulate on the surface of the car, causing an unsightly yellowish layer that can be difficult to remove.

However, it’s not just the appearance that is affected. Pollen particles can also cause damage to the car’s paint and finish over time if not properly cleaned.

Pollen is a common allergen that affects many people, and it can trigger allergies and respiratory issues. By keeping your car free from pollen, you create a healthier environment inside the vehicle, especially for those with pollen-related allergies.

Additionally, regular cleaning and maintenance can help prolong the lifespan of your car’s exterior and prevent any potential damage.

Park in Covered Areas

One effective way to keep pollen off your car is to park it in covered areas whenever possible. Parking your car in a garage or under a carport can provide protection from direct exposure to pollen. This can significantly reduce the amount of pollen that settles on your car’s surface.

If you don’t have access to a covered parking space, consider investing in a car cover. A car cover can provide an extra layer of protection against pollen and other environmental contaminants. Make sure to choose a cover that is specifically designed for your car’s make and model to ensure a proper fit.

When parking in covered areas or using a car cover, it’s important to clean the car cover regularly as it can accumulate pollen and other debris over time. Follow the manufacturer’s instructions for cleaning to keep it in good condition and maintain its effectiveness in keeping pollen off your car.

Additionally, parking under trees or in areas with high pollen counts should be avoided. Trees are a common source of pollen, and parking under them increases the likelihood of pollen landing on your car.

Tips for Cleaning a Car Cover

Cleaning a car cover regularly is essential to ensure it continues to provide proper protection against pollen. Follow these steps to clean your car cover:

  • Remove the car cover from the car.
  • Shake off any loose dirt and debris.
  • Read the manufacturer’s instructions for washing.
  • Hand wash or use a washing machine if recommended.
  • Avoid using harsh detergents or bleach that can damage the material.
  • Allow the cover to air dry completely before placing it back on the car.
  • Inspect the cover for any damages or wear and tear. Replace if necessary.

By following these cleaning tips, you can ensure that your car cover remains in good condition and continues to provide effective protection against pollen and other contaminants.

Additional Tips for Parking in Covered Areas

Here are a few additional tips for parking in covered areas:

  • Keep the covered area clean to minimize the presence of pollen.
  • Regularly sweep or blow away any accumulated debris, including leaves or twigs.
  • Consider using an air purifier or dehumidifier in the covered area to further improve air quality.
  • Inspect the covered area for any signs of mold or mildew, which can also trigger allergies. Take prompt action if necessary.

Implementing these additional measures can contribute to creating a clean and pollen-free environment for your car.

Regular Washing and Maintenance

2. Regular Washing and Maintenance

Regular washing and maintenance are crucial for keeping pollen off your car’s surface. By establishing a cleaning routine, you can effectively remove pollen and prevent it from causing any damage.

Here’s what you need to know:

Use a pH-Neutral Car Wash Soap

When washing your car, it’s important to use a pH-neutral car wash soap. Avoid using household detergents or dish soaps, as they can be too harsh and strip away the car’s protective wax coating. pH-neutral car wash soaps are gentle on the paint and effectively remove dirt, pollen, and other contaminants.

Start by rinsing your car with water to remove any loose debris. Then, using a sponge or wash mitt, apply the pH-neutral car wash soap mixed with water and gently wash the car’s surface. Pay extra attention to areas where pollen tends to accumulate, such as around the side mirrors, grille, and windshield.

After washing, rinse the car thoroughly with clean water. Make sure to remove all soap residue to prevent any streaking or spotting. Finally, dry the car using a microfiber cloth or a soft, lint-free towel.

Waxing and Polishing

Waxing and polishing your car’s exterior is another essential step in keeping pollen off and maintaining its appearance. Waxing creates a protective barrier on the car’s paint, making it easier to remove pollen and other contaminants.

Choose a high-quality car wax that suits your car’s specific needs. Apply the wax using a foam applicator pad in a circular motion, working on one section at a time. Allow the wax to dry according to the manufacturer’s instructions, then use a clean microfiber cloth to buff the wax and achieve a glossy finish.

Polishing can help remove any minor imperfections or scratches on the car’s surface, further enhancing its appearance. Opt for a polishing compound that matches your car’s paint color. Apply a small amount of the compound onto a foam pad and work it into the affected areas using light pressure. Finally, wipe off the residue with a microfiber cloth.

Windshield and Wiper Maintenance

The windshield and wiper blades can accumulate pollen, affecting visibility and potentially causing damage if not properly maintained.

Regularly clean the windshield with a glass cleaner to remove any pollen and maintain clear visibility. Ensure that the wiper blades are clean and in good condition. If the blades are worn or damaged, replace them to ensure optimal performance when removing pollen and other debris from the windshield.

Periodically inspect the wiper fluid reservoir and top it up with a high-quality windshield washer fluid that effectively cleans the glass without leaving streaks. This will help ensure that your windshield remains clear and free from pollen during your drives.

Interior Protection

Pollen can easily find its way into the interior of your car through open windows, ventilation systems, and even on your clothes and belongings. Taking measures to protect the interior can significantly reduce pollen-related allergies and keep your car clean.

Here’s what you can do:

Use Cabin Air Filters

Most modern cars are equipped with cabin air filters that help trap pollen and other contaminants before they enter the vehicle’s interior. These filters should be regularly inspected and replaced as recommended by the manufacturer.

Make sure to choose high-quality cabin air filters that are designed to effectively filter out pollen particles. This will create a cleaner and more comfortable environment inside the car, especially for passengers with allergies.

Keep Windows Closed

It’s advisable to keep your car windows closed while driving during high pollen seasons. This prevents pollen from entering the interior and causing discomfort to passengers with allergies.

If you need fresh air, use the car’s ventilation system and make sure to set it to recirculation mode. This way, the air inside the car is continuously filtered, keeping pollen and other contaminants outside.

Vacuum and Clean the Interior

To remove any pollen particles that may have entered the car, regularly vacuum and clean the interior surfaces. Use a vacuum cleaner with a brush attachment to effectively remove pollen from upholstery, carpets, and floor mats.

Wipe down the dashboard, steering wheel, and other surfaces with a microfiber cloth dampened with a mild cleaning solution. Avoid using harsh chemicals that can damage the interior materials.

If you frequently carry items that may accumulate pollen, such as sports equipment or gardening tools, consider placing them in plastic bags or containers to minimize the spread of pollen particles inside the car.

Regular Maintenance and Inspection

Regular maintenance and inspection of your car can help identify and address issues that may contribute to pollen accumulation or damage. Here are some key areas to focus on:

Check Exterior Seals and Trims

Inspect the exterior seals and trims around windows, doors, and other areas for any signs of wear or damage. Damaged seals can allow pollen to enter the car more easily. If you notice any issues, have them repaired or replaced by a professional.

Check the Air Conditioning System

Regularly check and maintain your car’s air conditioning system, as it plays a crucial role in keeping the interior clean and pollen-free. Ensure that the system is clean and free from any debris that can circulate pollen inside the car.

Replace the cabin air filter regularly and have the system inspected and serviced according to the manufacturer’s recommendations. This will ensure optimal performance and reduce the risk of pollen infiltration into the car’s interior.

Inspect the Exterior Paint

Regularly inspect the exterior paint for any signs of damage or deterioration. Minor scratches or chips in the paint can provide an entry point for pollen particles to settle and accumulate. Promptly address any paint issues to prevent further damage and pollen buildup.

Consider applying a protective coating or paint sealant to add an extra layer of protection to your car’s paint. These products create a barrier that makes it easier to remove pollen and prevent it from adhering to the surface.

Follow Scheduled Maintenance

Adhering to your car’s scheduled maintenance plan is essential for overall upkeep and preventing issues that can contribute to pollen accumulation or damage. Regular oil changes, tire rotations, and other routine maintenance tasks will help keep your car running smoothly and in optimal condition.

Preventing Pollen Build-Up on Your Car

Pollen can be a major nuisance, particularly for car owners who want their vehicles to look clean and neat. Here are some professional tips on how to keep pollen off your car:

  • Wash your car regularly: Cleaning your car frequently with water and a mild soap solution can help remove pollen particles that have settled on its surface.
  • Use a car cover: Covering your car with a breathable car cover can provide an extra layer of protection against pollen.
  • Park in a garage or under a tree canopy: Parking your car in a covered area can shield it from direct exposure to pollen, reducing the chances of pollen accumulation on its surface.
  • Install cabin air filters: Cabin air filters can help trap pollen particles before they enter your car’s interior, keeping the air inside clean and pollen-free.
  • Avoid parking near trees and grassy areas: Trees and grass produce a significant amount of pollen, so parking away from them can minimize the risk of pollen accumulation.

By following these professional tips, you can keep your car looking clean and pollen-free, ensuring a pleasant driving experience even during high pollen seasons.

Frequently Asked Questions

Pollen can be a nuisance when it covers your car, making it look dirty and reducing visibility. Here are some frequently asked questions about how to keep pollen off your car.

How can I prevent pollen from settling on my car?

To prevent pollen from settling on your car, it’s best to park it in a covered area like a garage or carport. If that’s not possible, try using a car cover specifically designed to protect against pollen. Regularly washing your car and drying it with a microfiber cloth can also help remove any pollen that has already settled.

Additionally, keeping your windows closed and using the recirculation feature on your car’s ventilation system can minimize the amount of pollen that enters your car.

Are there any specific products or treatments that can repel pollen?

There are certain products and treatments available that can help repel pollen from your car’s surface. One option is to apply a wax or sealant that creates a barrier between the pollen and your car’s paint. This barrier can make it easier to wash off the pollen and prevent it from sticking to your car in the first place.

You can also use a waterless car wash product that is specifically formulated to remove pollen without the need for water. These products usually contain lubricating agents that help lift the pollen off the surface of your car.

How often should I wash my car during pollen season?

During pollen season, it’s recommended to wash your car at least once a week to remove any pollen that has accumulated. If you notice a thick layer of pollen on your car, it’s best to wash it as soon as possible to prevent it from causing damage to your car’s paint.

Can keeping my car’s interior clean help reduce pollen inside?

Yes, keeping your car’s interior clean can help reduce the amount of pollen inside. Regularly vacuuming your car’s upholstery and carpets can remove any pollen that may have been tracked inside. Using air fresheners or air purifiers with HEPA filters can also help filter out pollen particles from the air inside your car.

It’s also a good idea to regularly wipe down surfaces in your car with a damp cloth to remove any pollen that may have settled.

Are there any natural remedies to keep pollen off my car?

While there are no foolproof natural remedies, there are a few things you can try. For example, you can mix vinegar and water in a spray bottle and use it to wipe down your car’s exterior. Vinegar can help break down pollen and remove it from the surface.

Another option is to park your car under a tree with large leaves that can act as a natural shield against pollen. However, be cautious not to park under a tree with sap or other debris that could damage your car’s paint.

Conclusion

In conclusion, keeping pollen off your car is important to maintain its cleanliness and prevent damage to the paint. By following a few simple steps, such as parking in a covered area, regularly washing and waxing your car, using a car cover, and keeping the windows closed, you can minimize the accumulation of pollen on your car.

Additionally, it is helpful to use a microfiber cloth or a soft brush to gently remove pollen from your car’s surface. Avoid using harsh chemicals or rough materials that could scratch the paint. Taking these precautions will not only keep your car looking its best but also reduce the allergens that can be brought into your vehicle.

Simple Solutions to Fix a Car Bumper Falling Off


Imagine cruising down the road, wind in your hair, when suddenly you hear a loud thud and see your car bumper falling off. It’s a frustrating and potentially dangerous situation, but fear not, because I’m here to guide you through the process of fixing that bumper and getting back on the road.

When it comes to fixing a car bumper that has fallen off, there are a couple of key steps to keep in mind. First, assess the damage and determine if it’s something you can fix yourself or if you’ll need the help of a professional. Then, gather the necessary tools and materials, such as a replacement bumper, screws, and a socket wrench. With these basics in place, you’ll be ready to tackle the repair and restore your car’s appearance and functionality.

how to fix a car bumper falling off

How to Fix a Car Bumper Falling Off

A car bumper is a crucial component that protects your vehicle from minor impacts and collisions. It’s typically made of plastic or fiberglass composite and is designed to absorb and distribute impact forces, minimizing damage to the rest of the car’s body.

However, over time, a car bumper can become loose or even fall off due to wear and tear or an accident.

If you find your car bumper falling off, it’s essential to address the issue promptly to prevent further damage and ensure your safety on the road. In this guide, we will walk you through the step-by-step process of fixing a car bumper that is falling off, so you can get your vehicle back in top shape.

Assess the Damage

Before you begin the repair process, it’s important to assess the extent of the damage to your car bumper. This will help you determine whether it can be fixed or if a replacement is necessary. Here’s what you need to do:

  • Examine the bumper for any visible cracks, dents, or scratches.
  • Check if the bumper is still firmly attached to the car’s body.
  • Test the bumper for any signs of flexibility or looseness.

If the damage is minor and the bumper is still structurally intact, you may be able to fix it yourself. However, if the damage is extensive or compromising the bumper’s integrity, it’s best to consult a professional. They will have the necessary expertise and equipment to handle complex repairs or replacements.

Materials You Will Need

Before you begin the repair process, gather the following materials:

  • Screwdriver or ratchet set
  • Bumper repair kit
  • Sandpaper
  • Adhesive
  • Plastic welding kit (if applicable)

Having these materials on hand will ensure you’re prepared to fix your car bumper effectively.

Step 1: Remove the Bumper

The first step in fixing a car bumper is to remove it from the vehicle. This will give you better access to the damaged area and make the repair process easier. Follow these steps:

  • Locate and remove the screws or bolts holding the bumper in place. These are typically located underneath the vehicle or inside the trunk.
  • Gently pull the bumper away from the car, being careful not to damage any surrounding parts or sensors.
  • Place the bumper on a clean and stable surface to work on.

Removing the bumper may require some force, but be cautious not to apply too much pressure as it can cause further damage.

Step 2: Assess and Repair the Damage

Once the bumper is removed, carefully inspect it for any cracks or damage. If you find any cracks, you can repair them using a bumper repair kit. Follow these steps:

  • Clean the damaged area using soap and water, then dry it thoroughly.
  • Using sandpaper, roughen the damaged area and the surrounding surface to create a better bond for the adhesive.
  • Apply the adhesive from the repair kit to the cracked area, following the product instructions.
  • Hold the cracked area together firmly for the recommended curing time to allow the adhesive to set.
  • Once the adhesive is fully cured, use sandpaper to smooth out the repaired area.

If the damage is extensive or involves a large hole in the bumper, you may need to use a plastic welding kit to repair it. Plastic welding fuses the plastic pieces together, creating a stronger and more durable repair.

Reattaching the Bumper

Reattaching the Bumper

After repairing the damage, it’s time to reattach the bumper to your car. Follow these steps:

Step 1: Align the Bumper

Before securing the bumper in place, make sure it is aligned properly with the rest of the car’s body. Use the following steps:

  • Carefully align the bumper with the car’s body, ensuring an equal distance on both sides.
  • Check the bumper’s fitment with the surrounding panels and adjust if necessary.
  • Double-check that all sensors, connectors, and attachment points are properly aligned.

Step 2: Secure the Bumper

Once the bumper is aligned correctly, it’s time to secure it back in place. Use the following steps:

  • Reinsert the screws or bolts that were previously removed, but don’t tighten them too much just yet.
  • Make sure all the attachment points are properly lined up before fully tightening the screws or bolts.
  • Check for any gaps or misalignments during the tightening process and adjust as necessary.

Step 3: Test the Bumper

After securing the bumper, it’s crucial to test its stability and functionality. Follow these steps:

  • Push and pull the bumper gently to ensure it is securely attached and doesn’t move excessively.
  • Test any sensors or connectors to make sure they are functioning correctly.
  • Inspect the bumper from different angles to ensure it sits flush with the rest of the car’s body.

Preventing Bumper Damage in the Future

Now that you’ve successfully fixed your car bumper, it’s important to take steps to prevent future damage. Here are some tips:

Practice Safe Driving

One of the best ways to prevent bumper damage is to practice safe driving techniques. Avoid tailgating, excessive speeding, and reckless maneuvers that can lead to collisions or impacts. By maintaining a safe distance from other vehicles and driving defensively, you can significantly reduce the risk of bumper damage.

Park with Caution

Be mindful of your surroundings when parking your car. Avoid parking too close to other vehicles or obstacles that may accidentally hit your bumper. If possible, park in designated parking spaces, away from high-traffic areas or tight parking spots.

Perform Regular Maintenance

Regular maintenance can help prevent bumper damage caused by wear and tear. Keep your car clean and inspect the bumper for any signs of damage regularly. Promptly address any minor issues, such as scratches or cracks, to prevent them from escalating into more significant problems.

Install Bumper Guards

If you frequently park in areas where bumper damage is more likely, such as crowded parking lots, consider installing bumper guards. Bumper guards, also known as bumper protectors, are protective strips or bars that can help absorb impact and prevent direct contact with the bumper, reducing the risk of damage.

By following these prevention tips, you can minimize the chances of your car bumper falling off or getting damaged in the future.

FAQs

Why did my car bumper fall off?

Car bumpers can fall off due to various reasons such as collisions, accidents, wear and tear, or improper installation. It’s essential to identify the specific cause to determine the appropriate fix.

Can I fix a loose car bumper at home?

In many cases, you can fix a loose car bumper at home. Simple issues like loose bolts, clips, or brackets can be addressed with basic tools.

However, more severe damage may require professional assistance.

What tools do I need to fix a loose car bumper?

Depending on the issue, you may need tools such as a socket set, screwdrivers, pliers, a pry bar, and possibly a heat gun for plastic bumpers. Having the right tools ensures a more effective and efficient repair process.

How do I prevent my car bumper from falling off again?

Regular maintenance is crucial for preventing bumper issues. Inspect your bumper for loose components, rust, or signs of damage. Properly secure loose parts, address any damage promptly, and consider professional inspections for a more thorough assessment.

Conclusion

Fixing a car bumper that is falling off requires careful assessment, repair, and reattachment. By following the step-by-step process outlined in this guide, you can effectively address the issue and restore your car’s bumper to its proper condition. Remember to prioritize safety and seek professional help if needed.

Additionally, take proactive measures to prevent bumper damage in the future by practicing safe driving, parking with caution, performing regular maintenance, and considering bumper guards. With proper care, you can keep your car’s bumper intact and ensure a safe and enjoyable driving experience.

How to Get Pee Smell Out of Your Car Without Hassle


When you find yourself dealing with the unpleasant odor of pee in your car, it can be both frustrating and embarrassing. Whether it’s from a spilled drink, a pet accident, or a potty-training mishap, getting rid of the pee smell is essential to restore freshness and comfort to your vehicle. Fortunately, there are effective methods to tackle this problem head-on and eliminate the odor for good.

One of the key aspects of removing pee smell from your car is addressing the source of the odor. It’s important to thoroughly clean and sanitize the affected area to prevent the smell from lingering. Start by using a mixture of white vinegar and water to scrub the surface, as vinegar is known for its deodorizing properties. Alternatively, you can try using a specialized odor-eliminating spray designed for removing pet odors.

Additionally, consider using baking soda to absorb any remaining odors. Leave an open box of baking soda in your car overnight to help neutralize the smell. By taking these steps, you can effectively banish the pee smell from your car and enjoy a fresh and pleasant driving experience once again.

How to Get Pee Smell Out of Car

How to Get Pee Smell Out of Car

It’s unfortunate, but accidents happen, and sometimes that includes accidents involving urine in your car. Whether it’s a child’s mishap, a pet accident, or an unforeseen circumstance, dealing with the lingering smell of urine in your car can be quite challenging.

However, with the right approach and a little know-how, you can effectively eliminate the pee smell and restore freshness to your vehicle. In this article, we’ll explore some expert tips and techniques to get rid of the pee smell from your car.

1. Immediate Action: Cleaning Up the Spill

The first step in eliminating the pee smell from your car is to clean up the spill as soon as possible. The longer urine sits, the stronger the smell becomes. Here’s what you need to do:

  • Blot up any excess urine with paper towels or clean cloths.
  • Mix a solution of equal parts water and white vinegar.
  • Using a clean cloth or sponge, gently dab the affected area with the vinegar solution.
  • Repeat the process until the area is thoroughly cleaned.

By following these steps, you can remove a significant portion of the urine and neutralize the odor, minimizing further damage and allowing for more effective cleaning.

2. Removing Odor from Car Upholstery

Once the initial spill has been cleaned, it’s time to tackle the odor that may have seeped into the upholstery. Here are some techniques to remove the pee smell from your car upholstery:

Baking Soda:

  • Sprinkle baking soda generously over the affected area.
  • Let it sit for a few hours or overnight to absorb the odor.

Enzyme Cleaner:

  • Purchase an enzyme cleaner specifically designed for removing urine odors.
  • Follow the instructions on the product and apply it to the affected area.
  • Allow the cleaner to sit for the recommended amount of time.

Steam Cleaning:

  • If the odor persists, consider steam cleaning the upholstery.
  • Be sure to use a cleaner suitable for your car’s upholstery material.

By using these methods, you can effectively eliminate the urine odor from your car upholstery and restore freshness to your vehicle.

3. Deodorizing the Air

Even after cleaning the upholstery, the pee smell may persist in the air inside your car. Here are some techniques to deodorize the air:

Air Fresheners:

  • Use car air fresheners specifically designed to neutralize odors.
  • Choose fragrances that are known to eliminate strong odors, such as citrus or cotton.

Baking Soda:

  • Place an open container of baking soda in your car overnight.
  • Baking soda helps absorb and neutralize odors.
  • Replace the baking soda every few weeks to maintain its effectiveness.

Ventilation:

  • Roll down the windows and let fresh air circulate through the car.
  • Use fans or air vents to encourage airflow and remove stale odors.

    These methods will help freshen up the air inside your car and eliminate any lingering urine smell.

    4. Professional Cleaning Services

    If all else fails or if you prefer to leave the task to professionals, you can seek the help of professional car cleaning services. These experts have the necessary equipment and knowledge to thoroughly clean and deodorize your car, ensuring the complete removal of the pee smell. They may use specialized steam cleaners, ozone machines, or other techniques to eliminate the odor.

    Ensure that you choose a reputable professional cleaning service that specializes in removing odors from cars. They will assess the situation and provide the most effective solution for your specific needs.

    How to Remove the Smell of Urine from Your Car

    If you have encountered the unpleasant situation of finding urine in your car, you may be wondering how to effectively get rid of the lingering odor. Here are some professional tips:

    • Act quickly: The sooner you can address the issue, the better chance you have of eliminating the smell completely.
    • Blot the area: Use paper towels or a clean cloth to absorb as much of the urine as possible.
    • Clean with an enzyme cleaner: Enzyme cleaners are specially formulated to break down the proteins in urine and eliminate the odor. Follow the instructions on the product label.
    • Avoid using ammonia-based cleaners: Ammonia can actually intensify the smell of urine.
    • Deodorize the car: Sprinkle baking soda on upholstery or carpeting, let it sit for a few hours, and then vacuum it up.
    • Use odor absorbers: Place an open box of baking soda or charcoal in the car to help absorb any remaining odors.

    Remember, it’s important to thoroughly clean and remove the urine to prevent any staining or further odor development. If the smell persists, it may be necessary to seek professional car detailing services.

    How to Remove the Smell of Urine from Your Car

    Frequently Asked Questions

    Having a lingering pee smell in your car can be quite unpleasant. Here are some frequently asked questions about how to get rid of the pee smell and ensure a fresh-smelling car interior.

    How can I remove the pee smell from my car?

    To remove the pee smell from your car, start by blotting up any excess urine with paper towels. Then, mix a solution of one part white vinegar and two parts water. Drench the affected area with this solution and allow it to sit for 10-15 minutes. Blot up the solution and rinse the area thoroughly with clean water. Finally, sprinkle baking soda on the spot, let it sit for a few hours, and vacuum it up.

    If the smell persists, you may need to use a commercial odor eliminator specifically designed for removing urine odors. Follow the instructions on the product packaging for best results.

    Can I use bleach to get rid of the pee smell in my car?

    No, it is not recommended to use bleach to remove the pee smell from your car. Bleach is a harsh chemical that can damage the interior fabric or upholstery of your car. Additionally, the strong smell of bleach can be overwhelming and linger in the car for a long time. It is best to use gentler and safer alternatives like vinegar and baking soda to eliminate the pee smell.

    How can I prevent pee smells from returning in my car?

    To prevent pee smells from returning in your car, it is important to act quickly when accidents happen. Blot up any urine immediately and clean the area thoroughly using a vinegar and water solution. Regularly vacuum and shampoo your car’s interior to keep it clean and fresh. You can also use odor-absorbing products, such as activated charcoal or air fresheners, to maintain a pleasant smell in your car.

    What if the pee smell persists after cleaning?

    If the pee smell persists after cleaning, it may have seeped into the car’s upholstery or padding. In such cases, it is best to seek professional help from a car detailing service. They have specialized equipment and products to thoroughly clean and deodorize your car’s interior, ensuring that the pee smell is completely eliminated.

    Can I use home remedies to get rid of the pee smell in my car?

    Yes, home remedies like vinegar, baking soda, and activated charcoal can be effective in removing the pee smell from your car. However, it’s important to note that the success of home remedies may vary depending on the severity of the odor and the type of upholstery in your car. If the smell persists or is particularly strong, it is advisable to seek professional help to ensure complete odor removal.

    Conclusion

    In conclusion, removing the pee smell from your car requires a combination of thorough cleaning and deodorizing techniques. Start by thoroughly cleaning the affected area with a mixture of water and mild detergent, and then apply a specialized enzymatic cleaner to break down the odor-causing molecules. Allow the cleaner to penetrate the upholstery or carpet fibers and then blot it dry.

    Additionally, you can sprinkle baking soda on the affected area and leave it overnight to absorb any lingering odor. Vacuum the baking soda the next day to remove it. If the smell persists, consider using an odor neutralizing spray or placing odor-absorbing materials, like charcoal or coffee grounds, in your car. Regularly airing out your car and keeping it clean will also help prevent future odors from developing.