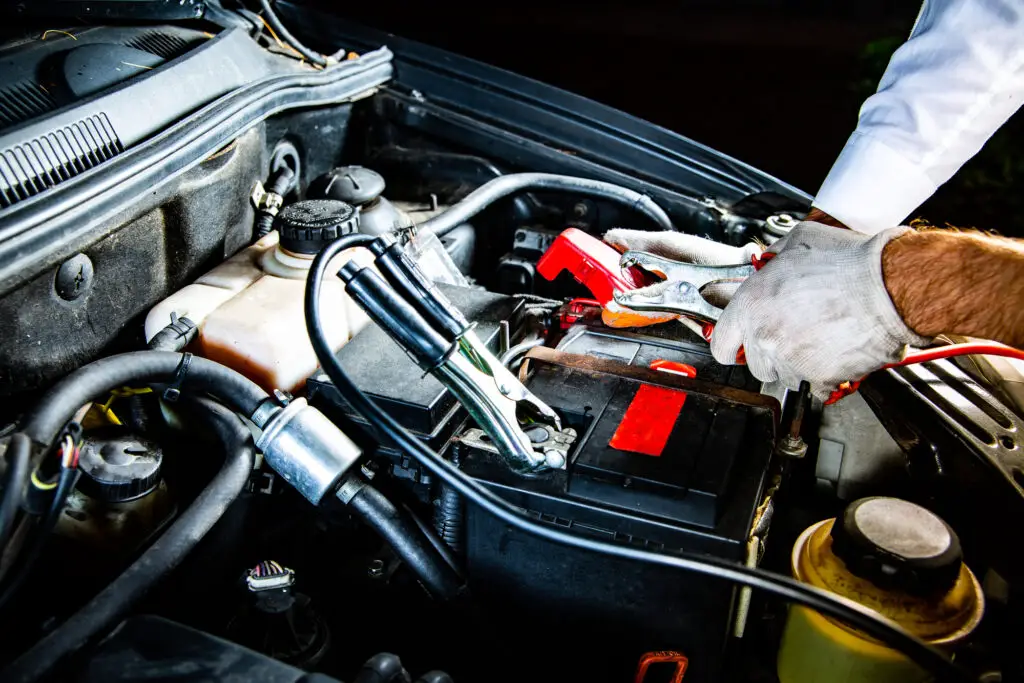
Recent Posts

How to Navigate Car Insurance?


Picture this: a sudden fender-bender, a perplexing insurance claim, or hearing a friend’s car accident saga. These moments are not just anecdotes; they highlight the importance of comprehending the intricacies of car insurance.

In this comprehensive guide, we delve into the world of car insurance, unraveling its complexities and empowering you with the knowledge to navigate it effectively. Beyond the jargon and policies lies a shield against unforeseen circumstances – an understanding of car insurance that not only saves money but also alleviates the stress that often accompanies unexpected vehicular mishaps. Join us as we unravel the mysteries of car insurance, ensuring you’re well-equipped to handle any road ahead.

How to Navigate Car Insurance
Credit: brze.sg

Understanding Car Insurance Basics

Understanding the fundamentals of car insurance is essential:

Explaining Coverage Types

  • Liability: Covers damage you cause to others.
  • Collision: Handles damage to your car in an accident.
  • Comprehensive: Protects against non-collision events (theft, natural disasters).
  • Uninsured/Underinsured Motorist: Steps in if the other driver is at fault but lacks insurance.
  • Personal Injury Protection: Covers medical expenses regardless of fault.

Policy Components

  • Deductibles: Out-of-pocket expenses before insurance kicks in.
  • Premiums: Regular payments for coverage.
  • Coverage Limits: Maximum amount the insurance will pay.

State Requirements

Insurance requirements vary by state, impacting coverage and policy costs. Understanding these differences is vital for drivers.

Factors Affecting Insurance Rates
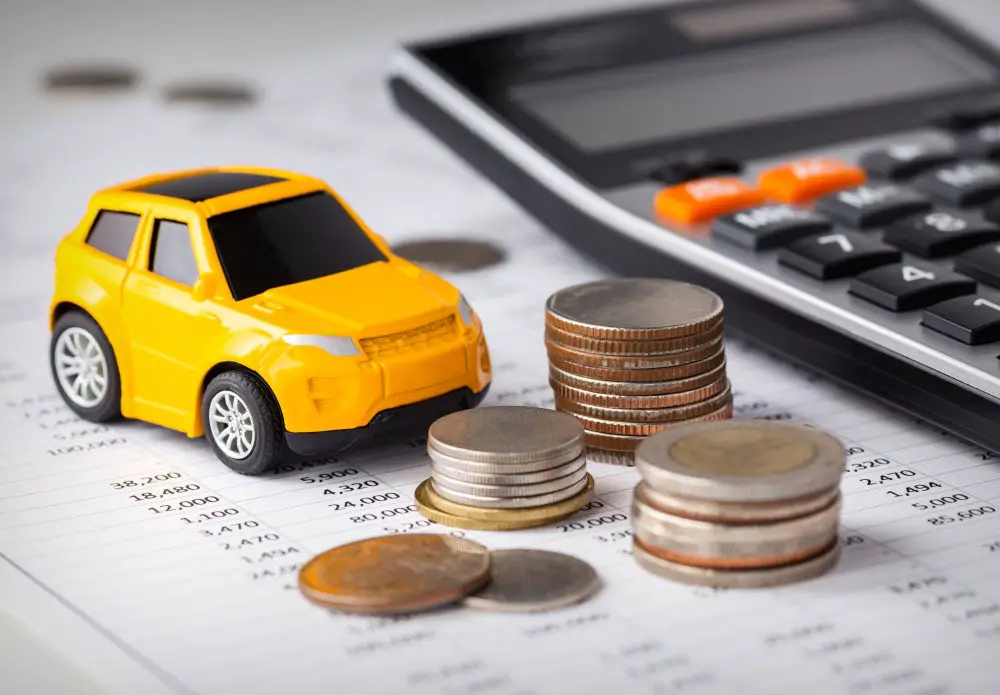
Factors Affecting car Insurance Rates
Credit: verified.org

Several factors influence insurance premiums:

Driving Record

Accidents or violations increase premiums due to higher perceived risk.

Vehicle Type

The make, model, and age of the car affect insurance costs. Luxury or high-performance cars often have higher premiums.

Location

Residing in areas prone to accidents, theft, or with higher traffic congestion can lead to increased insurance rates.

Credit Score

Credit scores can impact premiums; better scores may result in lower rates due to perceived financial responsibility.

Understanding these factors allows drivers to make informed decisions, find suitable coverage, and potentially lower insurance costs based on their circumstances.

Tips to Lower Insurance Costs

Saving on insurance requires strategic approaches:

Comparison Shopping

Comparing rates from various insurers helps find the best coverage at competitive prices.

Bundle Policies

Bundling home and auto insurance with the same provider often results in discounted rates.

Safe Driving Habits

Maintaining a clean driving record through safe practices can lead to premium discounts.

Vehicle Safety Features

Vehicles equipped with safety features like anti-theft devices or airbags often qualify for reduced premiums.

Usage-Based Insurance

For low-mileage drivers, pay-as-you-drive insurance offers tailored rates based on actual usage.

Making a Claim and Dealing with Insurers

Navigating claims requires specific steps and effective communication:

Step-by-Step Claim Process

Understanding what to do after an accident and the procedure for filing a claim is essential.

Communicating with Insurers

Tips for effective communication with insurers and comprehending the claim settlement process can expedite the resolution.

Dispute Resolution

Guidance on handling claim disputes or denied claims ensures policyholders understand their options in such scenarios.

FAQs

How often should I shop around for car insurance quotes?

Regularly comparing insurance quotes is beneficial, especially during policy renewal or major life changes like moving, purchasing a new car, or significant changes in your driving habits.

Experts recommend reviewing quotes at least once a year to ensure you have the best coverage at competitive rates.

Will my insurance rates increase after making a claim?

In many cases, filing a claim can result in increased premiums during the renewal period, especially for at-fault accidents. However, the degree of increase can vary based on the severity of the claim, your driving history, and the insurer’s policies.

It’s advisable to weigh the cost of repairs against potential rate hikes before filing a claim.

How do I dispute a claim denial or settlement offer?

If your claim is denied or you disagree with the settlement offered by the insurer, you have the right to dispute it. Start by reviewing your policy to understand coverage details. Document all communications, gather evidence, and present a clear, detailed case to your insurer.

If needed, seek assistance from state insurance regulators or legal counsel for further guidance or mediation.

Wrap Up


Understanding the complexities of car insurance empowers drivers to make informed decisions. From comprehending coverage types to adopting practices that lower costs, this knowledge is invaluable. By learning to navigate claims effectively and maximizing potential savings, drivers can protect themselves and their vehicles efficiently.

Applying these strategies not only ensures adequate coverage but also contributes to a more secure and cost-effective driving experience on the road.

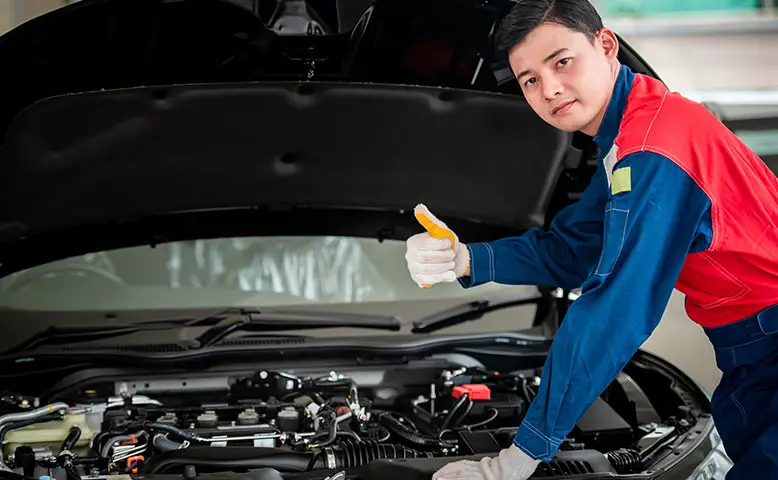
How to Extend the Lifespan of Your Car?


Your car isn’t just a mode of transport; it’s an investment deserving of care and attention. Extending its lifespan isn’t merely about mileage; it’s a testament to responsible ownership. In this guide, we unravel the significance of nurturing your vehicle to secure its longevity. Beyond saving money on repairs and replacements, maintaining your car ensures reliability and performance.

Explore the pivotal factors influencing a car’s lifespan, from meticulous maintenance practices and mindful driving habits to the impact of environmental conditions and technological advancements. Join us on a journey to unlock the secrets of preserving your car’s vitality and ensuring many more miles of dependable service.

Credit: texomaautorepair.com

Regular Maintenance

Scheduled Service Checks

Routine maintenance, as recommended by the manufacturer, is crucial for a vehicle’s health. This includes timely oil changes, filter replacements, and regular checks of vital fluids like coolant and brake fluid. Adhering to these service intervals ensures optimal performance, extends the vehicle’s lifespan, and prevents potential breakdowns.

Importance of Inspections

Periodic inspections of brakes, tires, belts, and hoses are preventive measures to catch issues early. Checking brake pads, tire tread, and assessing belt and hose conditions allows for timely replacements, preventing unexpected failures that could lead to accidents or expensive repairs.

Driving Habits for Longevity

Driving Habits for Longevity
Credit: carfromjapan.com

Gentle Driving

Encouraging gentle driving habits, such as smooth acceleration and braking, reduces stress on engine components. It minimizes wear on parts like the transmission, engine, and brakes, preserving their longevity and performance over time.

Consistent Speeds

Maintaining consistent speeds on highways reduces strain on the engine and transmission. Avoiding sudden accelerations or frequent braking not only improves fuel efficiency but also reduces wear on various mechanical components, contributing to the vehicle’s overall durability.

Adopting these driving habits and adhering to regular maintenance schedules ensures a vehicle’s longevity, enhances performance, and minimizes the likelihood of unexpected breakdowns. Taking proactive measures benefits both the vehicle’s health and the driver’s peace of mind on the road.

Environmental Care and Storage

Sheltering from Elements

Parking in covered spaces or using car covers shields the vehicle from elements like rain, snow, and UV rays, preserving its exterior and reducing the risk of rust, paint fading, and damage to sensitive parts.

Proper Storage Techniques

For seasonal or long-term storage, preparing the vehicle includes:

  • Fluid Checks: Ensuring fluids are at adequate levels to prevent issues like battery corrosion or brake fluid deterioration.
  • Battery Care: Disconnecting or using a battery maintainer to avoid draining during storage.
  • Tire Care: Inflating tires to the recommended pressure and occasionally moving the vehicle to prevent flat spots.

Technology and System Maintenance

Understanding Vehicle Systems

Encouraging drivers to comprehend their car’s systems and electronics helps prevent neglect or oversight of vital components. Familiarity with systems like the engine, transmission, and electrical systems enables better care and prompt attention to any abnormalities.

Updating Software

Regularly updating vehicle software is vital for optimal performance and safety. Software updates often address bugs, improve functionality, and enhance system efficiency. Updated software not only ensures smooth operations but also contributes to the vehicle’s overall longevity and reliability.

Empowering drivers with knowledge about environmental care, proper storage, and technological understanding facilitates proactive measures to safeguard their vehicles. Implementing these practices not only prolongs a vehicle’s lifespan but also ensures a smoother driving experience with fewer issues over time.

FAQs

How often should I update my vehicle’s software, and how can I do it?

Vehicle software updates can vary based on the manufacturer’s recommendations. Generally, it’s advisable to check for updates at least once a year or as advised by the manufacturer. Updates can be performed at authorized service centers, through USB drives provided by the manufacturer, or via over-the-air updates if supported by the vehicle’s system.

Can I store my vehicle for an extended period without any preparation?

Leaving a vehicle unprepared for extended storage can lead to various issues. To properly store a vehicle, it’s crucial to check fluid levels, especially the battery, and ensure the tires are adequately inflated.

Using a trickle charger for the battery and periodically moving the vehicle can prevent damage from prolonged inactivity.

Are car covers necessary if my vehicle is parked in a garage?

While a garage provides protection, a car cover offers an added layer of defense against dust, moisture, and minor scratches. Even in a garage, environmental factors can affect the vehicle, making a cover beneficial in preserving the paint and reducing exposure to elements that could affect various components over time.

Wrap Up

Caring for your vehicle extends far beyond the road. From routine maintenance to environmental protection and understanding your car’s systems, each aspect contributes to its longevity. Shielding your vehicle from elements, mastering proper storage, and staying updated on software ensure it remains in top condition.

Embracing these practices isn’t just about preserving the vehicle—it’s an investment in reliability, efficiency, and a smoother driving experience for years ahead.

How many Kilometers Need to Change Engine Oil for Car?


Maintaining a healthy engine hinges on a simple yet crucial ritual: regular oil changes. This blog unveils the significance of this fundamental aspect of car maintenance. Engine oil serves as the lifeblood of your vehicle, ensuring smooth operation and longevity.

Delve into the factors that sway the intervals between oil changes, from the impact of driving conditions to the type of oil used. Understanding these nuances is key to optimizing your car’s performance and safeguarding the heart of your vehicle against wear and tear. Join us as we navigate the intricacies of determining the ideal kilometers for your next engine oil change.

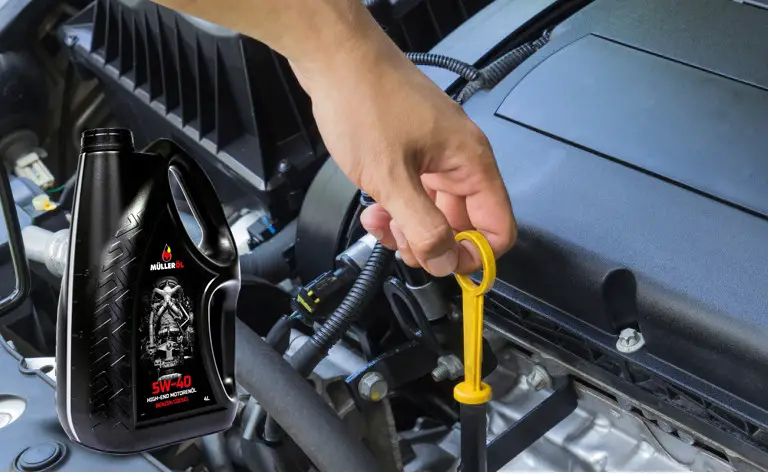
How many kilometers need to change engine oil for car
Credit: eng.mullerol.com

Understanding Oil Change Intervals

Manufacturer Recommendations

Manufacturers specify oil change intervals in the owner’s manual based on extensive testing and research for each vehicle model. These recommendations consider various factors like engine design, oil type, and driving conditions, offering tailored guidance for optimal engine performance and longevity.

Standard Guidelines

Conventional Oil: Typically, for vehicles using conventional oil, a common guideline is an oil change every 3,000 to 5,000 miles (4,800 to 8,000 kilometers).

Synthetic Oil: With synthetic oils, which offer enhanced durability, the interval can extend to 7,500 to 10,000 miles (12,000 to 16,000 kilometers). Some high-performance synthetics may even allow longer intervals.

These are general guidelines; however, specific recommendations may vary based on the vehicle’s make, model, and year.

Factors Influencing Oil Change Frequency

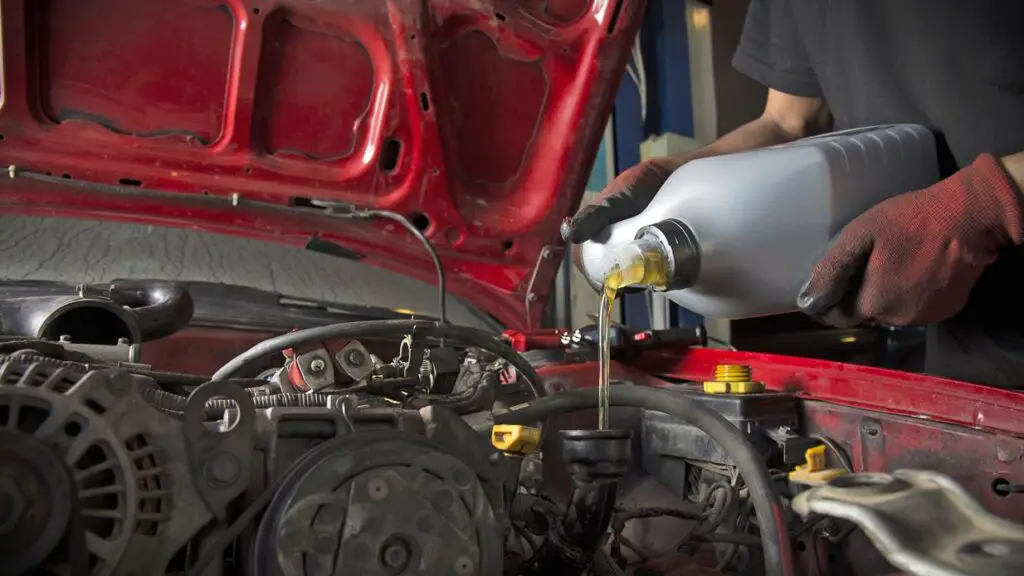
Factors Influencing Oil Change Frequency
Credit: machinerylubrication.com

Driving Habits

Frequent short trips, stop-and-go driving, or towing heavy loads can accelerate engine wear and contamination due to increased heat and stress. In such cases, it’s advisable to consider shorter oil change intervals, as these driving habits lead to quicker oil degradation.

Environmental Conditions

Extreme weather conditions, whether excessively hot or cold, can impact oil viscosity and its ability to lubricate effectively. High temperatures can cause oil to break down faster, necessitating more frequent changes.

Similarly, cold climates can lead to moisture buildup in the oil, affecting its performance and warranting closer attention to change intervals.

Signs Indicating Oil Change

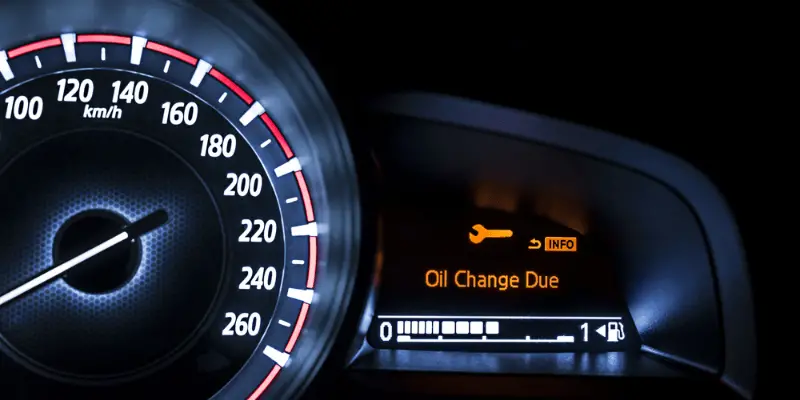
Signs Indicating Oil Change
Credit: drivesmartwarranty.com

Monitoring Oil Levels

Regularly checking oil levels using the dipstick is crucial for maintaining engine health. Drivers should ensure the oil level falls within the recommended range, topping off as necessary with the appropriate oil type.

Recognizing Warning Signs

  1. Engine Noise: Unusual engine sounds, like knocking or ticking, could indicate insufficient lubrication, signaling the need for an oil change.
  2. Decreased Fuel Efficiency: A sudden drop in fuel efficiency without any other apparent cause might suggest that the engine is working harder due to old or degraded oil.
  3. Dark, Gritty Oil: If the oil on the dipstick appears significantly dark or contains gritty particles, it’s a clear indicator that an oil change is overdue.

Customizing Oil Change Intervals

Consultation with a Mechanic

Seeking advice from a qualified mechanic allows for personalized recommendations tailored to individual driving patterns and vehicle conditions. A mechanic can assess factors like driving habits, environmental conditions, and the vehicle’s specific needs to suggest optimal oil change intervals.

Using Oil Life Monitors

Modern vehicles equipped with oil life monitors analyze engine conditions and driving patterns to calculate the optimal time for an oil change. These monitors consider various factors, providing drivers with more accurate and personalized recommendations for oil change intervals based on real-time data.

Encouraging drivers to be vigilant about both proactive checks and responsive action to signs of necessary maintenance ensures the engine remains in peak condition and extends its longevity. Consulting professionals and utilizing modern vehicle technologies further aids in customizing maintenance schedules for optimal performance.

Is it okay to Exceed the Recommended Oil Change Interval If the Oil Still Looks Clean on the Dipstick?

While clean-looking oil on the dipstick might indicate its cleanliness, it doesn’t necessarily reflect its lubricating properties or ability to protect the engine. Oil degrades over time due to heat, contaminants, and additives breaking down. It’s advisable to adhere to the manufacturer’s recommended oil change intervals for optimal engine health, even if the oil appears clean. Regular changes ensure the engine operates at its best and remains protected from wear and tear.

FAQs

How often should I check my oil level?

Regularly checking your oil level is essential for your engine’s health. Aim to check it at least once a month or before long trips. Additionally, it’s advisable to check before any extended drives, especially if your vehicle has shown signs of oil consumption or leaks.

Can I switch from conventional oil to synthetic oil, and how does it affect oil change intervals?

Switching from conventional to synthetic oil is possible and often beneficial. Synthetic oils offer superior longevity and performance, allowing for extended oil change intervals. However, when transitioning, it’s recommended to follow the conventional oil change schedule for the first couple of changes to allow the engine to adapt to the new oil before extending intervals.

Always consult your owner’s manual or a mechanic for specific guidance.

Wrap Up


Understanding your vehicle’s oil change needs is key to its longevity. Regular checks, recognizing warning signs, and customizing intervals based on driving habits ensure optimal engine health. By staying attentive to oil levels and heeding indications for an oil change, drivers can preempt engine issues.

Consulting professionals and utilizing technology further empowers car owners to tailor maintenance, ensuring engines run smoothly for miles to come.

How to Change your Car’s Oil?


Regular oil changes stand as a cornerstone in the realm of car maintenance, holding the key to your engine’s longevity and performance. In this comprehensive guide, we unveil the importance of this seemingly simple yet crucial task. Engine oil, the lifeblood of your vehicle, plays a pivotal role in lubricating engine components, reducing friction, and dissipating heat.

This article is your go-to manual, offering insights into the step-by-step process of changing your car’s oil. From understanding the significance of this maintenance ritual to navigating the intricate steps involved, join us in mastering the art of preserving your engine’s health and ensuring a smooth ride on the road ahead.

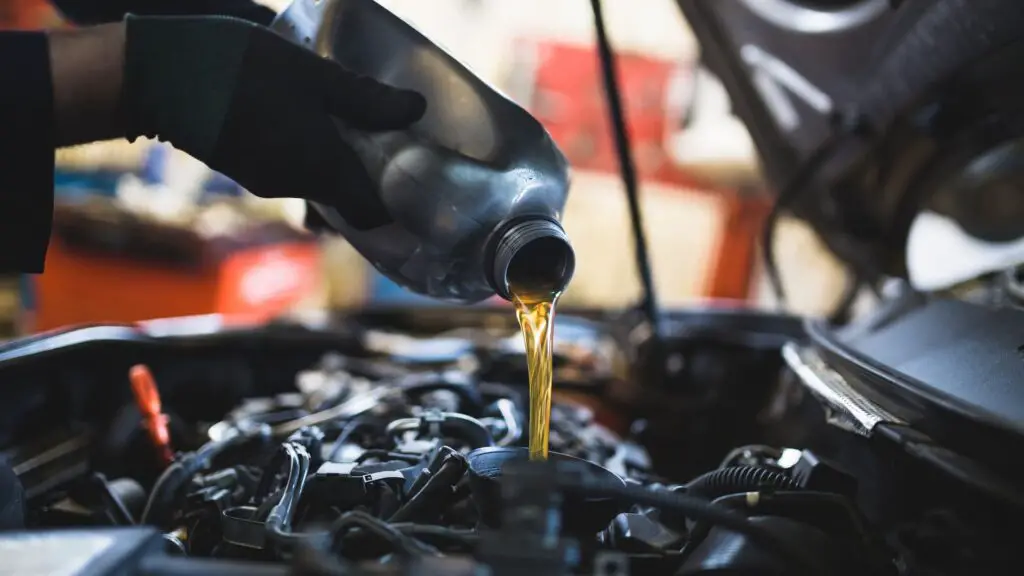
how to change your car's oil
Credit: repairsmith.com

Gathering Tools and Supplies

Necessary Tools

  1. Oil Filter Wrench: Essential for removing and installing the oil filter.
  2. Oil Drain Pan: To collect and dispose of the old oil safely.
  3. Socket Wrench Set: Needed to remove the oil drain plug.

Required Supplies

  1. Correct Type and Amount of Oil: Refer to the vehicle manual for the recommended oil type and quantity.
  2. New Oil Filter: Ensure it matches the specifications for your vehicle.

Preparing for the Oil Change

Park the Car

Find a suitable location with:

  • Level Ground: Ensures proper draining of the oil from the engine.
  • Adequate Space: Allow enough room to work comfortably around the vehicle.

Precautionary Measures

  1. Safety Gear: Wear protective gloves and goggles to prevent contact with hot oil and other fluids.
  2. Wheel Blocks: Place blocks behind the rear wheels to prevent the car from rolling while lifted.

Taking these preparatory steps ensures a safe and efficient oil change process, providing a secure working environment and the necessary tools and supplies for the task.

Draining the Old Oil

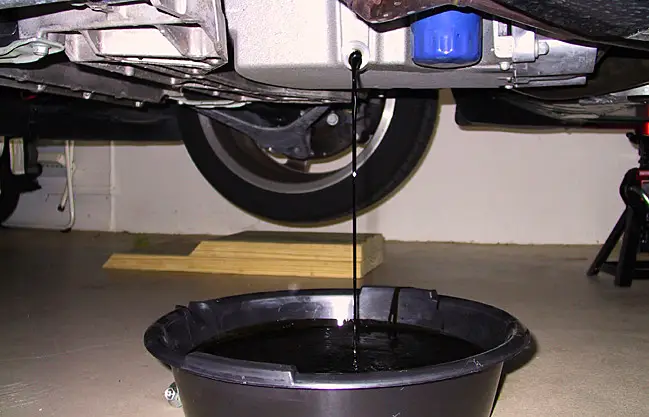
Draining the Old Oil
Credit: newroads.ca

Locating the Oil Drain Plug

  1. Finding the Drain Plug: Typically located on the underside of the engine.
  2. Importance of Locating: Identifying the drain plug before lifting the vehicle ensures a smoother draining process and prevents confusion during the oil change.

Draining the Oil

Step-by-Step Process:

  1. Prepare the Area:
    • Place the oil drain pan beneath the oil drain plug.
  2. Loosen the Drain Plug:
    • Use a socket wrench to carefully loosen the drain plug.
    • Position the drain pan to catch the oil as it drains.
  3. Drain the Oil:
    • Fully remove the drain plug and allow the old oil to drain completely into the pan.
    • Check the drain plug for any signs of damage or excessive wear.

Changing the Oil Filter

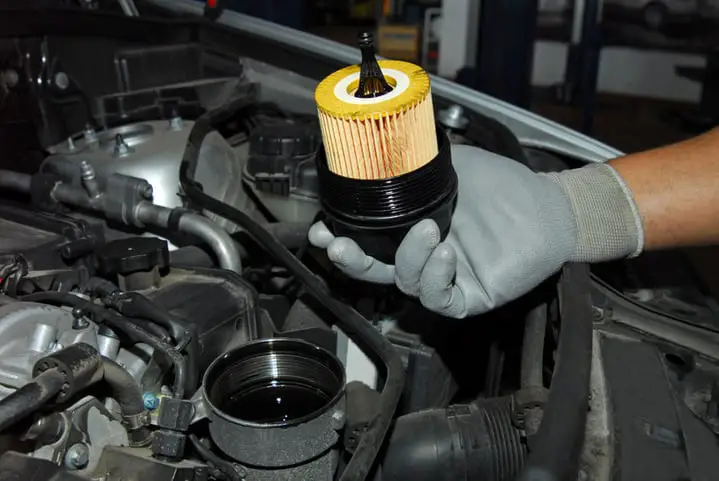
Changing the Oil Filter
Credit: brakemax.com

Removing the Old Oil Filter

Steps for Removal:

  1. Access the Oil Filter:
    • The oil filter is typically located near the engine.
  2. Use the Oil Filter Wrench:
    • Place the oil filter wrench around the filter and turn it counterclockwise to loosen the old filter.
    • Be prepared for some residual oil to spill, so have the drain pan handy.

Installing the New Oil Filter

Installation Guidelines:

  1. Prepare the New Filter:
    • Apply a thin layer of clean oil on the gasket of the new oil filter.
    • This helps with sealing and prevents the filter from sticking during future removal.
  2. Install the New Filter:
    • Hand-tighten the new oil filter onto the engine where the old one was removed.
    • Ensure it’s snug but avoid overtightening, which could damage the filter or its housing.

By following these step-by-step instructions, you’ll effectively drain the old oil and replace the oil filter, completing the crucial stages of an oil change process for your vehicle.

Adding New Oil

Locating the Oil Fill Cap

  1. Finding the Oil Fill Cap:
    • Usually located on the top of the engine and marked with an oil can or the word “oil.”
    • It’s essential to use the correct cap to prevent leaks and ensure a proper seal.
  2. Correct Type and Amount of Oil:
    • Refer to your vehicle manual for the recommended oil type and quantity.
    • Using the right oil is crucial for optimal engine performance and longevity.

Pouring in the New Oil

Step-by-Step Instructions:

  1. Using a Funnel:
    • Place a funnel into the oil fill opening to prevent spills.
  2. Adding New Oil:
    • Slowly pour the recommended amount of new oil into the engine.
    • Allow time for the oil to settle, then recheck the oil level using the dipstick.

Final Checks and Clean-Up

Checking for Leaks

  1. Inspect Under the Vehicle:
    • Look underneath the car for any signs of oil leaks around the oil drain plug or filter.
    • Address any leaks immediately to prevent further issues.

Disposal and Clean-Up

  1. Proper Disposal of Old Oil:
    • Pour the used oil from the drain pan into a sealable container.
    • Take the container to a recycling center or an auto parts store for proper disposal.
  2. Cleaning the Workspace:
    • Wipe any spilled oil with absorbent materials.
    • Dispose of used materials properly, avoiding environmental contamination.

Completing these final checks and clean-up tasks ensures a clean workspace and proper disposal of the old oil, allowing you to finish the oil change process conscientiously and safely.

FAQs

How often should I change my car’s oil?

It’s recommended to change your car’s oil every 5,000 to 7,500 miles or as suggested in your vehicle’s manual. However, this interval might vary based on your driving habits and the type of oil used. Always refer to your car’s manual for the manufacturer’s specific recommendations.

Can I reuse old oil filters or dispose of them with regular household waste?

It’s not advisable to reuse old oil filters. Once removed, they tend to contain used oil and contaminants, so it’s best to replace them with new filters. Additionally, used oil filters should not be disposed of in regular household waste due to environmental concerns. Local recycling centers or auto parts stores often accept used filters for proper disposal.

Conclusion

Maintaining your car’s oil is more than a routine; it’s a commitment to your vehicle’s well-being. Following the step-by-step process—from gathering tools to disposing of old oil—ensures a smoother, cleaner, and safer oil change.

Regular maintenance isn’t just about keeping your car running; it’s about preserving its heart—the engine. By adhering to a consistent oil change schedule, you’re investing in reliability, longevity, and the continued joy of driving a healthy, well-cared-for vehicle.

How to Perform Basic Car Maintenance?


In the realm of car ownership, the significance of regular maintenance cannot be overstated. It’s the cornerstone of ensuring your vehicle’s longevity, safety, and top-notch performance. This article serves as a guide, shedding light on the importance of basic car maintenance practices that every driver should embrace. From routine checks to minor fixes, we’ll explore various aspects integral to keeping your car in optimal condition.

Join us as we delve into the essentials of basic car maintenance, equipping you with the knowledge and skills to care for your vehicle and pave the way for smooth travels on the road ahead.

How to Perform Basic Car Maintenance
Credit: paautoinspection.com

Checking and Changing Engine Oil

Importance of Engine Oil

Engine oil is the lifeblood of a car engine, providing lubrication to moving parts, reducing friction, and preventing wear and tear. It also helps in cooling the engine by carrying away heat. Without proper lubrication, the engine components can wear out quickly, leading to overheating and potential engine failure.

Step-by-Step Guide for Checking and Changing Engine Oil

Step-by-Step Guide for Checking and Changing Engine Oil
Credit: caranddriver.com

Tools Needed

  • Car jack and stands (if required)
  • Socket wrench and appropriate socket for oil drain plug
  • Oil filter wrench
  • Funnel
  • New oil filter
  • New engine oil
  • Oil pan or container for old oil disposal

Frequency

Typically, oil should be checked every 3,000 to 5,000 miles, and changed every 5,000 to 7,500 miles, but it’s best to follow the manufacturer’s recommendations in your car’s manual.

Process

  1. Prepare the Car:
    • Park on a level surface.
    • Let the engine cool down for a few minutes.
  2. Gather Materials:
    • Pop the hood and locate the oil dipstick and oil filler cap.
    • Gather the tools and new oil.
  3. Check Oil Level:
    • Pull out the oil dipstick, wipe it clean, reinsert, and pull it out again to check the oil level. Ensure it’s between the minimum and maximum markers.
  4. Drain Old Oil:
    • Lift the car using a jack and stands if needed.
    • Place an oil pan beneath the oil drain plug.
    • Unscrew the drain plug using a socket wrench and drain the oil into the pan.
  5. Replace Oil Filter:
    • Use an oil filter wrench to remove the old oil filter.
    • Apply a bit of fresh oil on the gasket of the new filter.
    • Screw the new filter into place by hand (do not overtighten).
  6. Refill with New Oil:
    • Use a funnel to pour in the recommended amount and type of new oil as per your car’s manual.
    • Check the oil level again using the dipstick.
  7. Dispose of Old Oil:
    • Seal the container with the old oil and take it to a recycling center.

Inspecting and Changing Air Filters

Inspecting and Changing Air Filters
Credit: carwash.com

Importance of Air Filters

Air filters prevent dirt, debris, and other contaminants from entering the engine. Clean air is crucial for efficient combustion and helps maintain proper airflow. A clogged or dirty air filter can reduce engine performance and fuel efficiency while increasing emissions.

How-to Guide for Inspecting and Changing Air Filters

Tools Needed

  • Owner’s manual for the car
  • New air filter (if replacement is necessary)

Frequency

Generally, air filters should be checked every 12,000 to 15,000 miles and replaced if dirty or clogged.

Process

  1. Locate the Air Filter:
    • Refer to the owner’s manual to find the air filter housing.
    • Some air filters are in a rectangular box near the engine while others are cylindrical and sit directly in the engine bay.
  2. Inspect the Air Filter:
    • Remove the air filter according to your car’s manual.
    • Check for dirt, debris, or clogs. Hold it up to the light; if you can’t see light through it, it needs replacement.
  3. Replace if Necessary:
    • If the air filter is dirty or clogged, replace it with a new one.
    • Ensure the new filter is installed correctly, following the manual’s instructions.

Regularly maintaining your engine oil and air filters helps keep your car running smoothly, improves fuel efficiency, and extends the life of your engine.

Tire Maintenance and Rotation

Tire Care Importance

Properly maintained tires are crucial for safety, handling, and fuel efficiency. They are the only point of contact between your vehicle and the road. Adequately inflated tires with good tread depth provide better traction, improve handling in various road conditions, and enhance braking performance. Additionally, well-maintained tires contribute to better fuel economy by reducing rolling resistance.

Tire Rotation Guide

Frequency: Tire rotation is recommended every 5,000 to 7,500 miles or as specified in your vehicle’s manual.

Tools Needed:

  • Car jack and stands
  • Lug wrench
  • Chalk or marker (for marking tires)

Process:

  1. Prepare the Vehicle:
    • Park the car on a flat surface and engage the parking brake.
    • Loosen the lug nuts on all tires slightly before lifting the vehicle.
  2. Jack Up the Vehicle:
    • Lift one side of the vehicle at a time using a car jack and secure it with jack stands.
  3. Mark the Tires:
    • Use chalk or a marker to label each tire with its position (front left, front right, rear left, rear right) to keep track of their rotation.
  4. Rotate Tires:
    • The rotation pattern depends on whether your car is front-wheel drive, rear-wheel drive, or all-wheel drive. Follow the recommended rotation pattern in your vehicle’s manual.
    • Common rotation patterns include front-to-back, back-to-front, cross rotation, etc.
  5. Tighten Lug Nuts and Lower the Vehicle:
    • Tighten the lug nuts in a star pattern to ensure even pressure.
    • Lower the vehicle and remove the jack stands.

Checking and Topping Up Fluids

Essential Fluids

  1. Coolant: Regulates the engine’s temperature, preventing overheating.
  2. Brake Fluid: Transfers force from the brake pedal to the brakes, aiding in stopping the vehicle.
  3. Transmission Fluid: Lubricates and cools the transmission components, ensuring smooth gear shifts.

Fluid Maintenance

Tools Needed:

  • Owner’s manual
  • Funnel (if required)
  • Specific fluids recommended for your car

Process:

  1. Locate Fluid Reservoirs:
    • Refer to the owner’s manual to locate the reservoirs for coolant, brake fluid, and transmission fluid.
  2. Check Fluid Levels:
    • Ensure the car is on a level surface.
    • For coolant and brake fluid, there are markers on the reservoir indicating minimum and maximum levels. Check against these markers.
    • Transmission fluid often requires checking via a dipstick, similar to engine oil.
  3. Top Up as Needed:
    • If any fluid levels are below the recommended marks, carefully add the specific fluid to bring it to the appropriate level.
    • Be cautious not to overfill.

Regularly maintaining these fluids ensures optimal vehicle performance, safety, and longevity. Always consult your owner’s manual for precise instructions and fluid types recommended for your vehicle.


Battery Maintenance

Battery Health Importance

A healthy battery is essential for starting your vehicle and powering its electrical systems. Signs of a weak battery include slow cranking, dim lights, electrical issues, and difficulty starting the engine. A failing battery can leave you stranded and affect other vehicle components that rely on electrical power.

Battery Care Tips

  1. Regular Inspection:
    • Check for corrosion and buildup on the battery terminals. Clean them with a mixture of baking soda and water using a wire brush.
  2. Tighten Connections:
    • Ensure the battery connections are tight and secure. Loose connections can cause electrical problems.
  3. Maintain Proper Charge:
    • If your car isn’t driven often, consider using a trickle charger to maintain the battery’s charge.
  4. Protect from Extreme Temperatures:
    • Extreme heat or cold can affect battery performance. Park in shaded areas and consider insulated battery blankets in extreme weather.
  5. Check Electrolyte Levels (if applicable):
    • Some batteries have removable caps to check and top up with distilled water if necessary. Follow manufacturer instructions.

Brake Inspection and Maintenance

Brake System Importance

Brakes are fundamental for vehicle safety, allowing you to stop or slow down effectively. Signs of brake issues include squealing or grinding noises, soft brake pedal, or vibrations while braking. Ignoring brake problems can compromise safety on the road.

How to Inspect and Maintain Brakes

Tools Needed:

  • Jack and jack stands
  • Wheel chocks
  • Caliper tool (if checking brake pads)

Guidelines:

  1. Inspect Brake Pads:
    • Lift the car and remove the wheels.
    • Check the brake pads for thickness. If they’re too thin, replace them.
  2. Examine Brake Rotors:
    • Look for signs of wear, scoring, or grooves on the rotors. If severely worn or damaged, they might need resurfacing or replacement.
  3. Check Brake Fluid:
    • Locate the brake fluid reservoir and ensure the level is between the minimum and maximum marks. Top up if needed with the recommended brake fluid.
  4. Examine Brake Lines:
    • Look for any signs of leaks, cracks, or damage in the brake lines. These should be addressed immediately.
  5. Test the Brakes:
    • Drive at a safe speed in a controlled environment and test the brakes. Ensure they’re responsive and not making any unusual noises.

Regular inspection and maintenance of brakes are critical for safe driving. If you notice any issues during inspection or while driving, it’s advisable to have a professional mechanic inspect and repair the brakes promptly.

Conclusion

Maintaining your vehicle’s crucial components like engine oil, air filters, and tires ensures a smoother, safer ride while enhancing efficiency and longevity. Regular checks and proper care of batteries and brakes are paramount for safety on the road.

By following these maintenance guides, you not only ensure your car’s optimal performance but also contribute to its overall health, reducing the risk of unexpected breakdowns and ensuring a reliable driving experience. Stay proactive with these practices to keep your vehicle in top-notch condition for the miles ahead.

How to Jump-Start a Car?


In the automotive world, understanding how to jump-start a car is a fundamental skill that can save the day in various situations. From unexpected battery failures to lending a helping hand to a stranded friend, the ability to jump-start a car is a valuable tool in any driver’s repertoire. This blog delves into the importance of possessing this skill, shedding light on common scenarios that necessitate a jump-start.

Whether you’re facing a dead battery in the dead of winter or assisting a fellow motorist in need, mastering the art of jump-starting is a key aspect of being a responsible and well-prepared driver.

how to jump-start a car
Credit: way.com

Understanding the Basics

Components Involved

To embark on the journey of jump-starting a car, it’s crucial to familiarize yourself with the key components. The star of the show is, of course, the battery – the powerhouse of your vehicle. Additionally, having a set of reliable jumper cables and access to a second vehicle are essential. This section unfolds the roles of each component, setting the stage for a successful jump-start.

Safety First

Before diving into the practical aspects, prioritizing safety is paramount. Highlight the importance of wearing safety glasses to shield your eyes from potential sparks.

Emphasize the need to ensure both vehicles involved are securely in park (or neutral for manual transmissions) and switched off. By making safety the top priority, readers are poised to handle the situation with confidence.

Assessing the Situation

Assessing the Situation
Credit: mechanicbase.com

Identifying a Dead Battery

Understanding when a jump-start is required is the first step in this process. Explore the subtle signs of a dead battery, such as dimming lights and the dreaded clicking sounds when you turn the key. By recognizing these indicators, readers gain the knowledge needed to diagnose a dead battery accurately.

Rule Out Other Issues

Not all issues that mimic a dead battery are, in fact, battery-related. Briefly discuss other potential culprits, like a faulty starter or alternator, and provide insights on how to rule them out.

This step ensures that readers troubleshoot effectively, saving time and effort in situations where a jump-start may not be the solution.

Preparing for Jump-Start

Positioning Vehicles

Proper positioning is the foundation for a safe and successful jump-start. Guide readers on how to position both the working vehicle and the one with the dead battery.

Emphasize considerations like maintaining a safe distance, ensuring both vehicles are not in direct contact, and positioning them in a way that facilitates easy access to the batteries.

Turning Off Electronics

Before diving into the jump-start process, it’s crucial to eliminate potential electrical interferences. Advise readers to turn off all electronics, such as lights, radios, and air conditioning, in both vehicles.

This precaution minimizes the risk of electrical issues during the jump-start and ensures a smoother process.

Connecting Jumper Cables

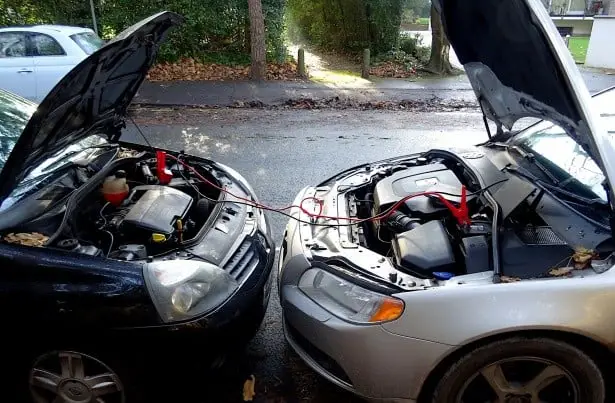
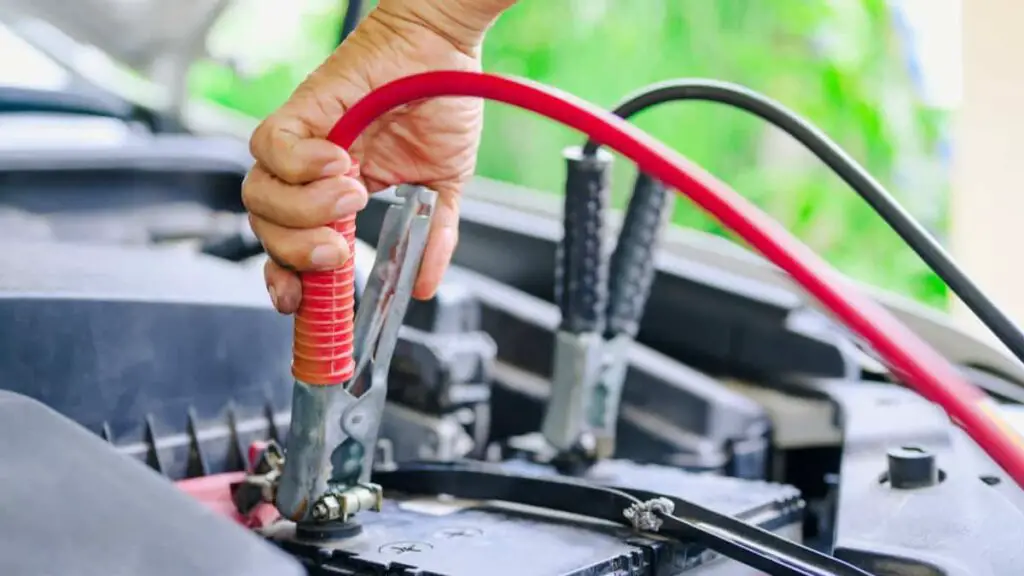
Connecting Jumper Cables
Credit: mycarmakesnoise.com

Positive and Negative Terminals

Delve into the specifics of connecting jumper cables correctly. Explain the importance of connecting to the positive and negative terminals in the right order. This section provides readers with a step-by-step guide on ensuring a secure and effective connection between the batteries.

Cautionary Notes

As readers embark on the cable connection process, highlight crucial precautions to avoid sparks and potential hazards.

Whether it’s emphasizing the importance of keeping the cables away from moving engine parts or stressing the need for precision in the connection sequence, these cautionary notes contribute to a safe jump-start experience.

Jump-Starting the Car

Starting the Working Vehicle

Guide readers through the process of starting the working vehicle. Highlight the importance of letting it run for a few minutes to allow the flow of charge to the dead battery. This step ensures that the working vehicle is ready to share its vitality effectively.

Attempting to Start the Dead Vehicle

Instruct readers on attempting to start the vehicle with the dead battery. Outline the steps to take if it doesn’t start on the first try, providing troubleshooting insights. This section empowers readers to handle the jump-start process with confidence, addressing potential challenges along the way.

Post-Jump Procedures

Removing Jumper Cables

After a successful jump-start, it’s essential to conclude the process safely. Explain the correct order for removing jumper cables from both vehicles to avoid electrical issues. Emphasize the importance of precision in this step to ensure a smooth disconnection without any sparks or disruptions.

Running the Revived Vehicle

Jump-starting isn’t the final chapter. Suggest keeping the revived vehicle running for a while. This allows the alternator to recharge the battery, ensuring it’s sufficiently powered for the next ignition. Encourage readers to be patient during this post-jump phase for optimal results.

When to Seek Professional Help

Knowing the Limitations

While jump-starting is a valuable skill, there are scenarios where it might not be enough. Discuss situations, such as a persistently dead battery or recurring issues, where seeking professional assistance becomes necessary.

Knowing the limitations of a DIY jump-start ensures that readers make informed decisions about the next steps.

Recommendations for Future Prevention

Prevention is often the best cure. Provide practical tips on how to prevent a dead battery in the future. This could include regular battery maintenance, periodic checks, and the importance of investing in a quality battery.

By arming readers with preventive measures, they can reduce the likelihood of encountering a dead battery and the need for frequent jump-starts.

FAQs

Can I jump-start a car by connecting the cables in any order?

No, it’s crucial to follow the correct order when connecting jumper cables. Start by connecting the positive (+) cable to the positive terminal of the working vehicle’s battery, then the other end to the positive terminal of the dead battery.

Follow the same sequence for the negative (-) cable, but connect the other end to a metal, unpainted part of the dead vehicle’s engine. This order minimizes the risk of sparks and ensures a safe jump-start.

How long should I run the revived vehicle after a jump-start?

It’s advisable to keep the once-dead vehicle running for at least 15-20 minutes after a jump-start. This allows the alternator to recharge the battery adequately. During this time, avoid using electronic accessories to maximize the charging efficiency.

If you’re planning to turn the vehicle off shortly after, it’s recommended to drive it for a longer duration to further charge the battery.

Conclusion

Mastering the skill of jump-starting a car is a valuable asset for any driver. From understanding the basics and safely connecting jumper cables to post-jump procedures and knowing when to seek professional help, this guide equips you with the knowledge to handle unexpected battery challenges.

Remember, prevention is key – regular battery maintenance and following safety protocols ensure a smoother journey. With these insights, you’re not just jump-starting cars; you’re empowering yourself to navigate the road with confidence and preparedness.